Sun Cluster 3.2 - Installation
I am going to explain how to install Sun Cluster 3.2 into a VMWare environment using Solaris 10 (x86).
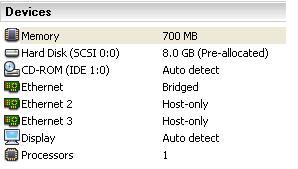
This is the current setup I have is:
As you can see I am not running the most sophisticated piece of hardware which goes to show any hardware that's within 3 years old should be ok.
Pre-cluster installation
Once you have installed VMware, configured two virtual machines as below (I called mine sclus3 and sclus 4), this was the minimum I could get away with without it being to slow. I will discuss how to add the shared storage later if you are wondering. I selected the Solaris 10 64-bit make sure its the 64-bit as Sun cluster needs a 64-bit operating system. I remove any unnecessary hardware like the USB, etc.
Once you have configured the VM's its time to install Solaris in them, but first lets discuss what we need to install Solaris, Sun have a good data cluster worksheet that you can download fill in and use to configure your cluster. To install Solaris you can either use a burned iso image of Solaris on a DVD or use the iso image directly from your hard disk, just change the settings in CDROM and select "use ISO image" and point it to the Solaris 10 iso image file.
Here is my quick and dirty worksheet
| Node 1 | Node 2 | Notes | |
| Server Name | sclus3 |
sclus4 |
I already have a cluster running 3.1 using sclus1 and sclus2, if you are wonder why i choose those names |
| Public Network | IP: 192.168.0.100 subnet: 255.255.255.0 GW: 192.168.0.10 |
IP: 192.168.0.101 subnet: 255.255.255.0 GW: 192.168.0.10 |
feel free to change the IP address to reflect your network |
| 1st Private Network | n/a |
n/a |
The cluster will automatically configure these when we setup the cluster using scinstall later |
| 2nd Private Network | n/a |
n/a |
|
| Disk Partitioning | Slice 0: / - 6GB |
In the real world you would also create a separate /opt and a /var slice. | |
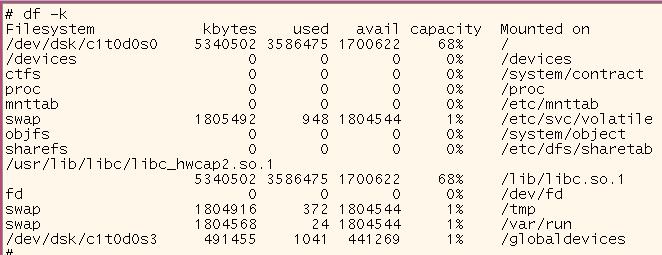
I will discuss creating resources and group later, but when you start the Solaris servers the disk setup should look something like below, in the real world you would now configure the Volume manager software be it Sun or Veritas to mirror root disks, etc but i am leaving this out and only concentrating on Sun Cluster.
The network setup should look something like below, again you would setup IP multipath groups to have resilience in the networking but I will leave this to google on how to setup IPMP up.

Hopefully you should be able to ping all IP addresses of the other nodes within the cluster.
The next thing you should do is setup SSH so that both servers can access each other without the need for a password, I will leave you to google on how to do this as there are many documents out there for setting up SSH.
The next task is to setup the shared storage that will be access by all the nodes in the cluster, in the real world this world be a disk array or a SAN.
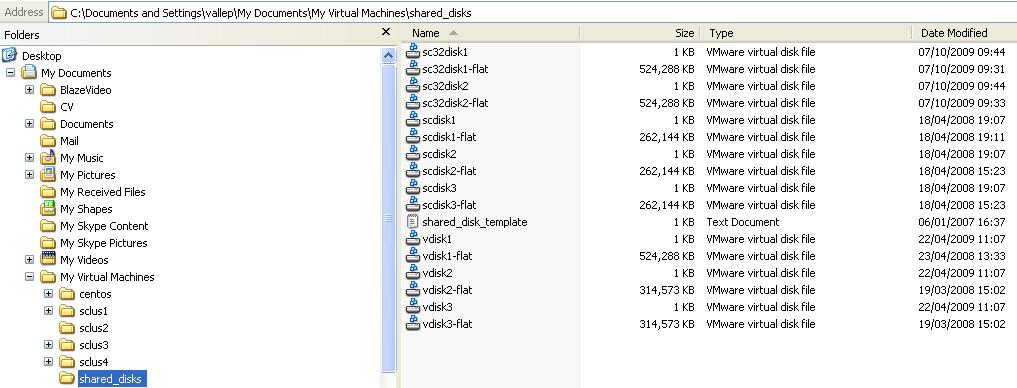
First create two virtual disks using the vmware workstation software, I select one of the nodes then "edit virtual machine settings" node then select "add" -> select hard disk -> next -> create new virtual disk -> next -> select SCSI -> next -> select where you want the disk to be located, I created a separate directory that contains all my shared disks (see below)-> I created 0.5GB size disk and make sure you select the "allocate all disk space now" -> next, the virtual disk will now be created. Repeat this process again so that we have two virtual disks to play around with.
The two virtual disks that I created for this example are sc32disk1.vmdk and sc32disk2.vmdk (at the top), ignore the others these are for other clusters I have created (Solaris 3.1 cluster and Veritas 5.0 cluster)
Now we need to make the virtual hosts aware of these virtual disks, you have to edit the both virtual hosts configuration file (sclus3 and sclus4), the file in my setup was located c:\Documents and Settings\vallep\My Documents\My Virtual Machines\sclus3\Solaris 10 64-bit.vmx and add the following, change the paths to reflect where you put the virtual disks.
| update the vm configuration file (Solaris 10 64-bit.vmx) | disk.locking = "FALSE" diskLib.dataCacheMaxSize = "0" diskLib.dataCacheMinReadAheadSize = "0" diskLib.dataCacheMaxReadAheadSize = "0" diskLib.dataCachePageSize = "4096" diskLib.maxUnsyncedWrites = "0" scsi1.present = "TRUE" scsi1:0.present = "TRUE" scsi1:1.present = "TRUE" |
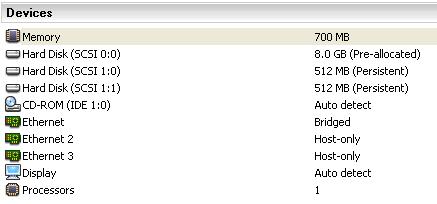
Restart the VMWare workstation software and hopefully you should see the disks before you start the virtual host, notice the two additional disks for the above original configuration
Start the VM's (sclus3 and sclus4) and run the following command "echo|format", hopefully you should see the additional disks
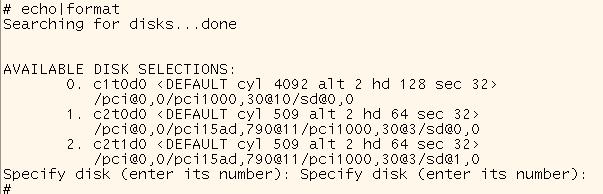
That's it, now to install the Sun cluster software and configure it.
Before we begin installing and configuring the cluster, we need to make a number of checks
Download the latest cluster software from Sun, I have downloaded cluster 3.2 01/09 (suncluster_3_2u2-ga-solaris-x86.zip) it's 328MB in size, unzip the file.
Before we install the cluster software you need o make sure that the following directory location are in your path variable
I installed the software using he GUI, so make sure you are using either the VMWare console screen or have a Xterm session open, change directory to where you unzip the cluster software and run the following
| Installing cluster software | # cd /var/tmp/packages/cluster/ Solaris_x86 |
Now follow the below
| Screen Name |
Instructions |
|---|---|
Software License Agreement |
Accept the license agreement. |
Language Support |
Choose any languages that you want to install in addition to English. |
Installation Type |
Answer NO when asked if you want to install the full set of Java ES software. |
Component Selection |
Choose Sun Cluster and Sun Cluster Agents. Do not deselect Sun Cluster Manager. Confirm your selection when prompted. Follow the onscreen instructions to install the following data service packages:
|
Shared Component Upgrades Required |
Accept upgrade of the list of shared components. |
Configuration Type |
Choose Configure Later. |
You can check the install logs in /var/sadm/install/logs, the software installation is now complete.
Once the cluster software has been installed and your $PATH variable has the additional paths, you should be able you run the cluster setup command
| Cluster setup menu | *** Main Menu *** |
| Second menu screen | Select the create new cluster option |
| Third menu screen | Select the custom option Note: I tried the typical option but this failed, i think it was getting mixed up with what network adaptors to use with which transport switch, so i used the custom option instead and configured it manually, it's not that difficult |
The custom installation will ask a number of questions, my options are below but you can change any of these if you wish.
| Component |
Description |
Answer |
|---|---|---|
Cluster Name |
What is the name of the cluster that you want to establish? |
suncluster1 |
Cluster Nodes |
List the names of the other nodes. |
sclus3 (if not already selected) Note: make sure both nodes are listed before using Ctrl-D |
| Cluster Transport Switch | Here you setup the two cluster transport switches | Switch1 Switch2 |
Cluster Transport Adapters and Cables |
What are the names of the two cluster transport adapters that attach the node to the private interconnect? |
e1000g1 Note: you may get an error here if you have then already configured, so unplumb them |
| Cluster Transport switch and adapter association | Here you tie the two transport products together | switch1 - e1000g1 |
Quorum Configuration |
Do you want to disable automatic quorum device selection? |
No |
Check |
Do you want to interrupt installation for sccheck errors? |
No |
The cluster will now be configured, it took about 20 mins on my laptop, eventually sclus4 server rebooted and sclus3 waited patiently until sclus4 had restarted, then it rebooted itself.
That's all there is, a simple two node cluster running on a oldish laptop, although not the fastest but it will be enough to play around with.
To make sure that the cluster is running properly there are some command to run to make sure that everything is in order, first check the filesystem structure
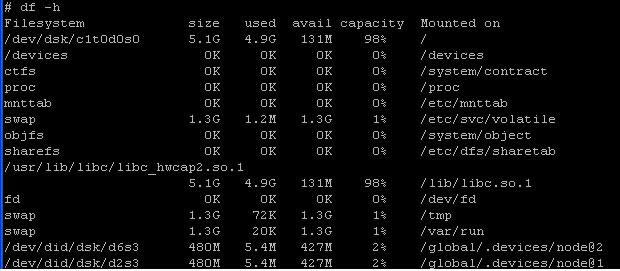
As you can see the /globaldevices filesystem has now been changed so that both nodes within the cluster can access it, it uses the cluster global device names to access them.
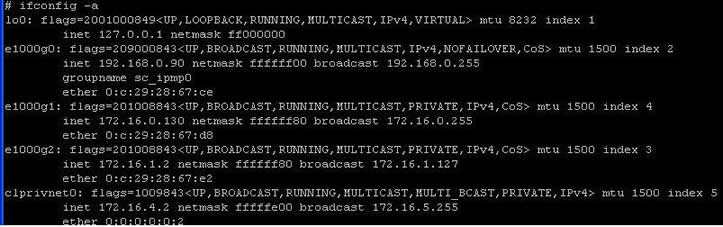
The cluster created the two interconnect interfaces for us (e1000g1 and e1000g2), I took the default values but you could have specified the IP addresses, it also created a private VLAN clprivnet0, snooping his interface I can see the two nodes communicating with each other across this network.
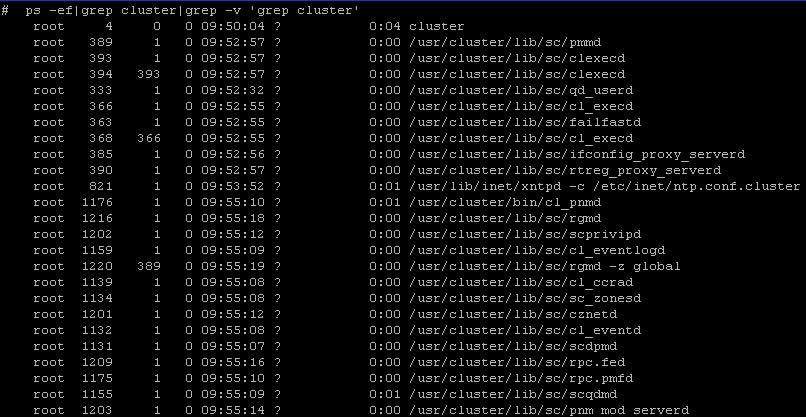
There are many processes, see the cheat sheet to find an explanation of each of these
That's it, see the cheat sheet and the common tasks for more information on how to managed and configure your cluster