vSphere Lifecycle Manager (vLCM)
In the older versions of vSphere the VMWare Update Manager (VUM) was used to patch and update the VMWare environment, VMWare have upgraded this tool which is now called the vSphere Lifecycle Manager (vLCM), the vSphere Lifecycle Manager introduces many new features that simplify the process of managing not only ESXi patching but also the full firmware lifecycle of the ESXi host’s hardware.
Patching can be a dangerous game, some administrators believe that if the environment is working then why patch, especially if the environment is contained and has no access to the internet, patching could cause problems where there were none before. I am a strong believer in patching especially if you follow the applying to Dev, QA and finally Production environments and in a controlled manor, you would never not service your car on a regular basis, otherwise you just know that one day it will stop working. Besides security, patching also helps performance, with the latest drivers and kernel releases to enhance the O/S and fix any potential bugs that you may have not experienced yet, like I said the fear with patching is that you break something that was already working as this never goes down well with management.
vSphere Lifecycle Manager (vLCM)
vSphere Lifecycle Manager addresses the issues that VMware Update Manager had and also introduces a new desired state model and by supporting updating of server firmware provided by the OEMs.
- Manging cluster software using desired state images
- Verification of host hardware against the VMware Compatibility Guide (VCG) and the vSAN Hardware Compatibility List (vSAN HCL)
- Automated Firmware Updates
vSphere lifecycle manager uses desired state images, it maintains an image of the cluster, the Image represents the desired state specification that includes software, drivers, and firmware to apply to all hosts in a cluster, this functionality allows you to take advantage of new functionalities, such as image recommendations, automated firmware updates, and hardware compatibility checks.
You can use baselines which only defines a list of updates to be applied to hosts, this can lead to unpredictable results where images consist of a number of elements to ensure that the cluster is up to date
- ESXi base image
- Vendor add-ons (drivers, patches, etc)
- Firmware and driver add-on (firmware, specific OEM drivers, etc
- Component (VMware package components that are applied to base images)
You can manage the whole cluster with a single image that will be applied to all hosts, they will inherit all from the same image and thus will have all the same patching requirements.
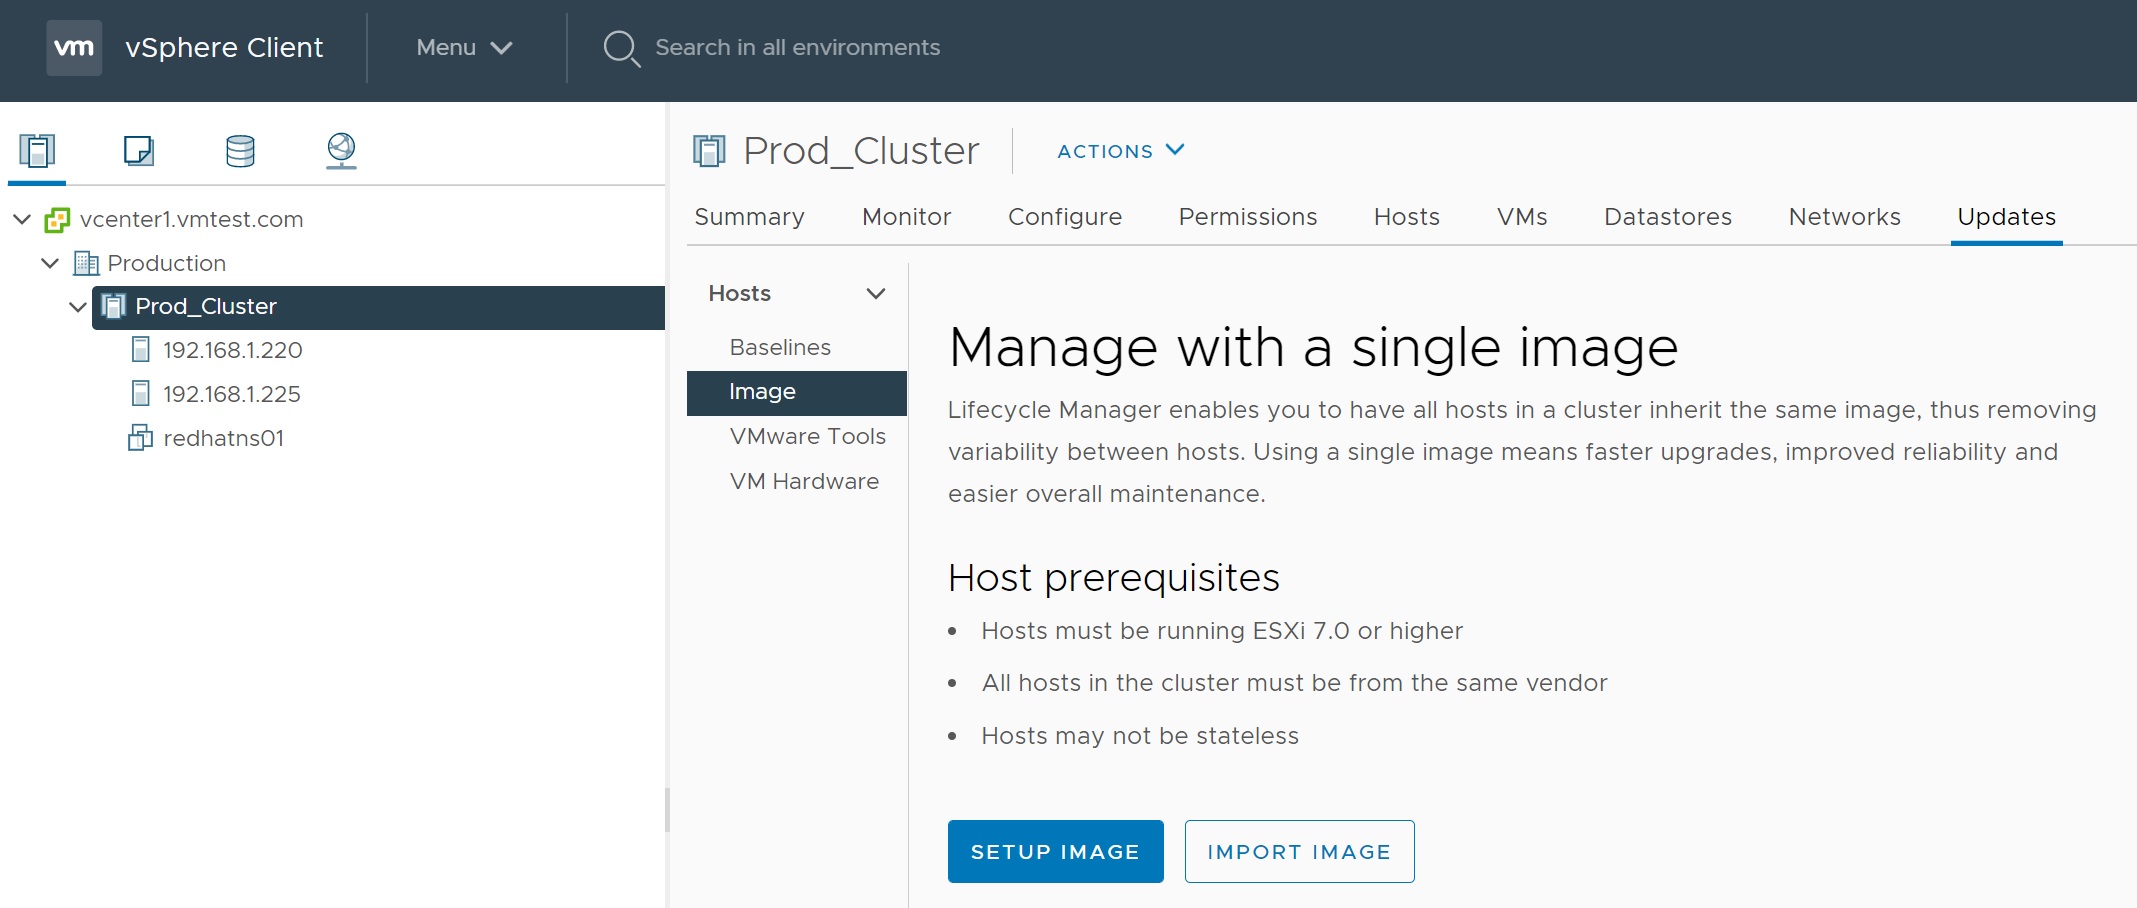
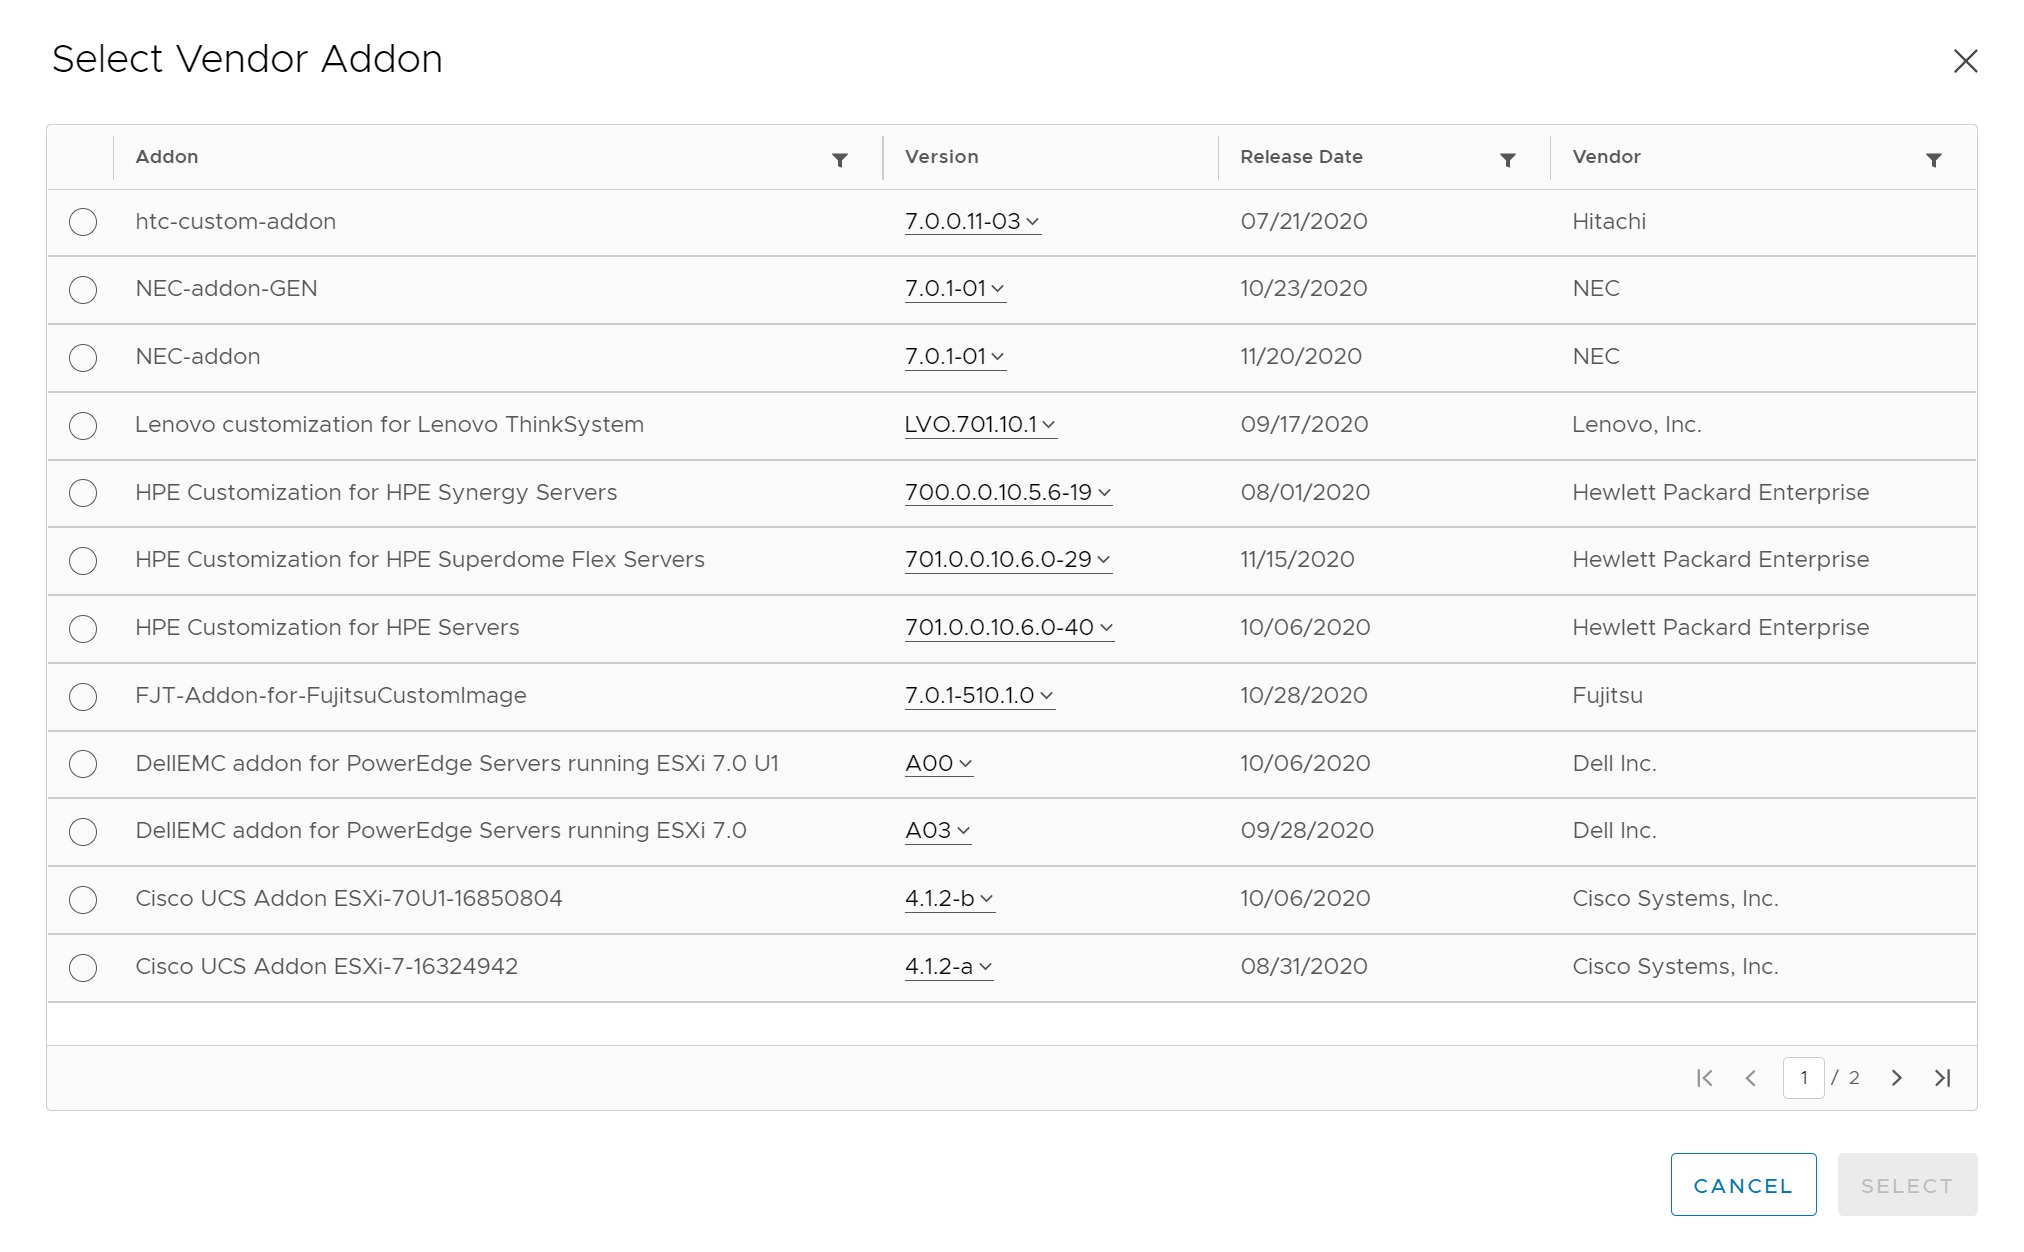
When you select the setup image you can specific the VMWare version, the type of hardware that you are using any additional drivers or add-ons and finally any VMWare components, remember that once the image is created it will be applied to all hosts within the cluster, as you can see this makes patching all very simple.

Drilling down the ESXi version you can see all the lastest versions that you can upgrade too

You can also list all the vendor add-ons, you can see how easy this is getting the all the vendors latest patches
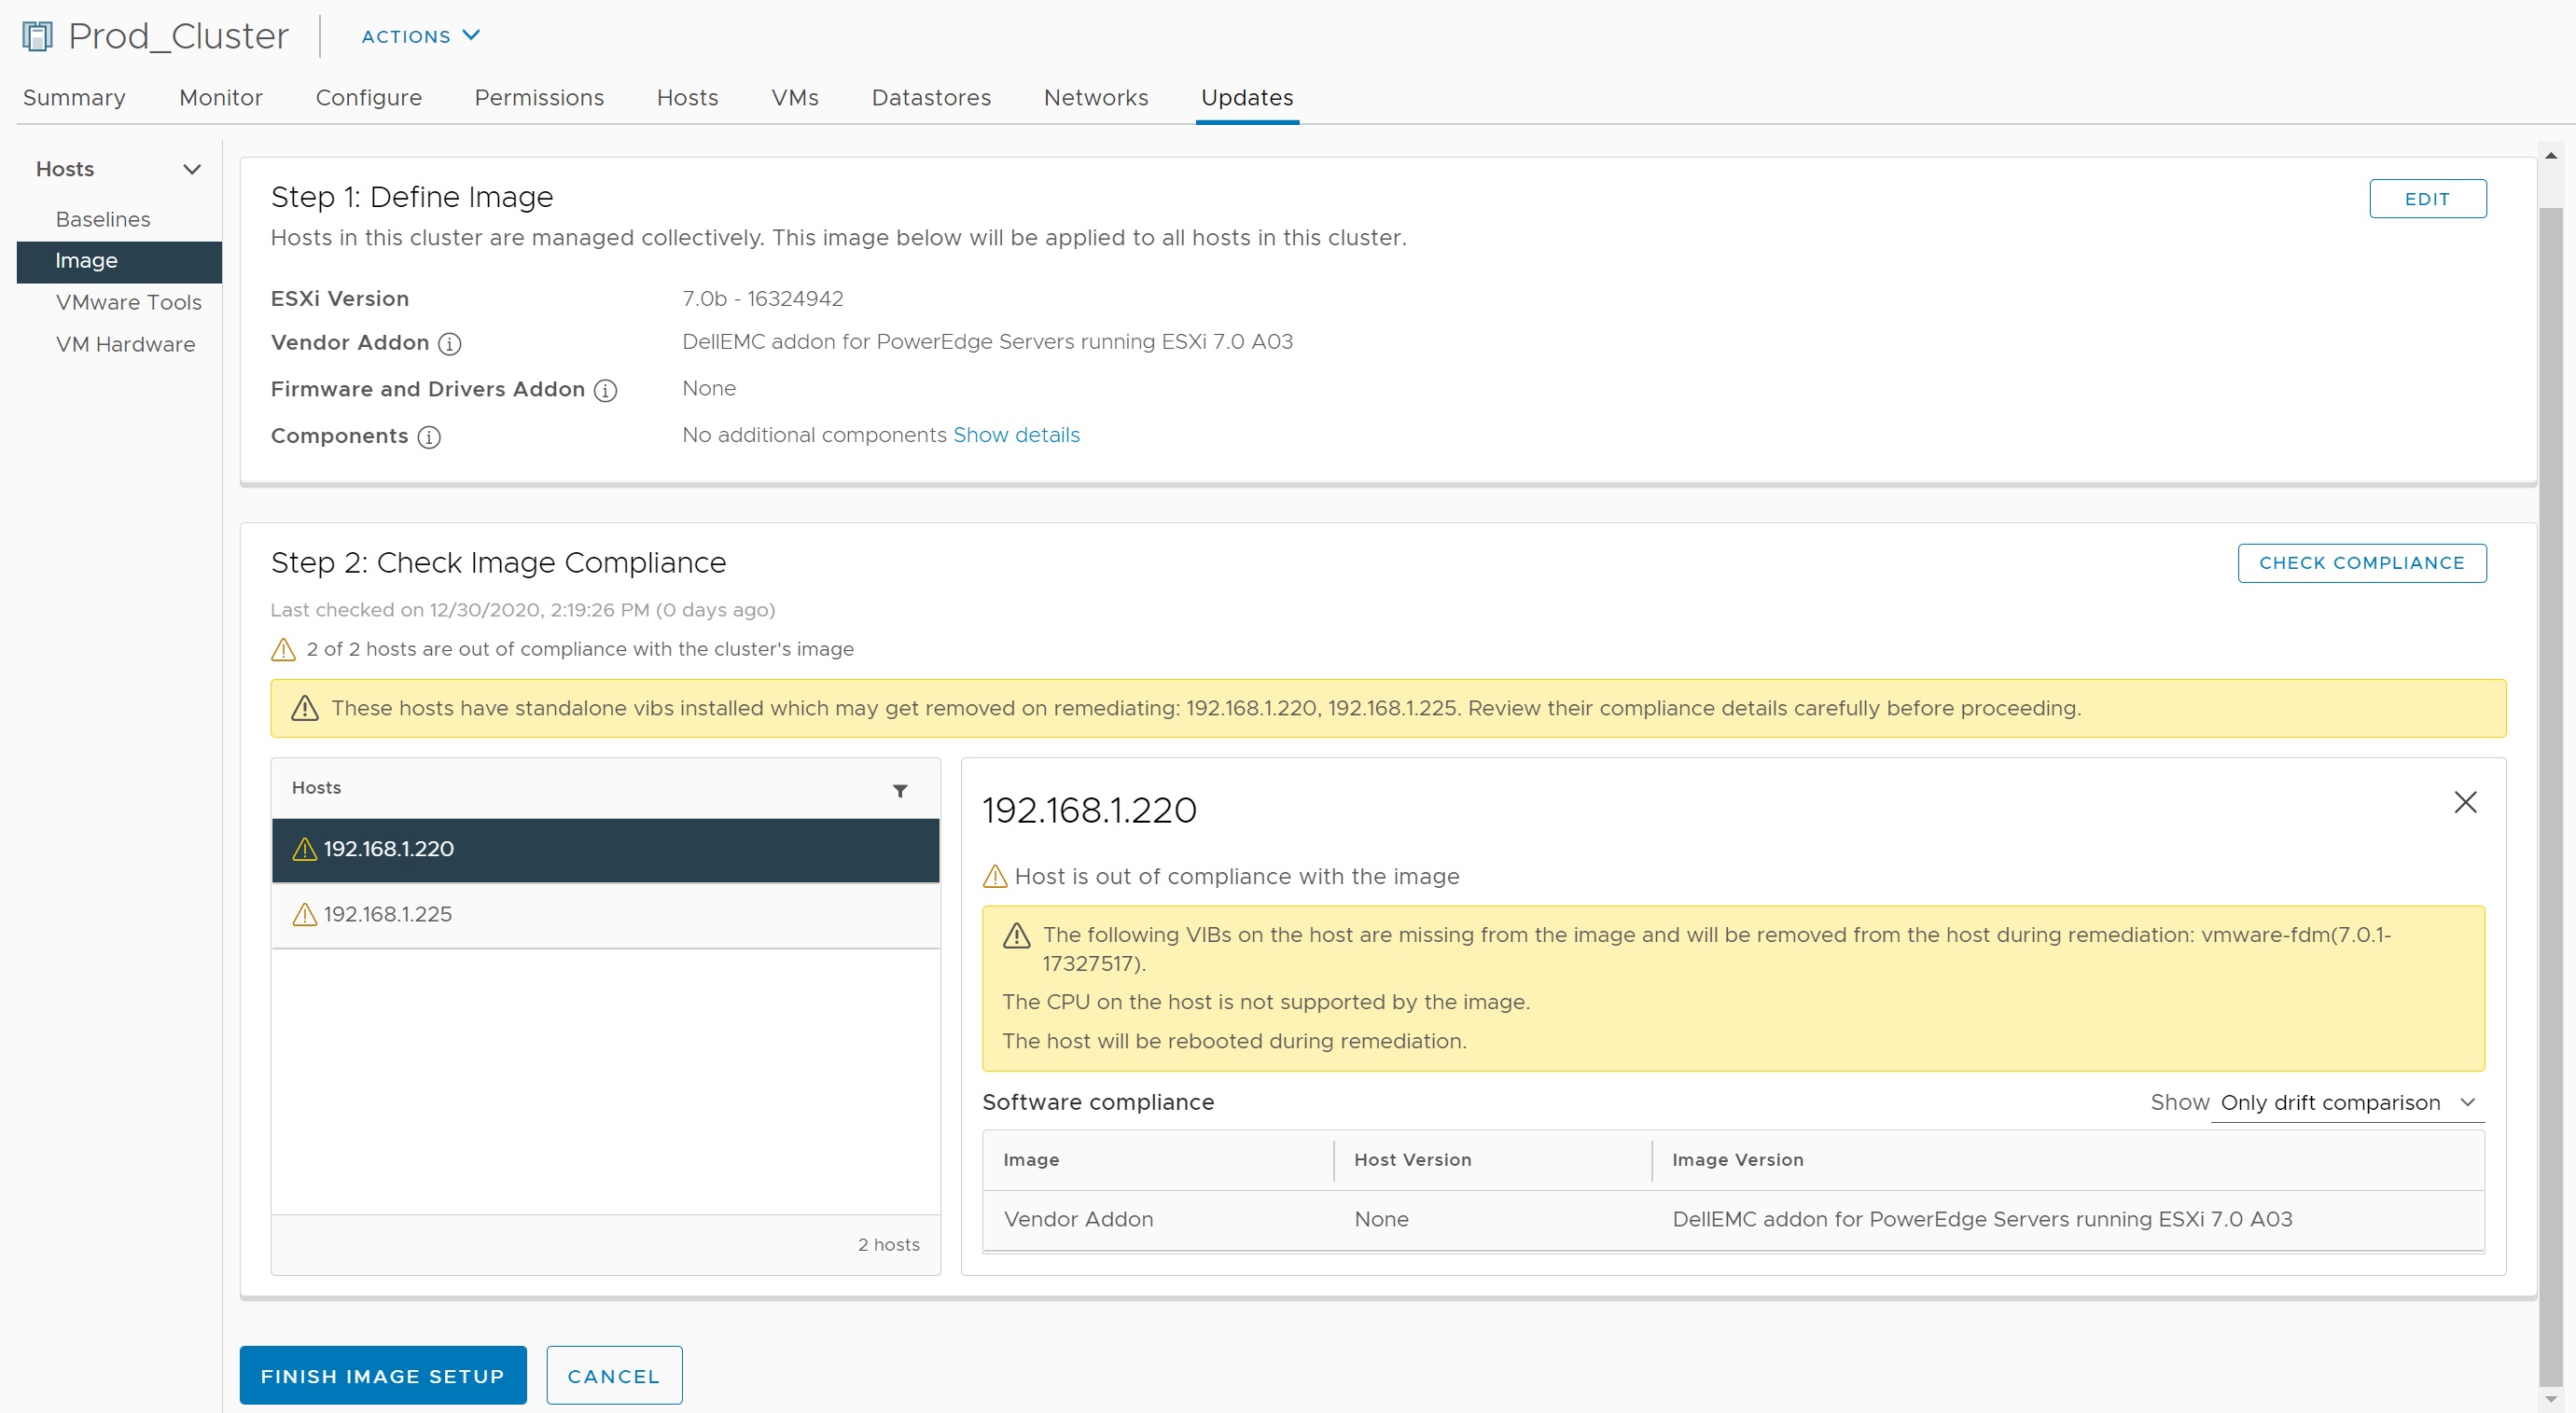
You can either validate or save the image and when you do all the options that you selected will be checked against the hardware and setup that you have and any issues will be highlighted, I am using a nested ESXi configuration and thus a few issues will be alerted.
If all is well then finish off the image.

Next we start the remediation
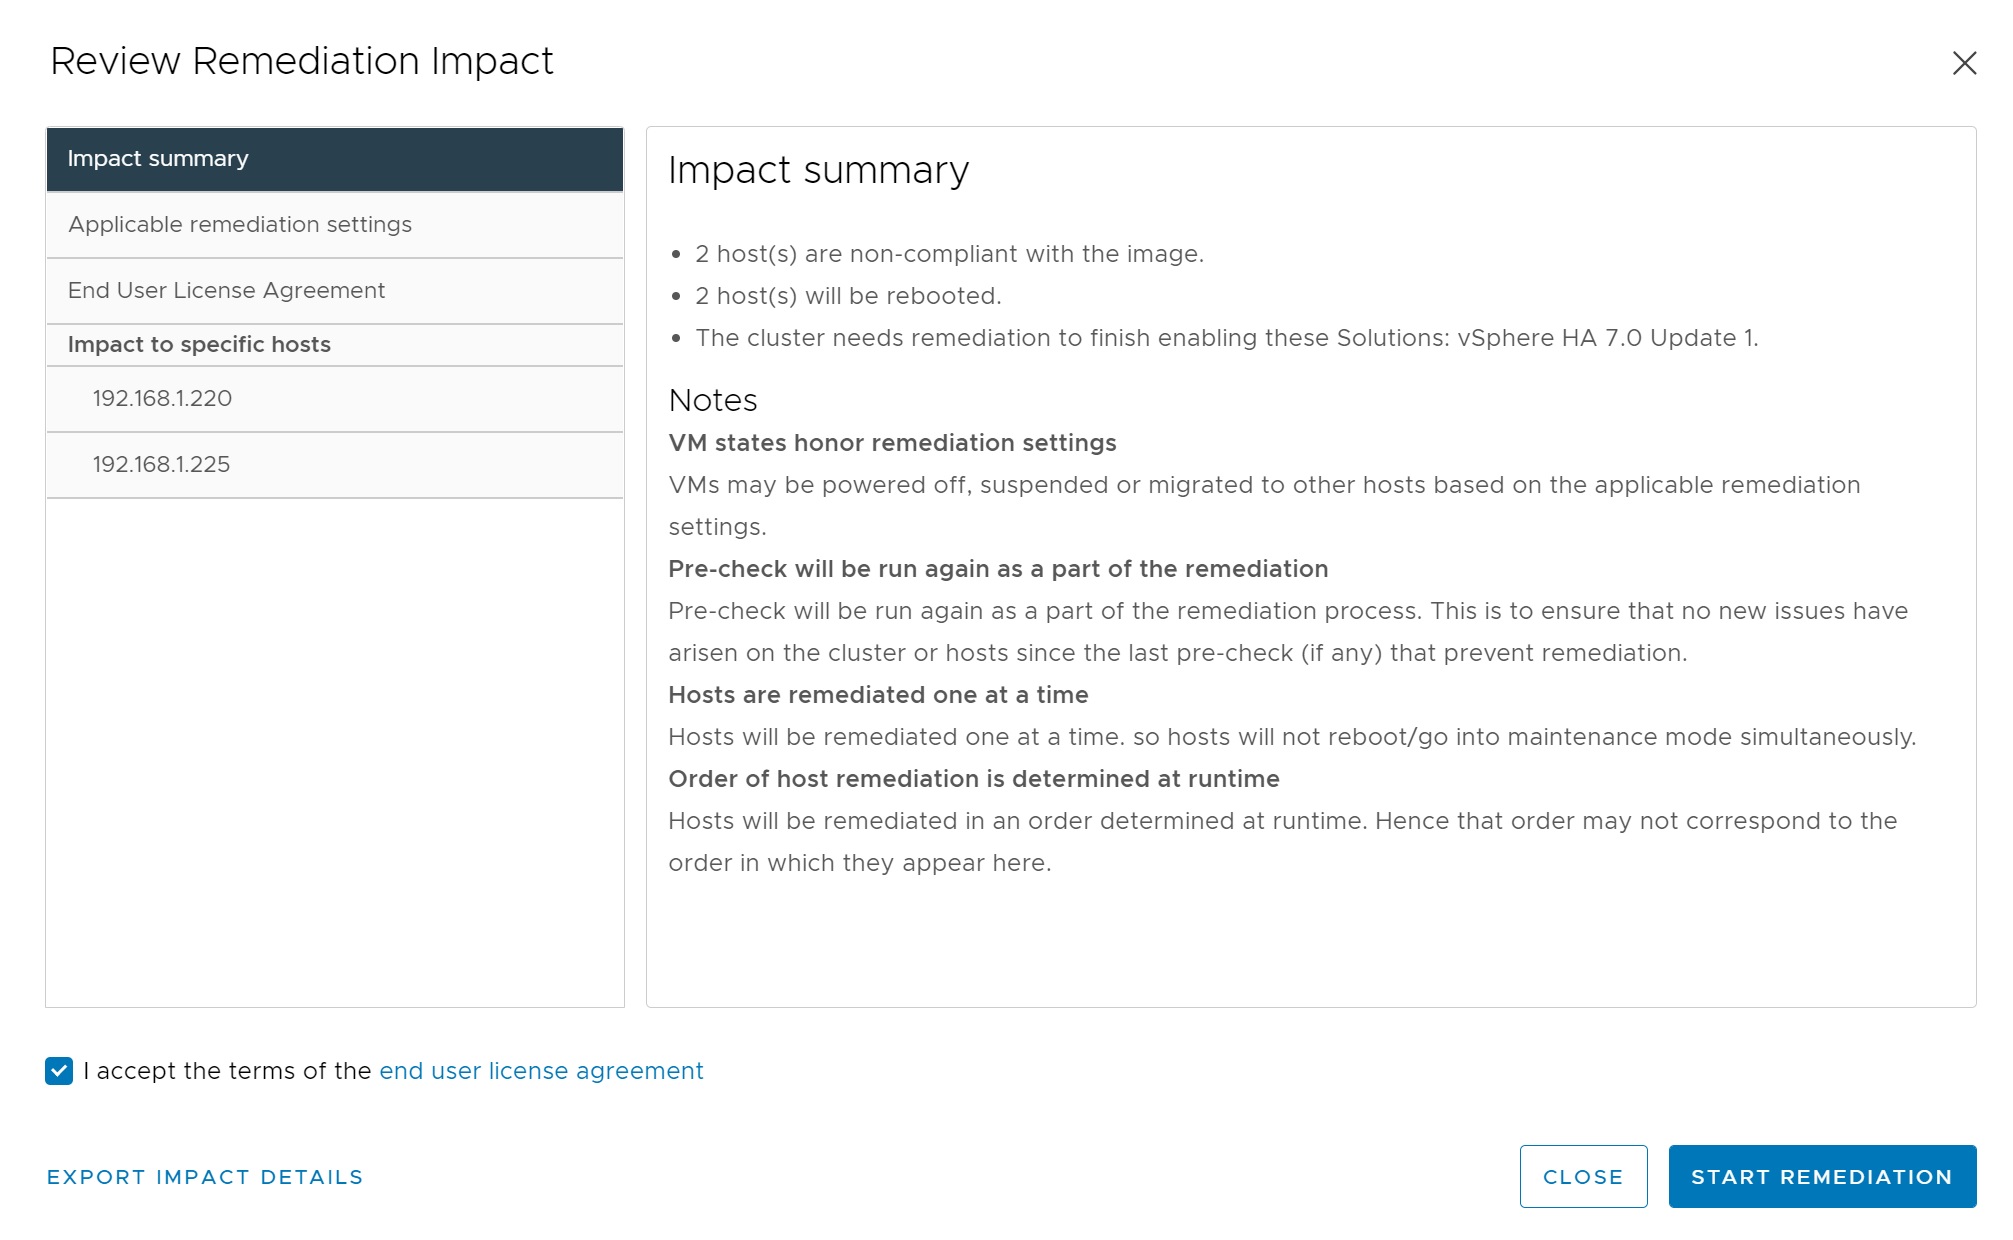
Each of the hosts in the cluster are taken into maintainance mode then checked and patched accordingly.

After a while all hosts in the cluster should be compliant as seen below

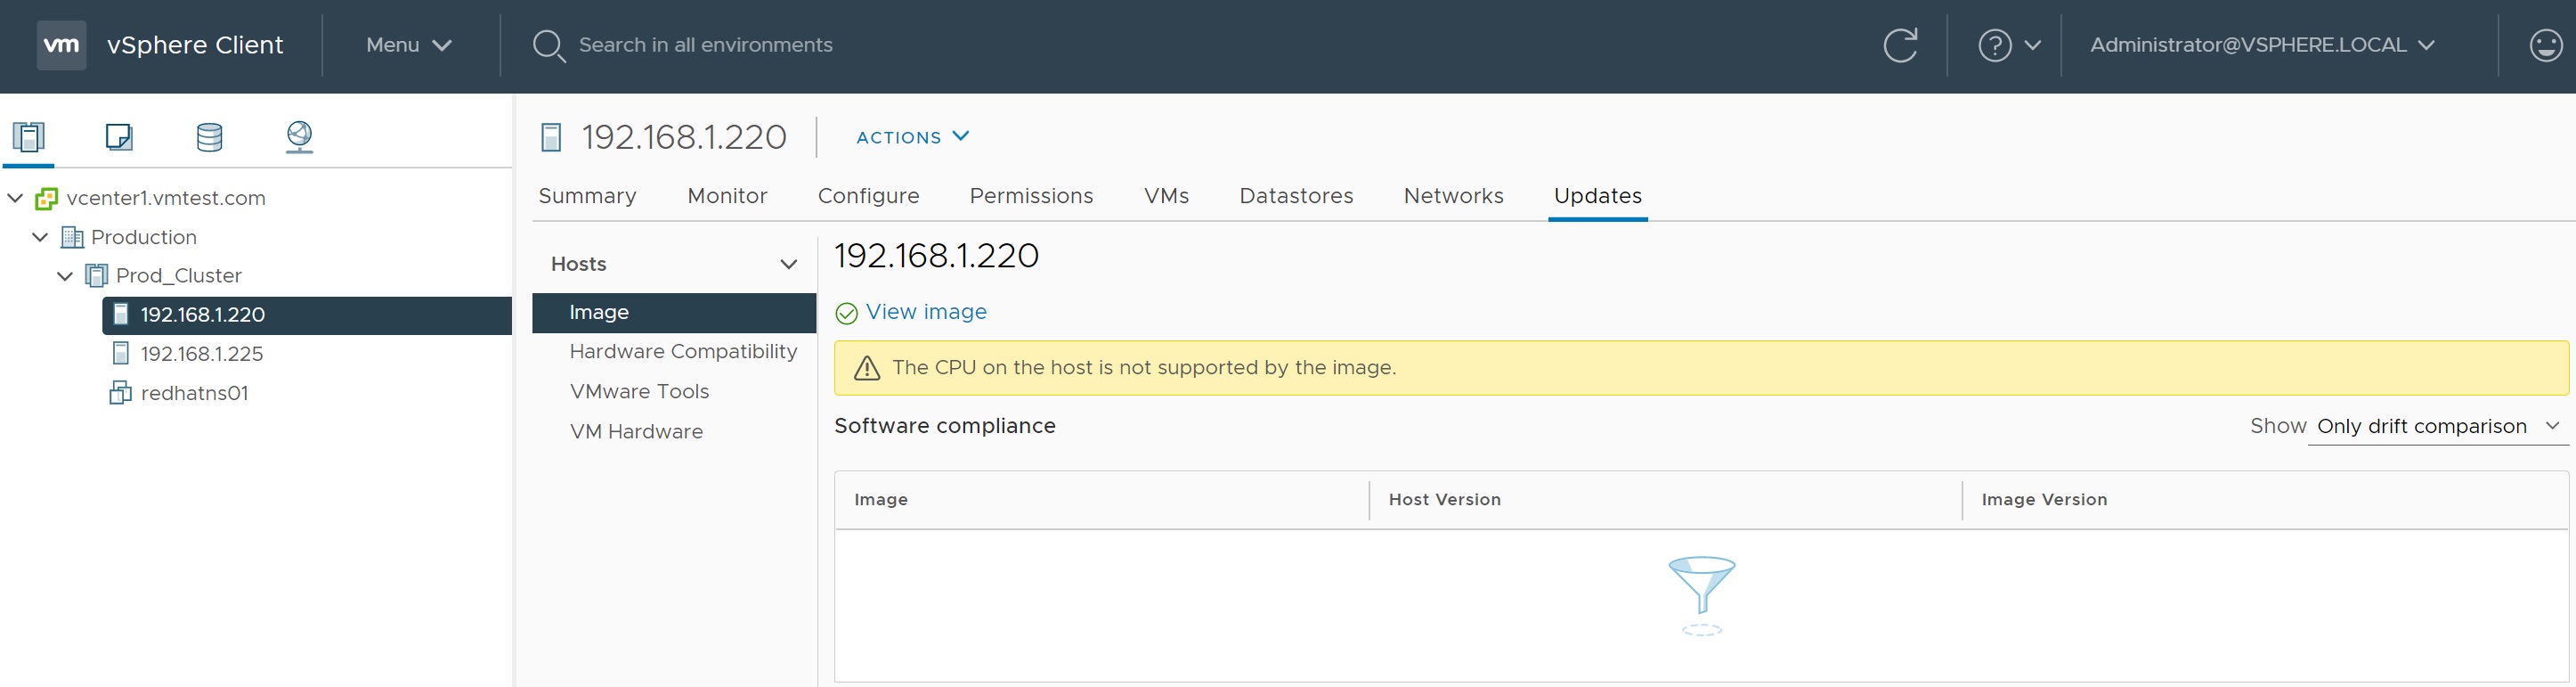
If you are using the cluster image you can see if a individual host is non-compliant by simply highlighting the host and selecting the Updates tab, any non-compliant issues will be highlighted, as in my case below, my reason is that I am using nested ESXi servers and a unsupported DELL R620 non-compliant CPU's. Selecting the view image will take you to the cluster image we created above.
If you update the cluster image hosts will start to flag up that they are non-compliant and if compatible with the the new image can be remediated and brought upto date.

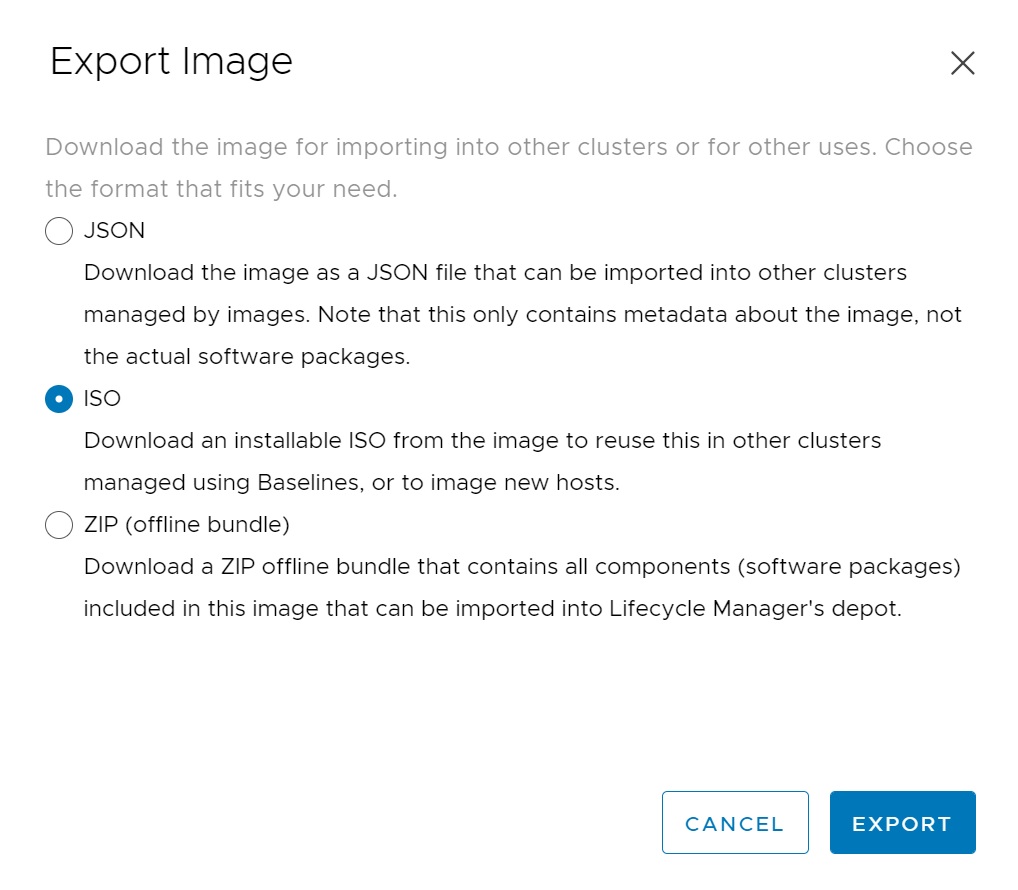
You can export the image which can be used on other clusters

You can choose from 3 different image types