to start the installation as root run the SDBINST command and follow the below
MaxDB Administration
This section again will be fairly large, I will be discussing the following
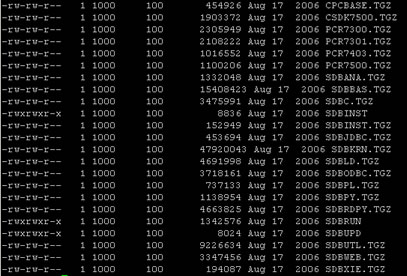
SAP MaxDB can be freely downloaded from the SAP website, there are a number of version to cover a wide range of operating systems. First I will discuss how to install MaxDB on a Unix server. Once downloaded you must extract the software either using winzip or SAPCAR, once extracted you should have the following files
to start the installation as root run the SDBINST command and follow the below
| software components | here you have a number of options
Select option 2 |
| Custom installation | here you have a number of options available
Select option 3 |
| Server Installation (preparing phase) | The installation will now ask a series of questions regarding below, you can change any of the above to suit you own requirements
The installation will go and do some stuff and come back requesting information regarding the database kernel preparing
|
| Server Installation (installation phase) | The installation will now be carried out in the background, the database is automatically started |
Thats all there is to it, you can also use a commandline option to install MaxDB
| Installation in the background | ./SDBINST -component_group Server -indep_data /var/opt/sdb/data -indep_prog /opt/sdb/programs -o sdb -g sdba |
There is also a GUI version called the installation manager, this is mainly used on Windows installation.
If there were any errors or problems installing the software you can view the installation logs
| Installation logs | Unix: <independent_data_path>/wrk/MaxDB<profile>_install-<date>-<time>.log Windows: <independent_data_path>\wrk\MaxDB<profile>_install-<date>-<time>.log |
Before we can crete a new SAP MaxDB instance we need to know what requirements we need for the following
Now these type of questions are hard to judge when creating databases, if you really have no ideal then have one eye on how you would increase the the above if the thresholds were meet, for example you know that the data volumes are going to be spread across different disks then try to match the size of the filesystems with the volume sizes,also allow for additional disks to be added, with load try to have options that you can increase memory in your server at a later date.
The size of the database is important as depending on the number of data volumes MaxDB configures the number of I/O threads, this is specified by the parameter _IOPROCS_PER_DEV. SAP recommends 2 for unix systems and 1 from windows systems. If you have two many threads per I/O it may cause a performance bottleneck on the operating system. To calculate the number of data volumes SAP recommends the formula below
| Calculate data volumes | You basically use the square root of the total volume size, now for some examples 50GB = 7.07, so round up to 8 data volumes (50 / 8 = 6.25GB each) 75GB = 8.66, so round up to 9 data volumes (75 / 9 = 8.34GB each) I generally round the size of each volume for eaxample the 6.25GB i would round upto 7GB. |
There are a number of restrictions that you must, be made aware of, keep an eye on the latest versions as I suspect these limits will increase with time
| Maximum number of data volumes | 4095 |
| Maximum number of log volumes | Unrestricted |
| Maximum size of data volume | 512GB |
| Maximum size of log volume | 32TB |
| Maximum size of entire instance | 64TB |
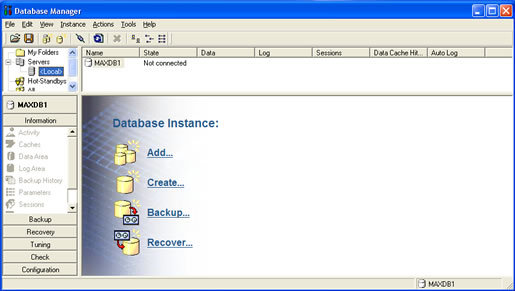
Now lets move on to creating the database, I will be using the Database Manager GUI, although being a Unix chap, I will still use a GUI that is reliable and I have had no problems with this GUI, for the die hard CLI fans I have also given the commandline options.
Create a Database Instance |
|
| Start the SAP Database Manager | The MaxDB Database Manger GUI when open should look something like below
|
| Select the template type | To create the instance you can either select instance -> create or select the create instance button (as seen in above picture), you will be asked to select one of the templates, have choose custom
|
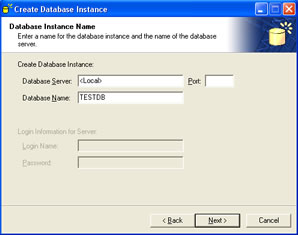
| Database Instance Name | Here we can give the Database Instance a name of our choosing, notice that you can connect to an external MaxDB server and create Databases
|
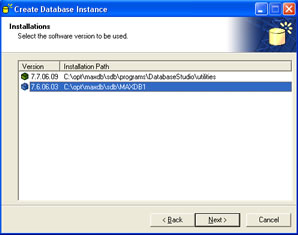
| Installation Version | If you have multiple versions of MaxDB installed you can select any version you want
|
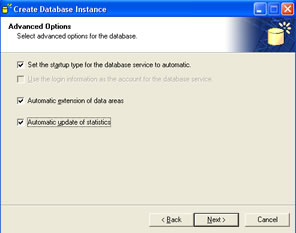
| Advanced Options | There are a number of advanced options you can configure, I generally use them all
|
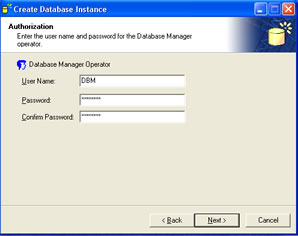
| Setup the DBM user | Just put in the password of your choice
|
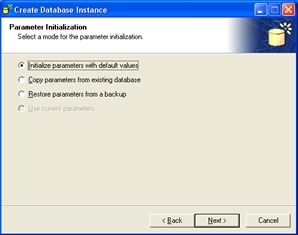
| Parameter setup | If you have a specific set of parameters that you wish to use then you have the option to use them here, i am just going for the defaults
|
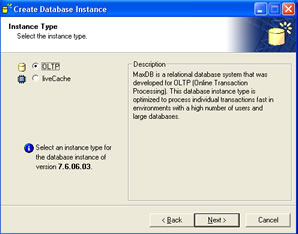
| Instance Type | Again I am going with the default, OLTP database. LiveCache by the way is a objected-oriented model that also uses the memory more
|
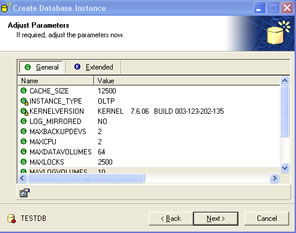
| Parameter Adjustment | here I tweeked a number of parameters, memory, CPU's and MaxlogVolumes. You can change these settings at a later date but the instance will require a reboot
|
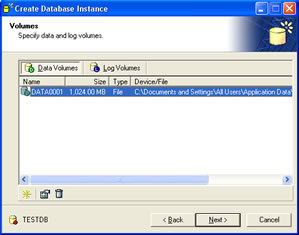
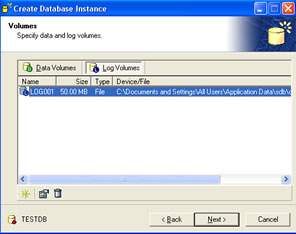
| Volume Setup | By default a data volume and a log volume will be created adjust these to what you planned above,
NOTE: One word of warning if you have selected to install the tutorial you must increase the size of the log volume otherwise the installation hangs, increase it to at least 1,024MB |
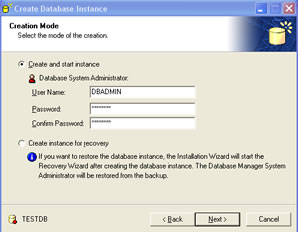
| Creation Mode | we need to create a password for the dbadmin account
|
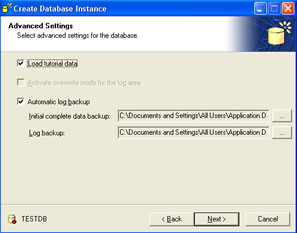
| Advanced settings | Some more advanced settings to adjust, if this is a development database i always like the tutorial data to play around with
|
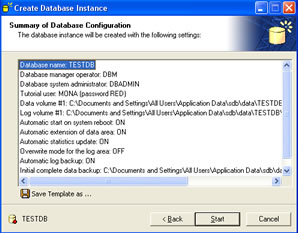
| Final Step - Summary page | Finally we get to the summary page, check everything then select next to create the database instance
|
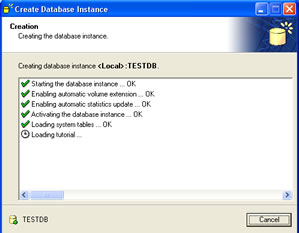
| Creating Database Page | You will now see the creation of the database instance
|
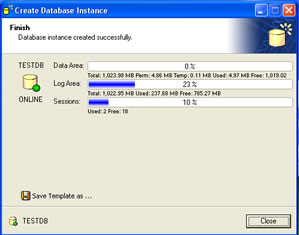
| Finish page | Finally you get the finish page confirming that the installation was successful.
|
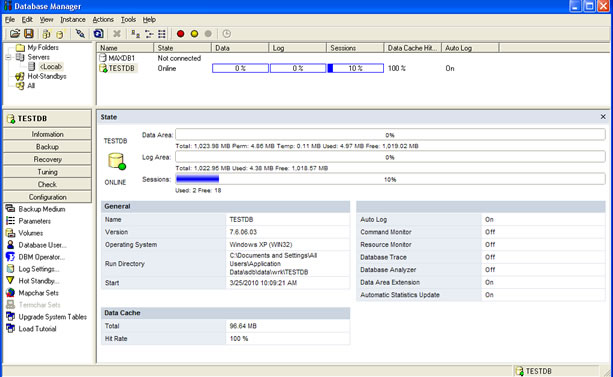
| Database Manager | Once the installation has finished you should see the below in the database manager
|
Of course you could just script it up which would like something like below
| Automated installation | #Database Creation # User creation |
Once you got the database up and running it time to enchance it, the first thing to do is to mirror the log volumes
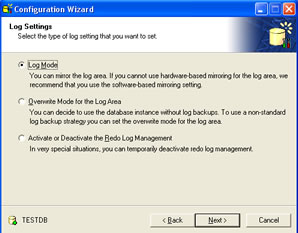
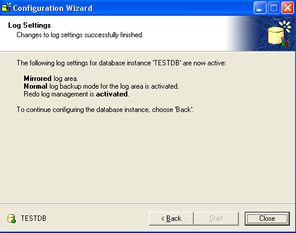
| Mirror Log Volumes | Start the database manager GUI, and select instance -> configuration -> log settings, you get the log configuration settings menu up
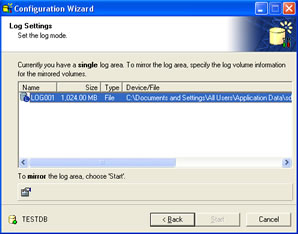
Select log mode, then next, the menu will ask which log file to mirror
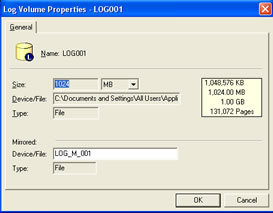
Double click on the single log file and notice the bottom of the configuration screen, the mirror part should have been filled in with default values, you can change these if so desired
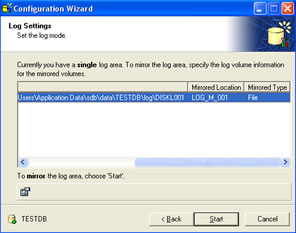
When you named the mirror file you should see it back in the log settings screen
You will be asked to confirm the creation of the mirror log file
To confirm that the log is mirrored select instance -> configuration -> volumes -> select the log volumes button, you will notice that the "mirrored location" and "mirrored type" are filled in |
If automatic backup log mode has not already been configured now is the time to do this,
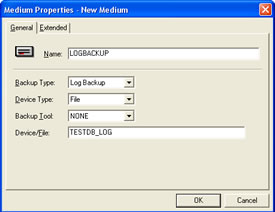
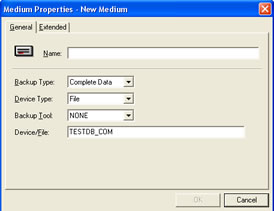
| Automatic backup log | First you need to create a log backup file select instance -> backup -> backup medium -> right click in the window and select new medium, fill in the details as you see fit
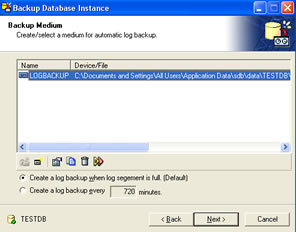
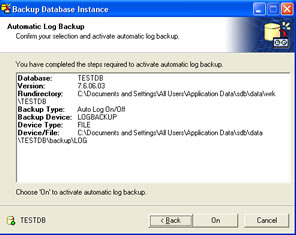
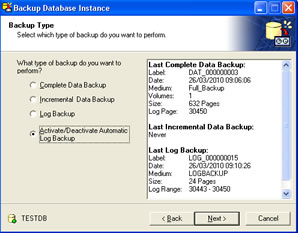
Select instance -> backup -> backup wizard, Select the Activite/Deactivite automatic log backup
Select the critrea that you need, normally i active a log backup when the log is full
Select on to start the automatic backup log
|
Once the database has been running a while you will be required to either add a data volume or a log volume, here are the steps to do this
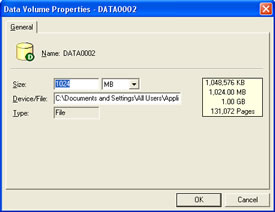
| Adding a Data Volume | Select instance -> configuration -> volumes, select the next volume on the list and right click and select new volume
Select OK to create the additional data volume the commandline option is as follows 7.6: |
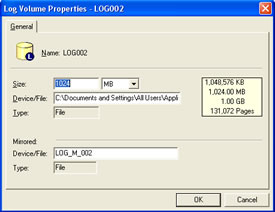
| Adding a Log Volume | Select instance -> configuration -> volumes, click on the log volume button to display the log volumes, select the next volume on the list and right click and select new volume
Note that because we have selected mirror log volumes (see above) the mirror will also be created 7.6: |
| Deleting a Volume (Data or Log) | deleting a volume is very simple, select -> instance -> configuration -> volumes, select the volume that you want to delete, right click and select delete. |
As with any system you need to take regular backups, MaxDB has a number of types of backups
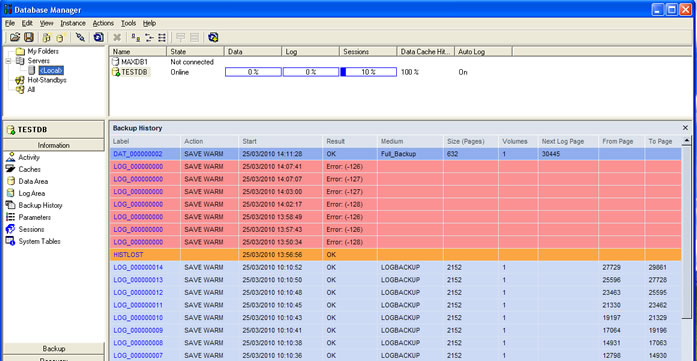
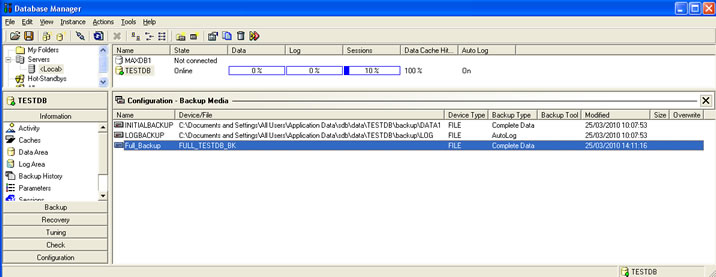
MaxDB has a very nice backup history which you can access via the database manager GUI
| Backup History | select instance -> backup -> backup history
|
As you can see the backup history page has a lot of information, the action selection may contain the following
I am only going to mention backup stategies in that you should have one, my personal one is to perform a full offline backup once a week and to backup the log files everyday, but I have small database of about 60GB.
Before we can backup the database we need to create a backup medium (a backup device), these can be either
| create backup meduim | using the database manager gui select instance -> backup -> backup medium, right click in the main window an select new medium
fill in the details giving a name to the backup and stating the filename, etc
As you can see I have a number of backup mediums, including a log file meduim |
Once you have a backup medium you can backup your database
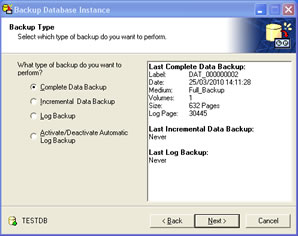
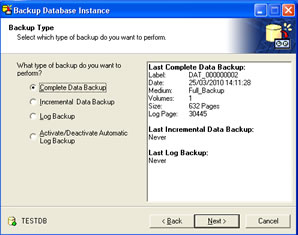
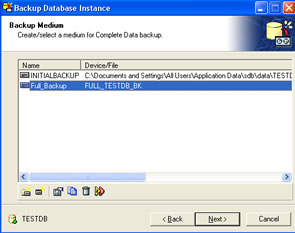
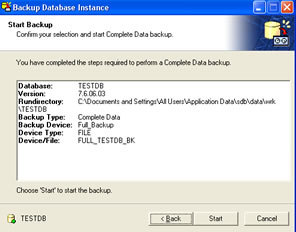
| Database Backup | using the database manager GUI select instance -> backup -> backup wizard
Select the backup medium
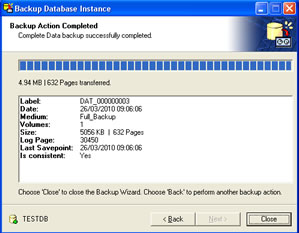
Comfirm that you are happy then click on start, the backup will start
After a period the backup should be completed
you can also use a commandline version |
Log backups are perform using the same procedure, however you must deactive the automatic backup feature before performing a manual log backup.
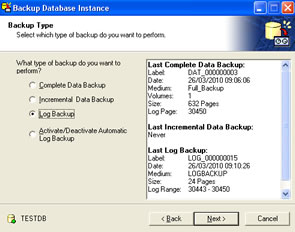
| Log backup | First deactive the automatic log backup feature select instance -> backup -> backup wizard
The select the log backup
Then just follow the steps as in the data backup you can also use a commandline version dbmcli> medium_getall |
You can check your backups if you desire
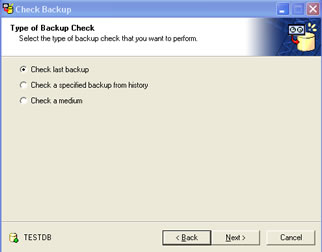
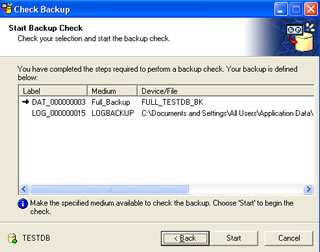
| check backups | to check your backups select instance -> check -> backup
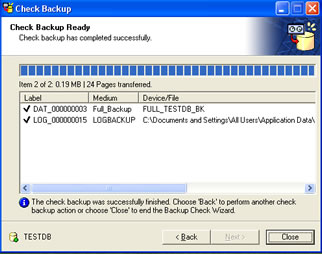
MaxDb will now go and check the backups, a tick will be displayed against
|
Recovery is performed in the admin state, therev are two types of recovery
The difference between them is that with initialization data and log volumes are recreated, without initialization the volumes are left untouched
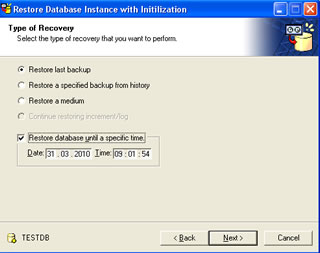
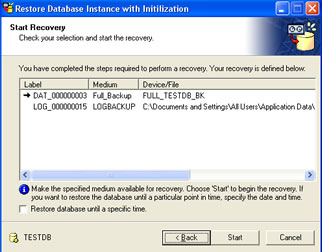
| recovery with initailization | the instance must be in the admin state, select instance -> recovery
Here you have a number of choices, you can even specify a specific time. You then select the backup that you want to restore
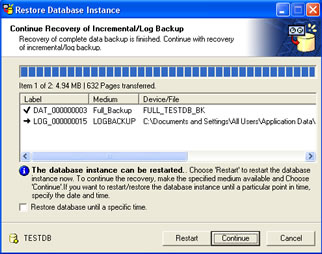
Once the data has been restored you then need to apply the log backups
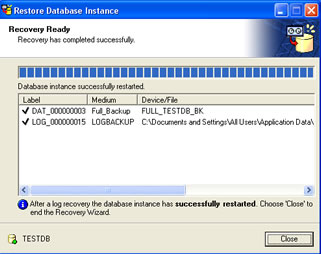
MaxDB will then display a summary screen indicating a successful restore or not
you can of course use the commandline |
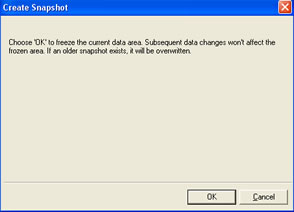
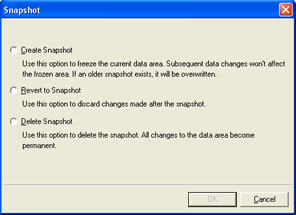
From time to time you may wish to performa very large update, snapshots allows you rcover very quickly if the update was unsuccessful. You can save one snapshot per instance, thus old snapshots are overwritten.
| Creating a snapshot | First the instance must be in the ADMIN state, then select instance -> backup -> create snapshot
select OK and the snapsjot will be created you can also use the commandline to create a snapshot |
| Deleting a snapahot | Again the database must be in an admin state, then select instance -> snapshot, select delete snapshot
you can also use the commandline to delete a snapshot dbmcli> db_admin |
| Reverting to a snapshot | Again the database must be in an admin state, then select instance -> snapshot, select revert to snapshot
This may take sometime depending on the number of chanes to the database since the snapshot was taken dbmcli> db_admin |
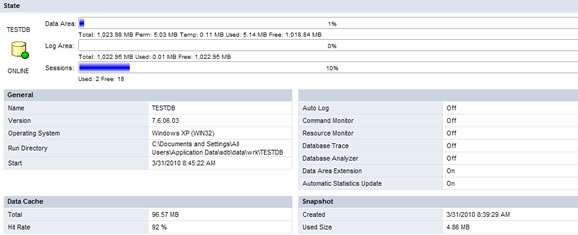
| viewing snapshot | To see when the last snapshot was taken see the main database screen, look in the bottom right hand corner you will see a snapshot section
|
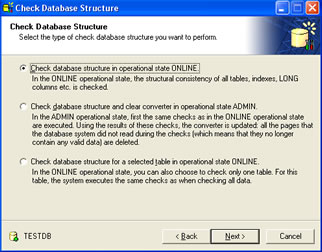
Internal data structures can become corrupted, a consistency check will allow to check the internal structure of the database. You can perform a consistency check either in online mode or admin mode.
Depending on the size of the database this may take a while to complete, so it is best to run it during quiet periods.
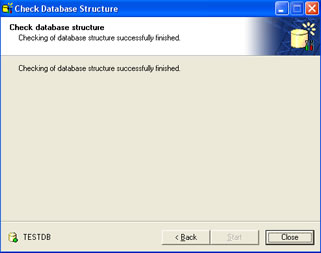
| consistency check | select instance -> check -> database structure
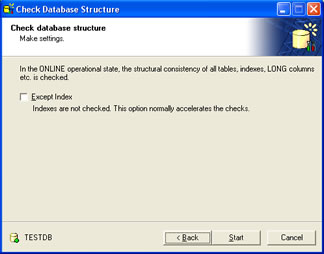
choose the one you want to run, you can speed things up alittle by not checking the indexes
after a while you should get a summary page
you can also use the commandline, here are some examples to check the consistency ## online checks |
| Previous | Menu | Next |