This Spring Boot (Spring Framework) tutorial is more of a quick cheatsheet guide with a little theory, its not a beginners guide but for someone who has used it before and needs a source for quick lookups on particular topics. There are many training videos on the web and I use Udemy for my main source for programming/devops courses.
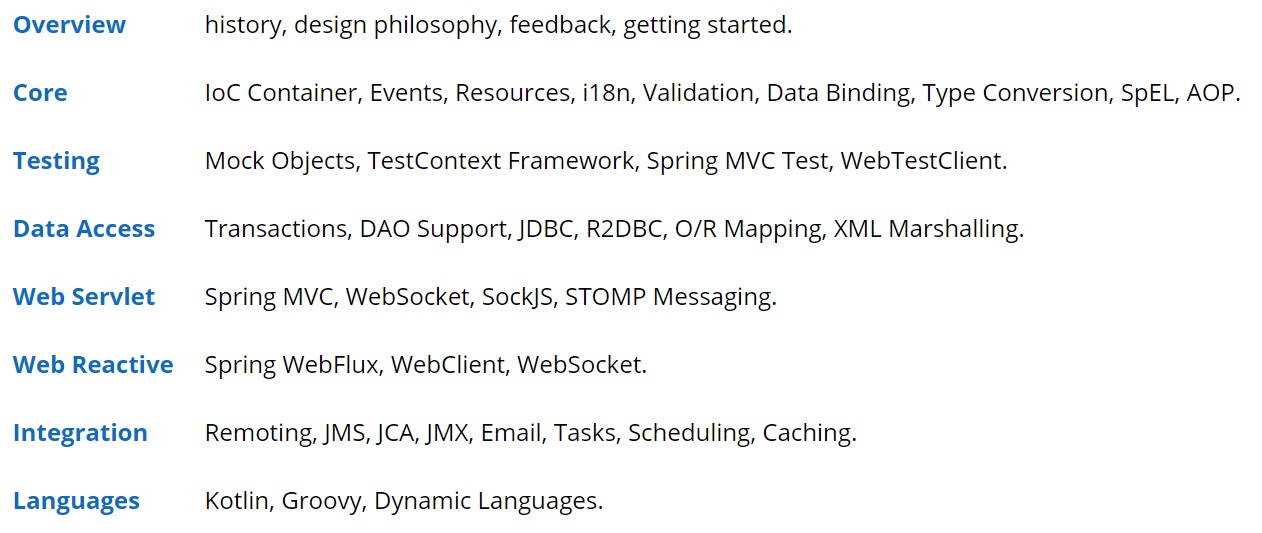
Before we take a look at Spring Boot we need to look at whole Spring ecosystem as it can handle many types of programming solutions, the website for Spring is the best place to start and you can then pick a particular area that you need.
- Microservices
- Reactive
- Cloud
- Web Apps
- Serverless
- Event Driven
- Batch
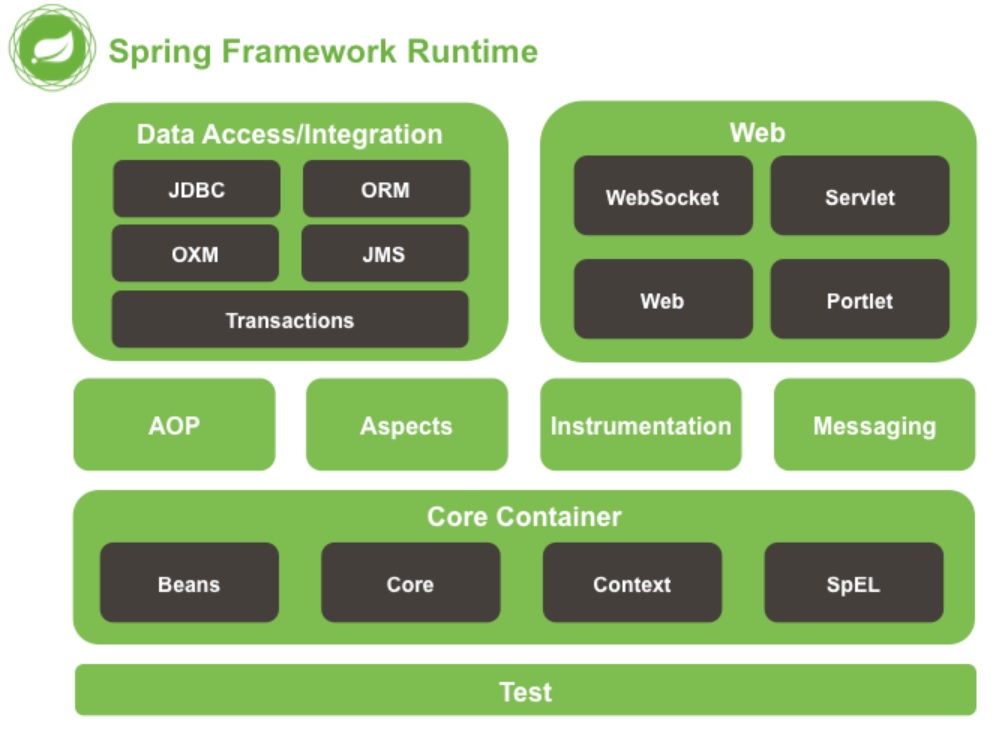
Drilling down I am going to look at the Spring Framework and in particular Spring Boot. The Spring Framework gives you a configuration model that allows you to program faster (cuts down on the boilerplate code), more securely, uses industry standards and is very popular in many Java workshops.
The diagram to the left was up until version 5 (M5) and details the components of the framework, the right diagram is the lastest version at of this time of writing (5.3.0-M1), not all of the components have to be used and it depends on the application you are writing, however I am going to cover most of these components.
 |
 |
Spring Boot is becoming the standard tool for writing Java applications, this is due that it can be used as a standalone application and works very well in microservices and cloud applications. The advantages of using Spring Boot are
- provides a flexible way to configure Java Beans, XML configurations, Database Transactions
- uses standard REST endpoints
- uses a powerful batch processing
- almost everything is auto configured
- uses annotations to cutdown on code
- makes dependency injection a dream
- includes a embedded servlet container (Tomcat)
- many IDE's have configuration options to easily configure the components that you need, plus you can use Spring Initializr
One of the most powerful features of Spring Boot is the ability to automatically configure the application based on the dependencies you have in the project, Spring Boot provides a set of dependencies that are guaranteed to work woth each other and thus gives you confidence at each components will work, this solves many headaches of version mismatches when developing also known as the dependency hell. The other cool feature is that Spring Boot on startup will scan for beans and package declarations automatically and uses annotations to do this which means no XML configuration files are need.
| Introduction | some code |
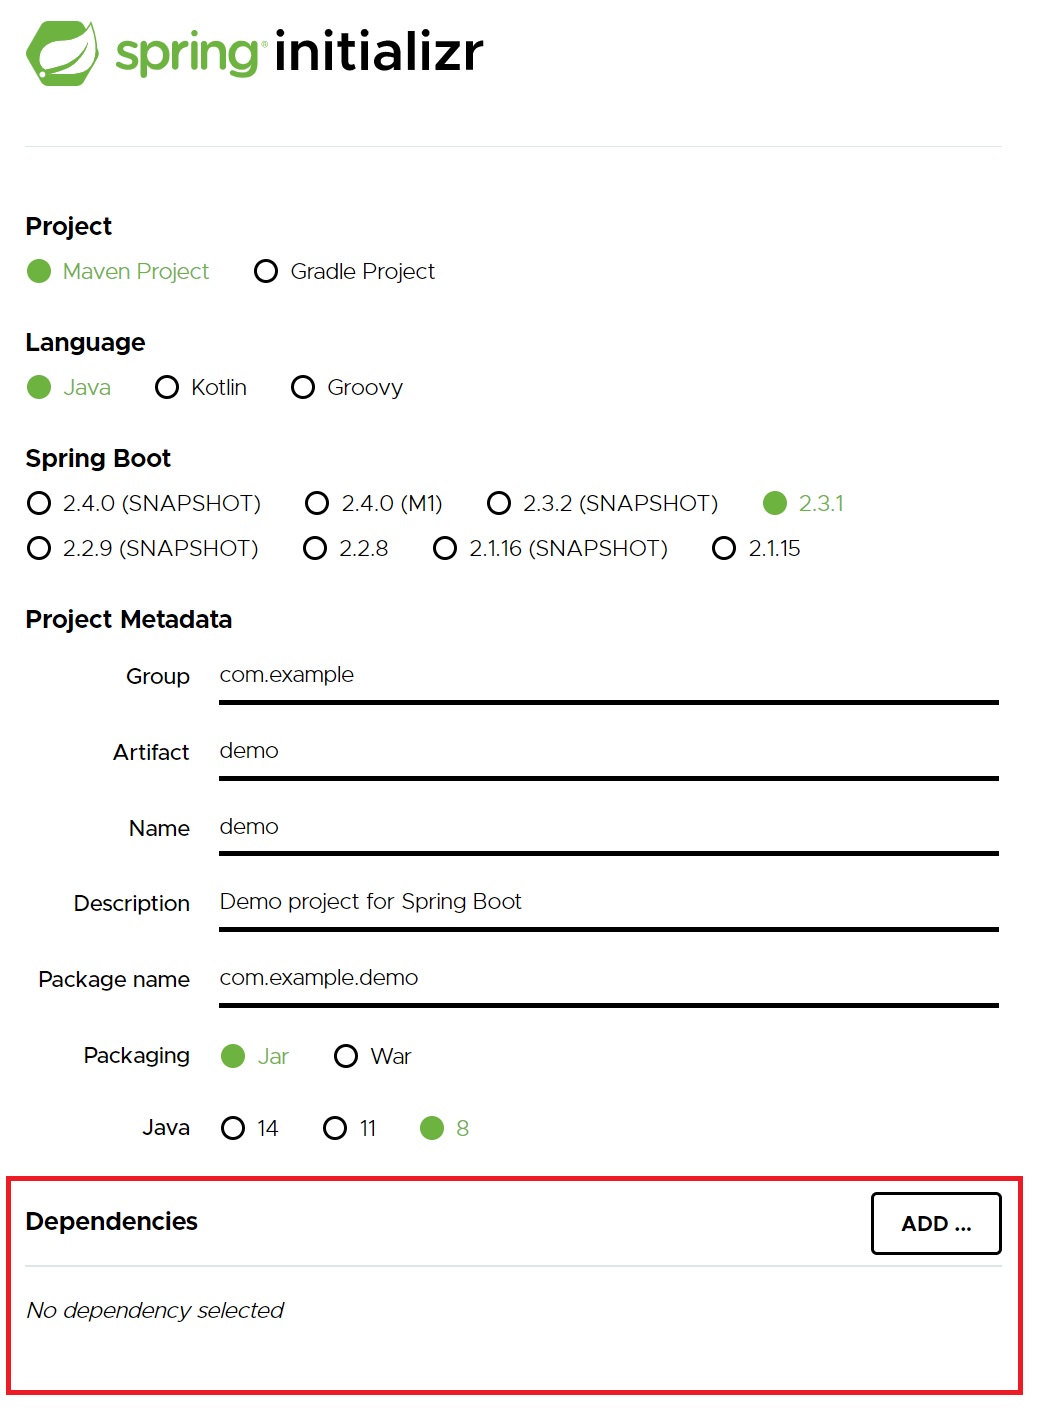
As I mentioned above there are two common ways to start a Spring Boot project, using Spring Initializr or using your IDE (I will be using JetBrains Intellij and using Maven).
Spring initializr generates a Spring Boot with only the requirements that you specify, so if you need web app then you add this, if you need database then you add this and only these components will be added and thus keeping the project as small as it can, all dependencies will be taken care of for you.
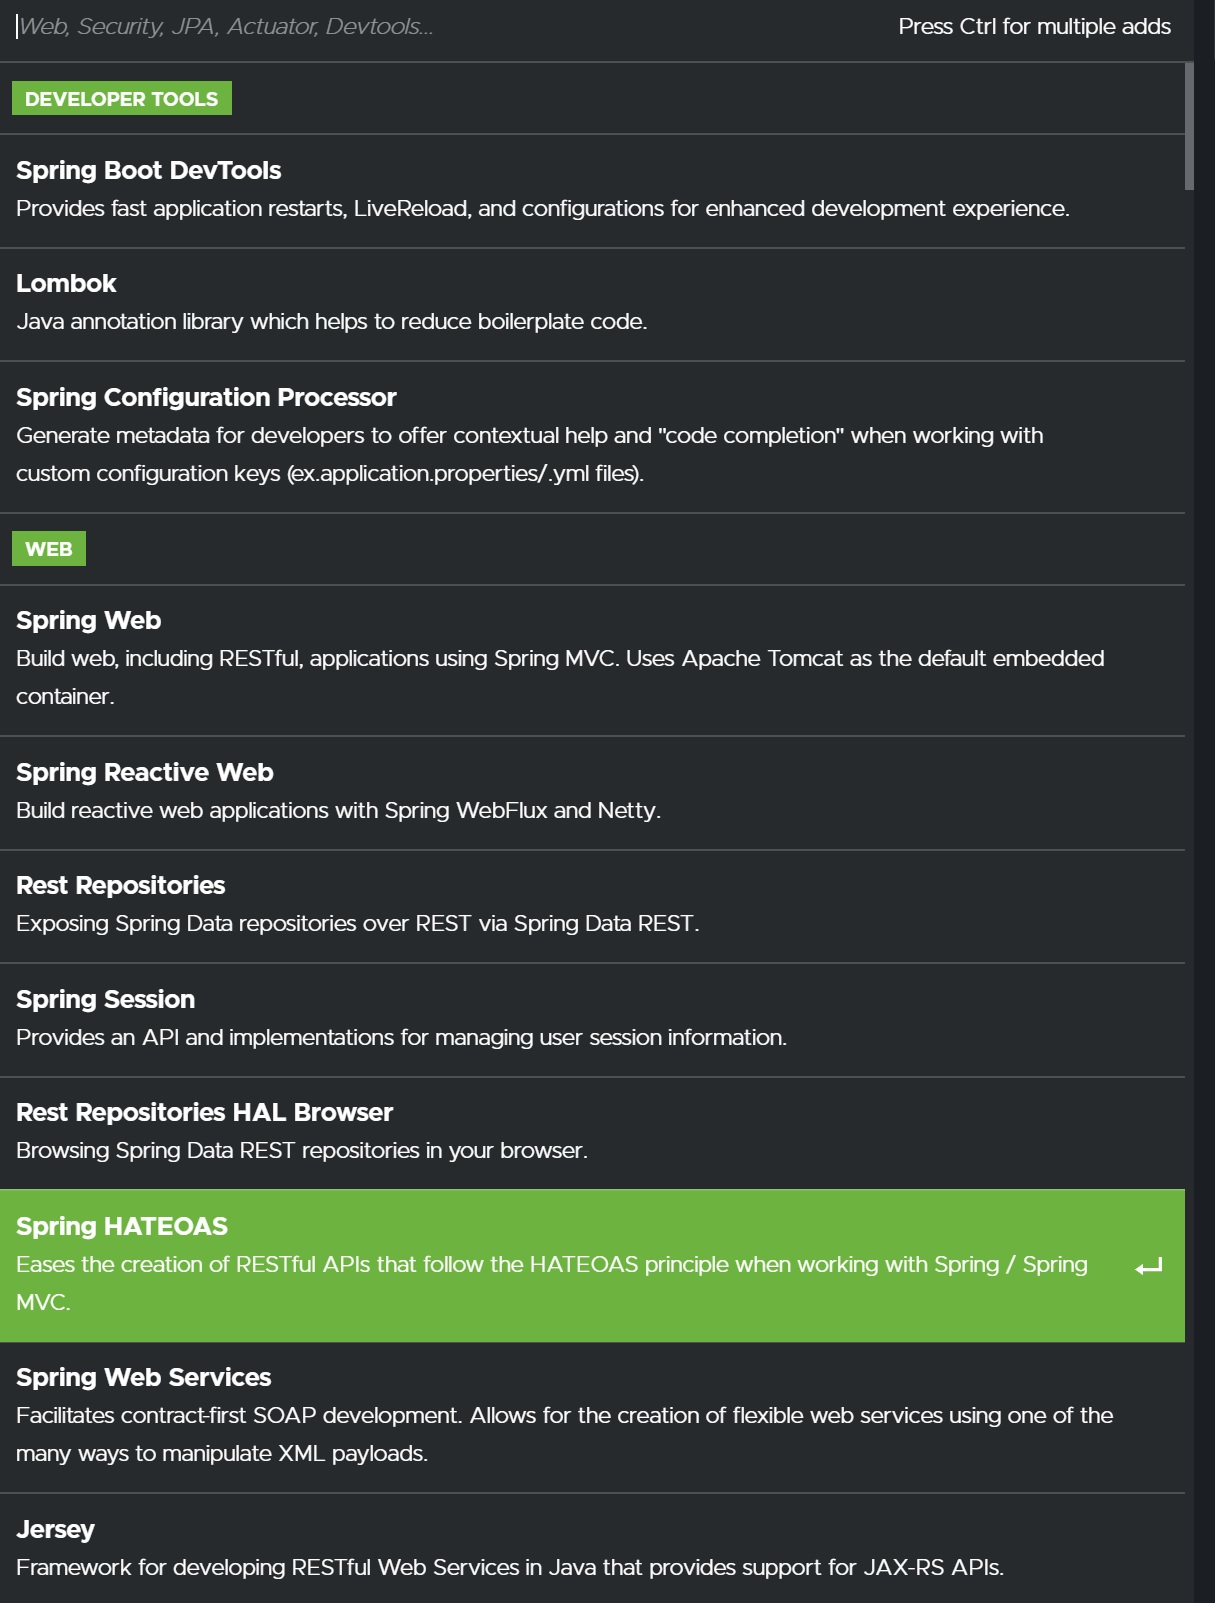
The lastest version on the web looks like the below left-hand screenshot (light-mode), its a familar project setup but one thing to notice is the dependency section at the bottom, you have a list of many dependencies that you can use (example in right hand screenshot - dark mode), web app, database, reactive web, etc.
 |
 |
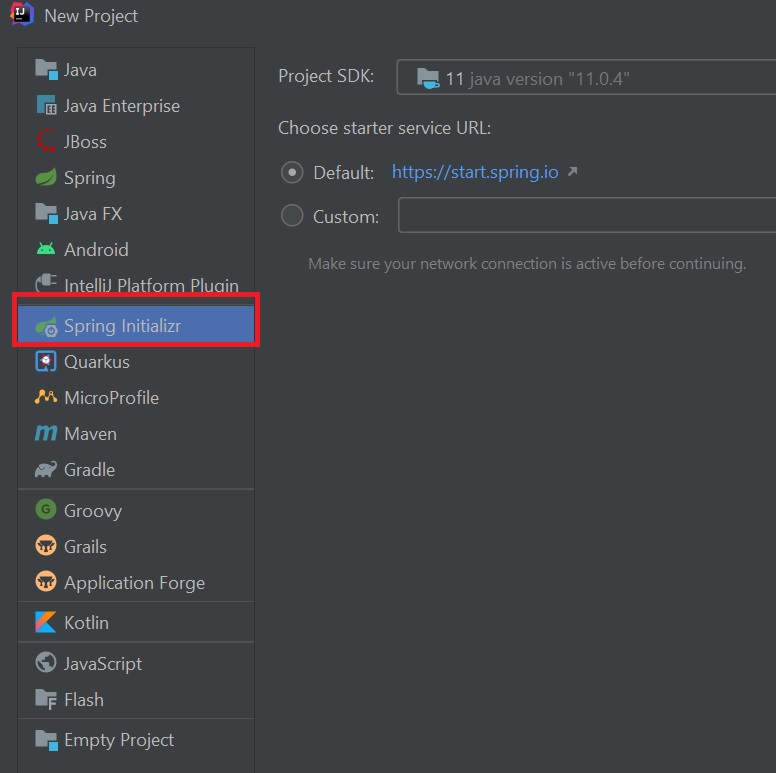
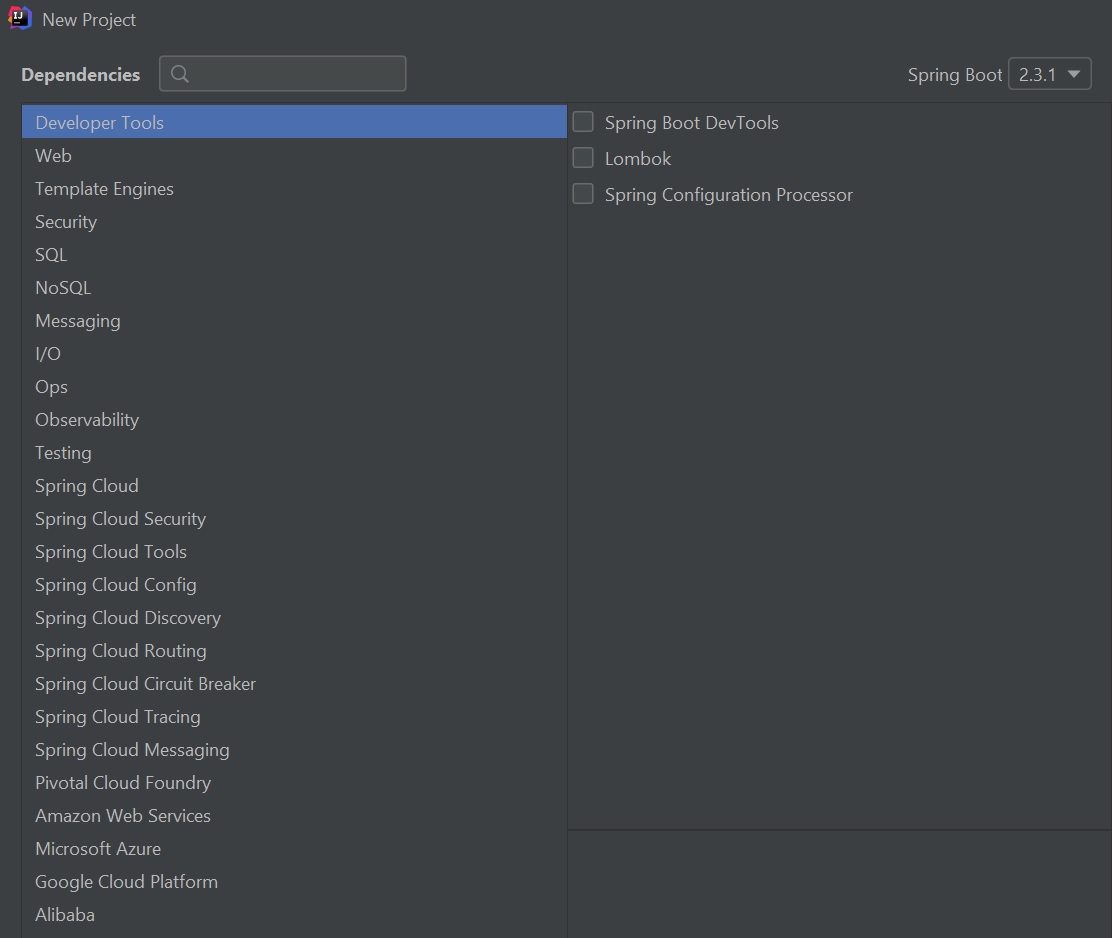
Intellij has the same feature as seen below, just tick what you need, you also can specify the spring boot version
 |
 |
What has happened is that when the project is created all the dependencies are created and downloaded as you can see below, also the versions have been tested to work with each other. You are no ready to code no more project configuration is needed, you can also build on this and add additional dependencies at a later date, this saves lots of time.
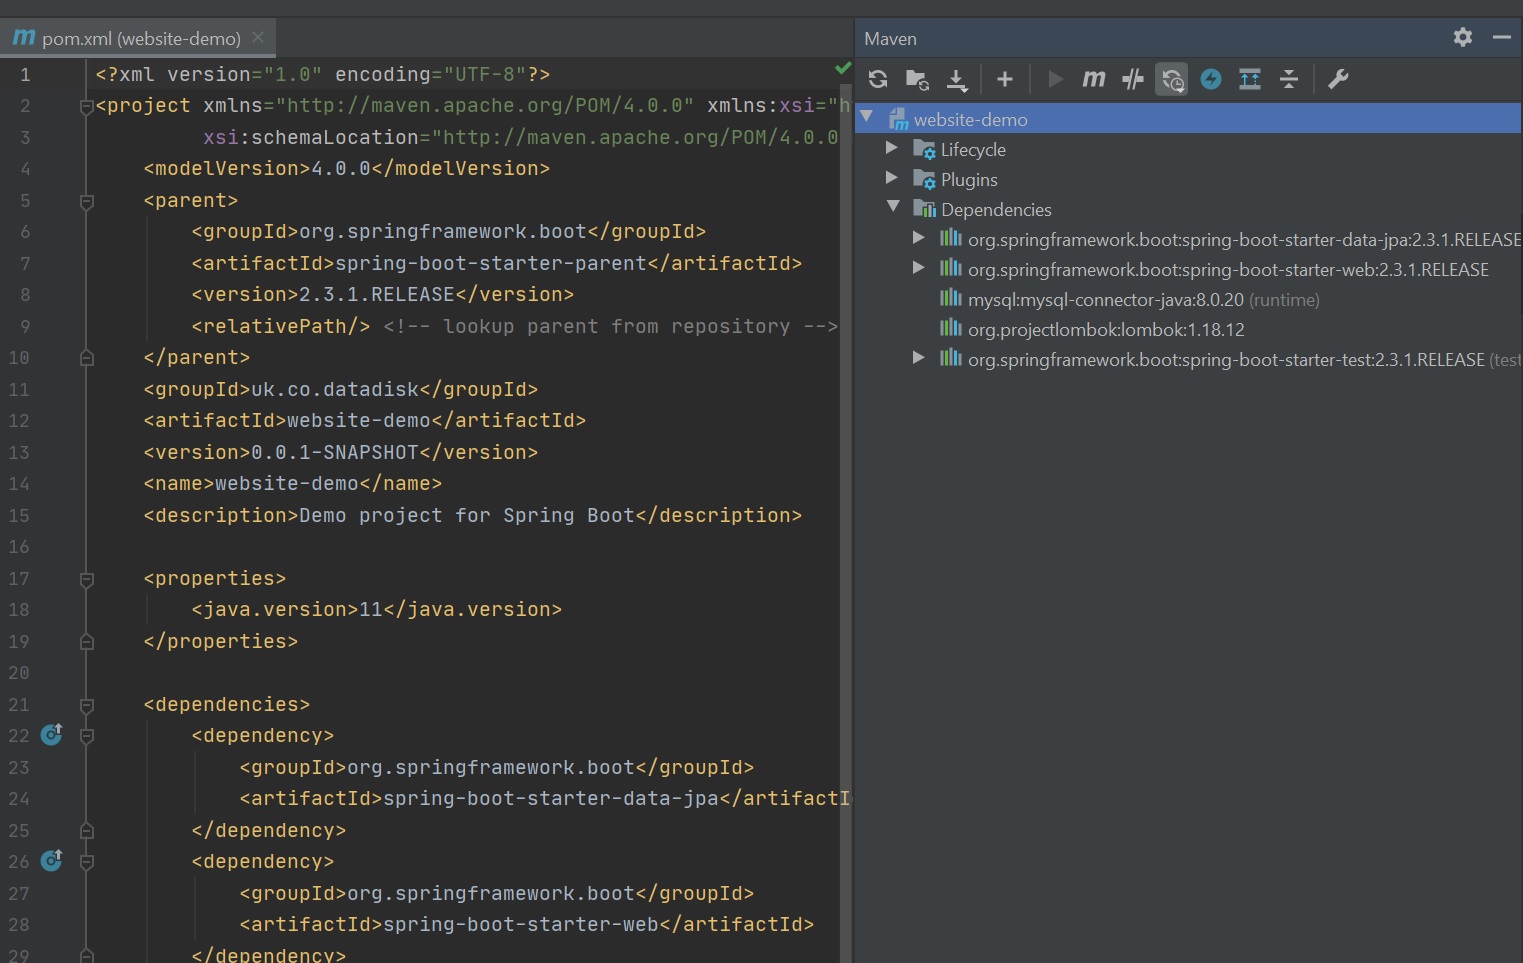
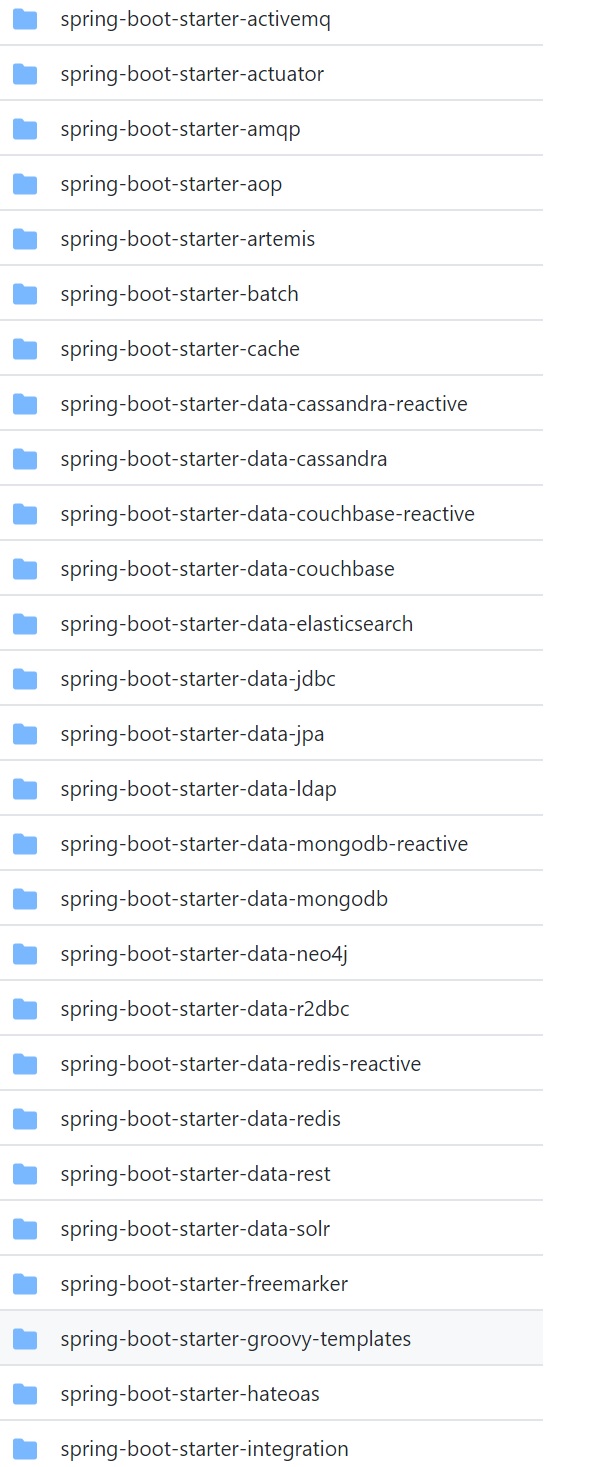
The way Spring Boot does this is using starters which are in this case Maven BOM's to give us all the dependencies that we require for the project, you can see Spring Boot Starter JPA below (left-hand screenshot), this will pull in all the necessary JPA related dependencies and the correct versions of those dependencies. There are many Spring Boot starters (right-hand screenshot) that can be used to configure many open source project like database connection, messaging, redis, etc.
 |
 |
Before we move on to looking at coding an application I want to talk about dependency injection as its heavy used in Spring and a good knownledge is required.
Firstly a good understanding of the SOLID principles is required I have already covered this in another section
The Spring Context (IoC containers) which is responsible for instantiating, configuring and assembling beans by reading the configuration files, Java annotations or Java code in the configuration files.
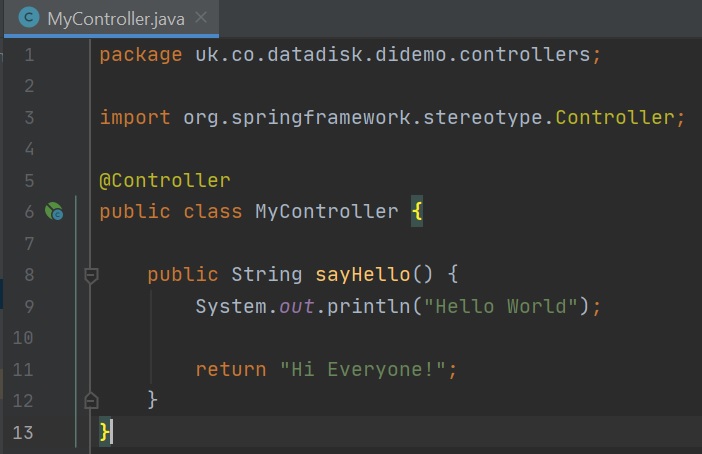
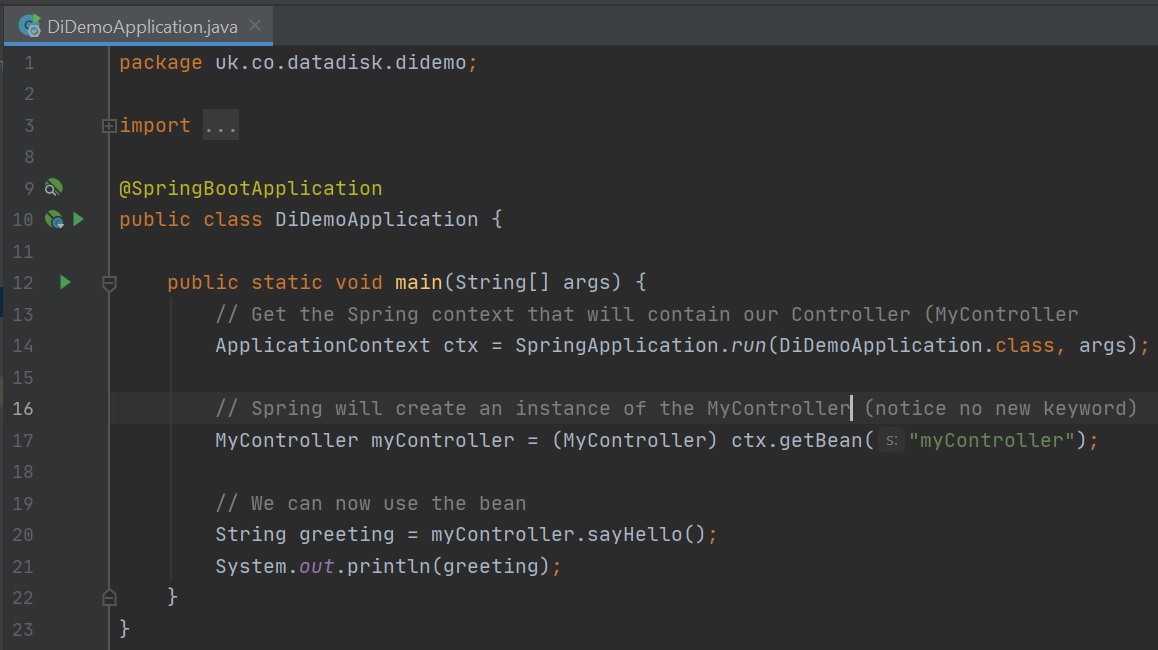
In the below example we create a controller class (left-hand screenshot) and then retrieve the spring context (right-hand screenshot), we can then get Spring to handle the instantiation notice that we don't use th new keyword and simply ask Spring to get me an instance of MyController. This is how Spring Boot works it creates the beans needed by the application using the configuration files and annotations.
 |
 |
The Spring Framework will provide the dependency injection for you so you don't have to and the framework will make sure you get the correct dependency. So when you injection something into a class its the frameworks responsibility to instantiate the object for you and thus you don't need to us the new keyword. This helps when for an example you need a database connection, you simply ask the framework for it and you don't have to code the complex configuration to get that connection. Inversion of Control (IoC) is a technique that allows dependencies to be injected at runtime, Spring will be in control of the injection of dependencies.
There are several types of dependency injection, one point to make is try to code to an interface (when practical):
- using a constructor which is the preferred way (no need for the @Autowired annotation)
- using a setter method (@Autowired)
- using class properties (@Autowired) but the least preferred
| Constructor (preferred) | 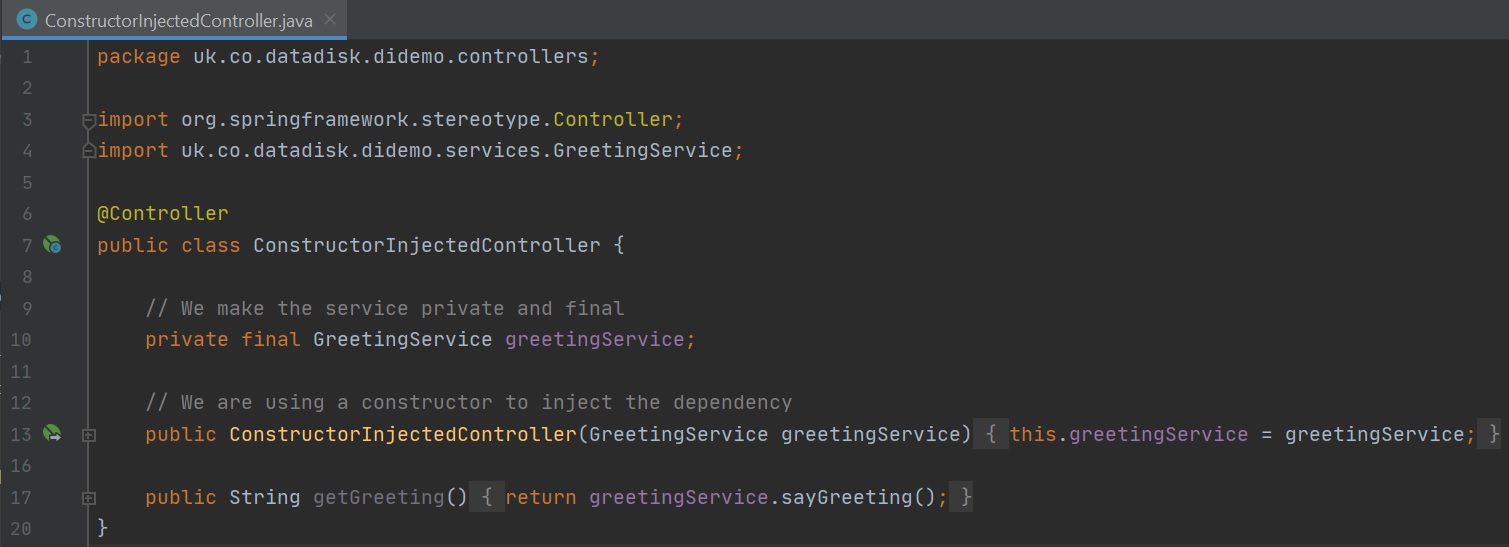 |
| Setter |  |
| Property (least preferred) | 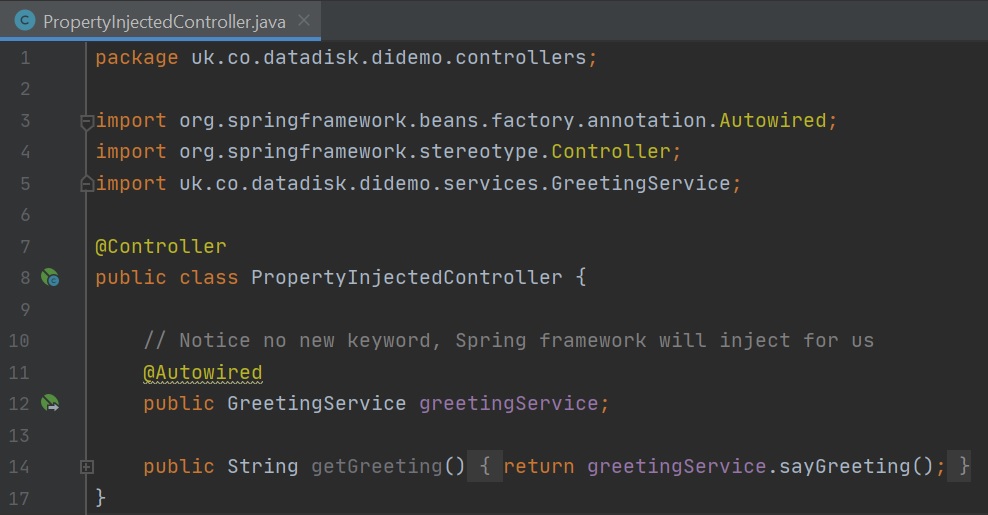 |
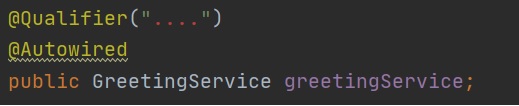
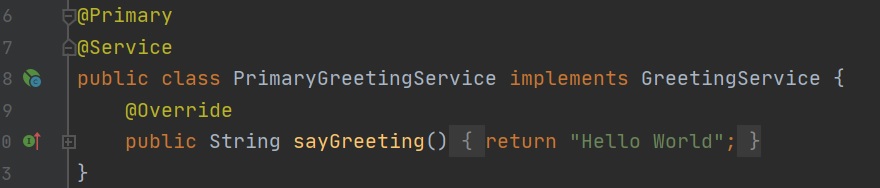
There are times were you might need to qualifier which bean you wish to use if there are multiple bean choices, you can use either @Qualifier or @Primary annotations, Spring Boot will inform you on startup if there are any mulitple bean choice issues.
  |
 |
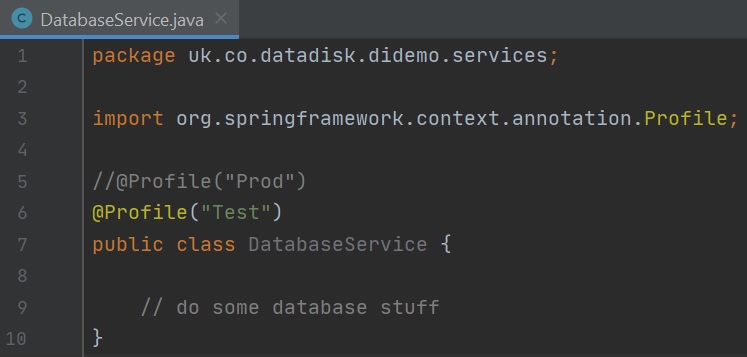
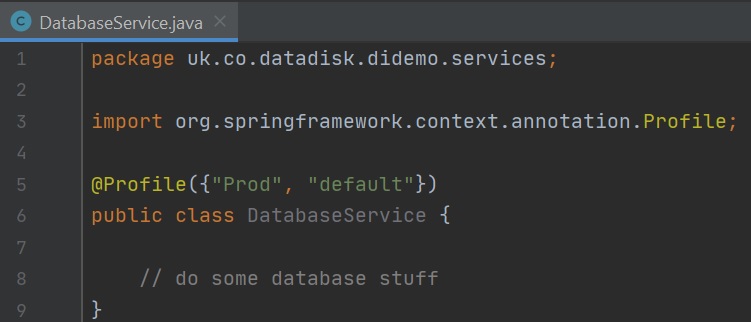
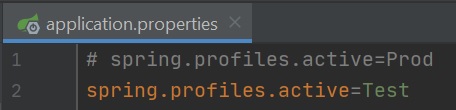
You can use profiles (even multiple profiles, use a list or the &) so that the application can change based on a profile, for example you may want a test profile which uses a different database, etc. You use the @Profile annotation and then configure the application.properties file you use the profile that you require, only the beans that match the profile will be pulled into the spring context. By default if no profile has been set then spring will use the default profile.
  |
 |
As a beginner you don't really need to fully understand but som complex application will require you to have an understand of the bean lifecycle, firstly a class will be instantiated and properties can be passed so that propery values can be set within the bean. There are a number of interfaces that are called and there are some pre and post bean processors, once this has finished the bean is ready to use. The destroy method is called to terminate a bean you can also implement a custom destroy method if you desire.

You have two annotations that you can hook into the lifecycle @PostConstruct and @PreDestroy, you can also implement two interfaces postProcessBeforeInitialization and postProcessAfterInitialization which will also hook into the bean lifecycle.

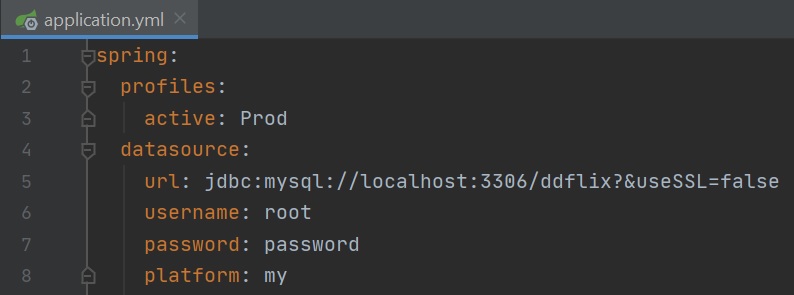
The default properties file for spring boot is the applications.properties file (text file) in the resources folder, you can switch to using YAML instead and thus the file name will be application.yml. This file is used for Spring boot configuration and additional dependencies and any of your own properties that you would like to use in the application.
| Text | Yaml |
|---|---|
 |
 |
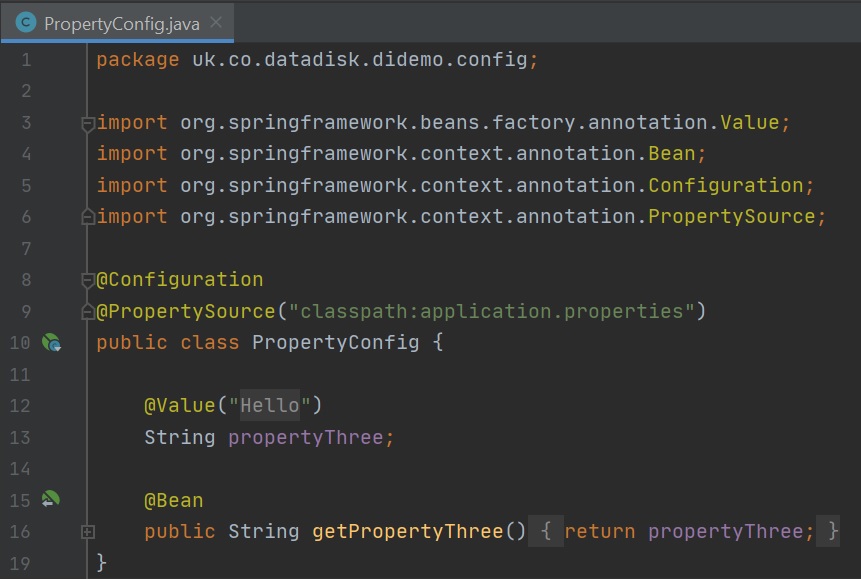
If you want to use your own properties you have a number of options, you can use the existing property file or create your own custom property file, then there are various ways to access those properties
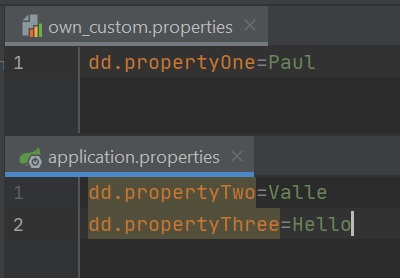
- use the Environment bean which can be injected into your class (left-hand screenshot) use the @PropertySource (or @PropertySources) and @Value to retrieve a property from your own property file (left-hand screenshot)
- create you own configuration file and create a bean that can be injected into you class (right-hand screenshot)

|  |
The ordering of properties can be seen in the spring documentation below:

Lastly you can tie in spring profiles with property files by using the profile name in the property filename for example lets say you have a profile called prod you can create a property file called application-prod.properties, this will have a higher priority based on the ordering above.

There are times when you just want to run a batch of commands or perform some pre-data loading, this is were you can use the CommandLineRunner interface, there is also the ApplicationRunner interface which does the samething but allows passing of arguments, I will only demostrate the CommandLineRunner. You can either use the main spring application file (left-hand screenshot) or create your own custom file (right-hand screenshot), all you have to do is implement the CommandLineRunner interface and override the run() method. The code in the run() method will be executed before the application fully starts up which is idea if you perhaps need to load data into a database for example. You can also a number of files that use CommandLineRunner and you can use the @Order annotation to order when they run.

| 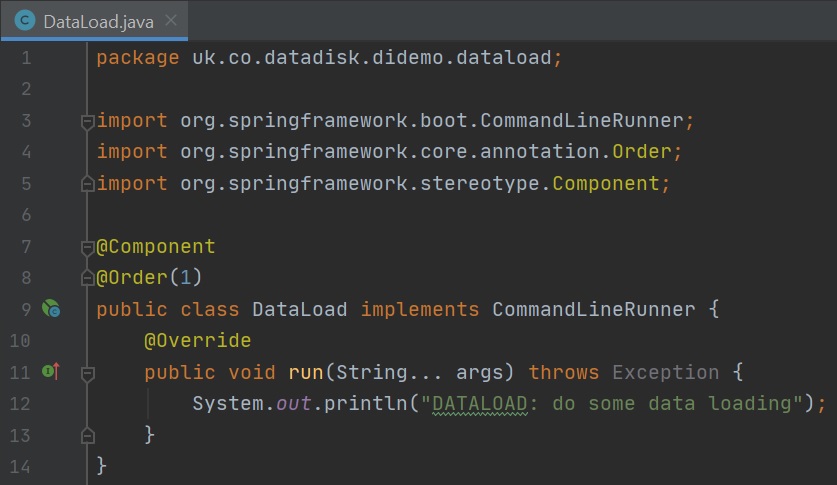 |
Before I start on Lombok, its a project that helps with reducing writing boilerplate code, some developers like it, others hate it, personally I think you should give it a try and make your own decision as it's not for everyone. There are some pros/cons to think about
| Pros |
|
| Cons |
|
In a nutshell Lombok helps with writing boilerplate code that you repeatly write for example no arg constructors, constructors with arguments, getters/setters, equals and hashCode by using annotations. I am not going to describe how to use Lombok but give a brief overview.
Lombok works by using the annotation processor to generate the code specified by the annotation during the build phase, there is sometimes a bit of configuration to do, below is Intellij setup this may or may not be required but just to make you aware if you do run into build problems with Lombok
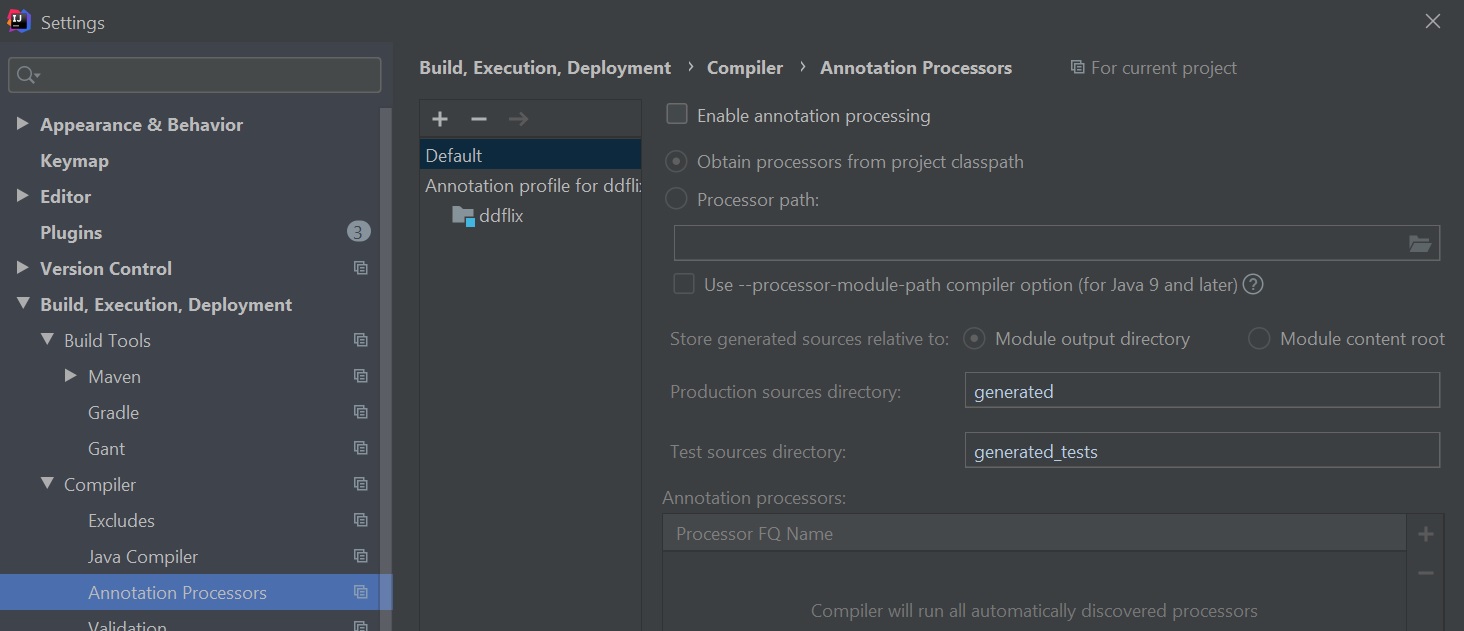
|  |
In the below example code the first 5 are Lombok annotations that will generate the boilerplate code, constructors, getter/setters, ToString, etc.
| Example code | |
| Introduction | @Data
@NoArgsConstructor
@AllArgsConstructor
@EqualsAndHashCode(exclude = {"birthCountry", "films", "actorImages"}, callSuper = false)
@ToString(exclude = {"birthCountry", "films", "actorImages"})
@Entity
@Table(name = "actors")
public class Actor extends AbstractDomainClass {
@NotNull
@Column(name = "first_name")
private String firstName;
@NotNull
@Column(name = "last_name")
private String lastName;
@Column(name = "dob")
@Temporal(TemporalType.DATE)
private Date birthDate;
@NotNull
@Column(name = "gender")
@Enumerated(EnumType.STRING)
private Gender gender;
@OneToOne
@JoinColumn(name = "country")
private Country birthCountry;
// additional methods, etc
} |
| Commonly used Lombok Annotations | |
| @NoArgsConstructor, @AllArgsConstructor, @RequiredArgsConstructor | There are a number of constructor annotations you can also use @NonNull to make sure arguments are being passed to the fields (see below). |
| @Getter, @Setter | annotations to generate your getter and setters, they will be public but you can specify an access level, you can perform at class level or specific fields. The @Getter annotation has a option to set lazy which can use caching. |
| @ToString | will generate a toString method, you can also include or exclude specific fields, also use callsuper to include the super classes toString. You can perform on the class as a whole or specific fields. |
| @EqualsAndHashCode | generates both hashCode and equals methods you can include or exclude specific fields or perform on the class as a whole, you can also use super to use the super classes equals and hashCode. |
| @Data | short-cut for @ToString, @EqualsAndHashCode, @Getter/@Setter and @RequiredArgsConstructor becuase these are commonly used. |
| @Builder | use for building objects, allows you to do the below:
Person.builder().name("Paul Valle").city("Milton Keynes").job("Programmer").build(); |
| @Slf4j, @Log4j, @Log, @JbossLog (many more) | generates a static log field that can be used to log output, there are many variations. |
| @NonNull | checks that parameter is not null otherwise an exception will be thrown |
| @Value | short-cut for @ToString, @EqualsAndHashCode, @AllConstructor, @Getter |