Site Recovery Manager (SRM)
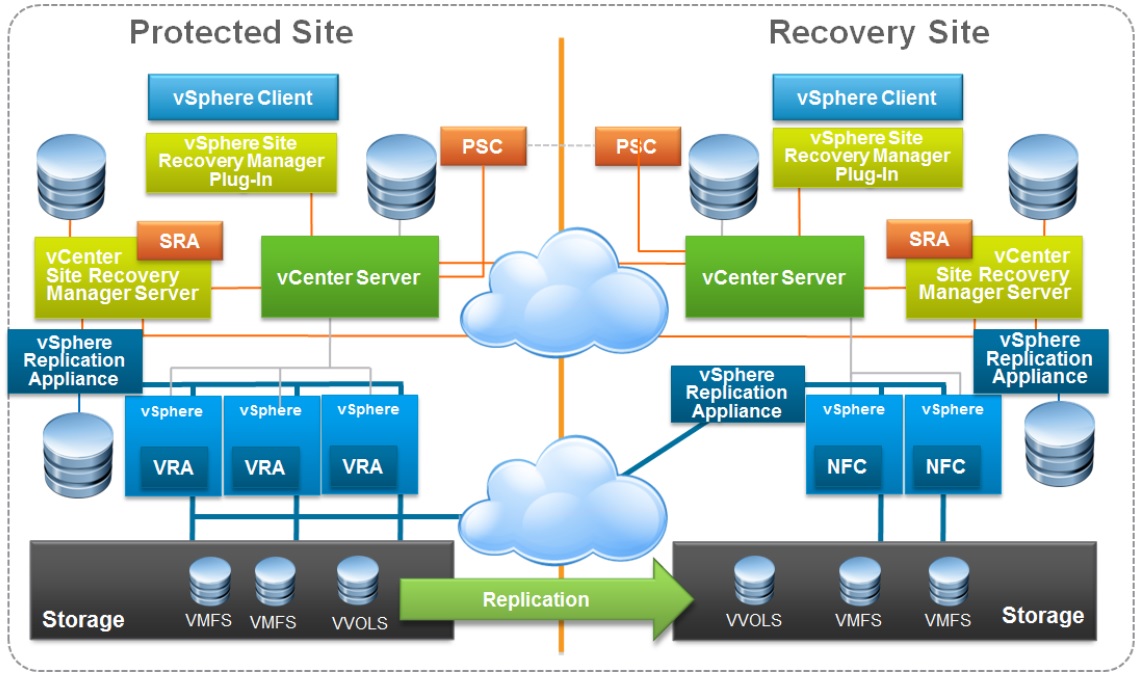
Site Recovery Manager (SRM) is a Disaster Recovery Software which fully supports VMWare Replication. SRM helps you plan, test, and run the recovery of virtual machines between data centers. The SRM server hooks into the vCenter server and with the help of the replication server can recover lost VM's when a data center is interrupted (loss of power, etc).
Below is a document from VMWare which explains the complete setup, you can also use vendors replication tools, basically the Replication and Site Recovery Manager servers hook into the vCenter server from here you can control the replication and the recovery of VM's should a disaster happen.
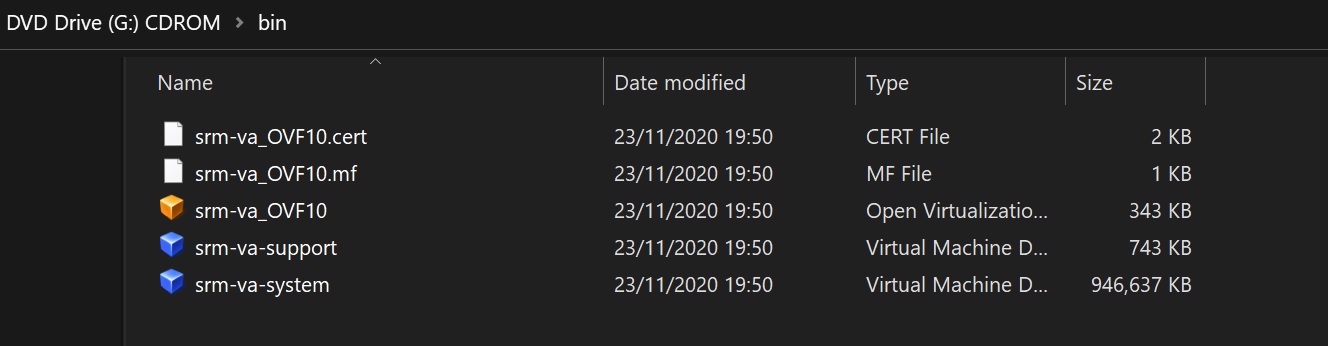
You have two options in which the SRM can be installed using a windows server and install the SRM binaries or using a OVF template and install inside a VMWare cluster, which is the method we will be looking at below.

As I am using a windows laptop I mount the ISO image exposing the OVF files.
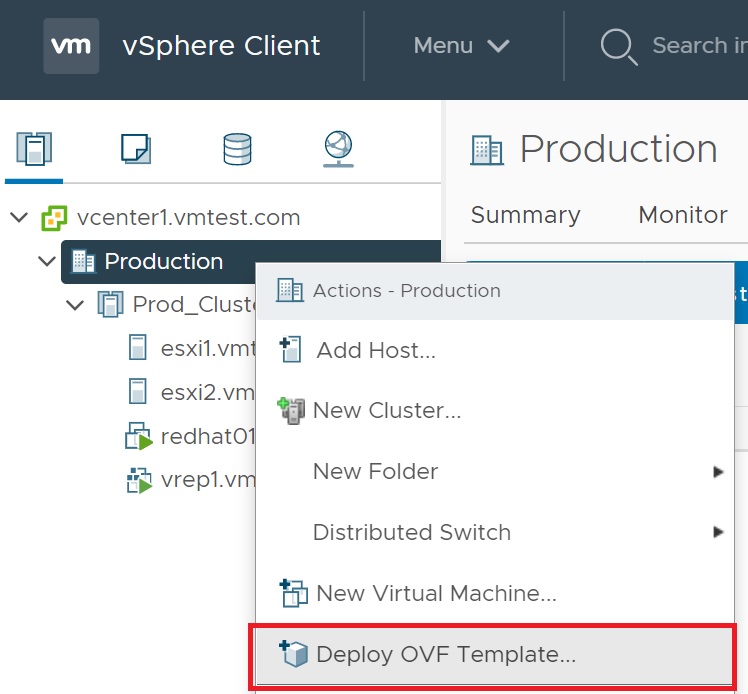
We use the vCenter server to install the OVF template, which takes us to a number of setup screens
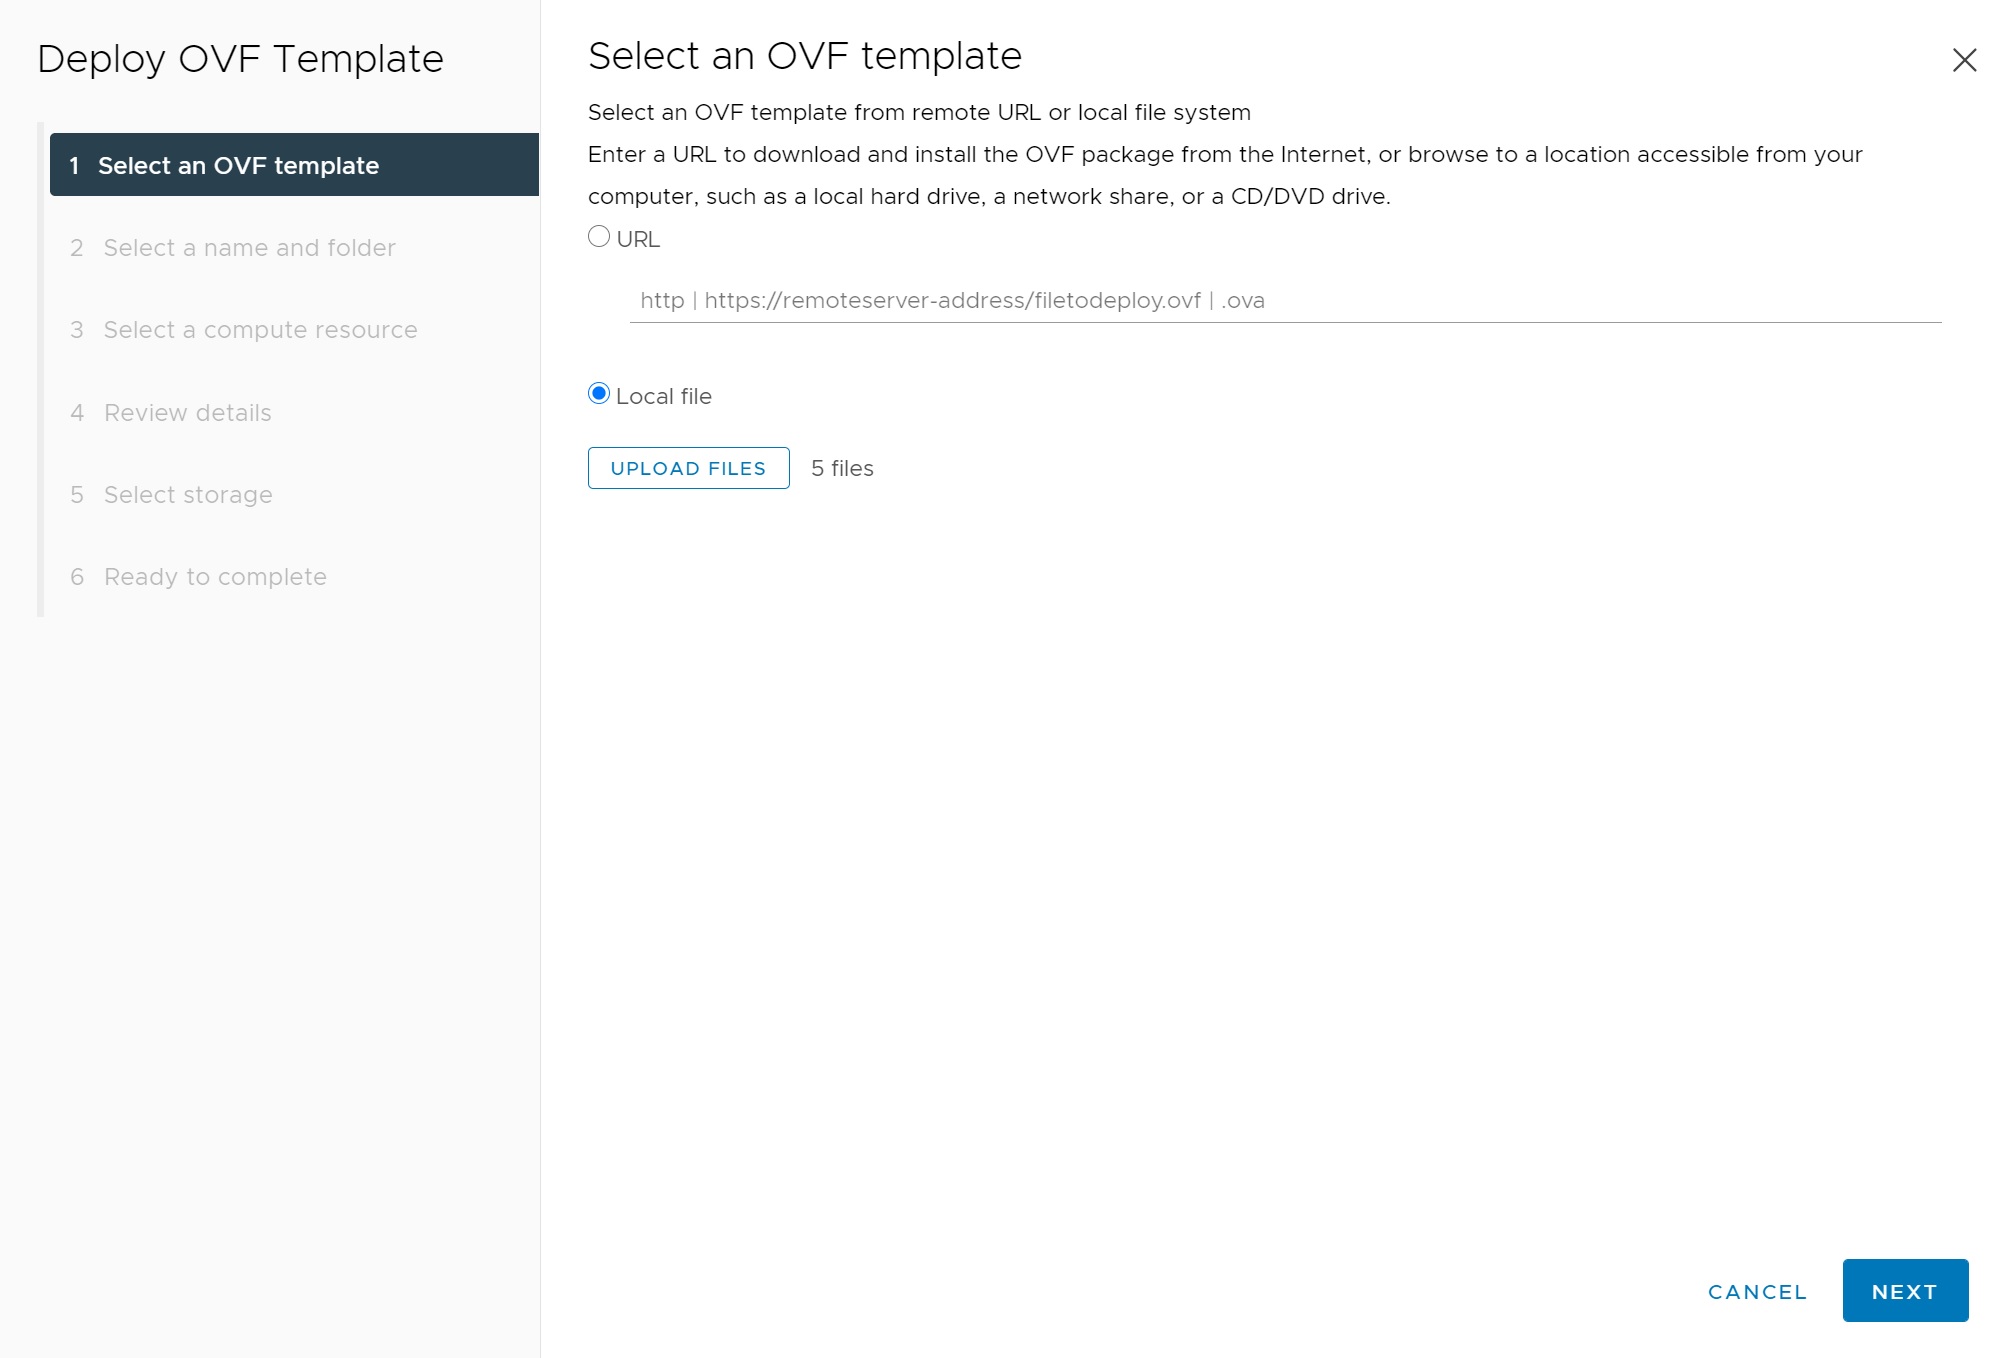
The first setup screen requires us to identify the OVF template files in the above screenshot.
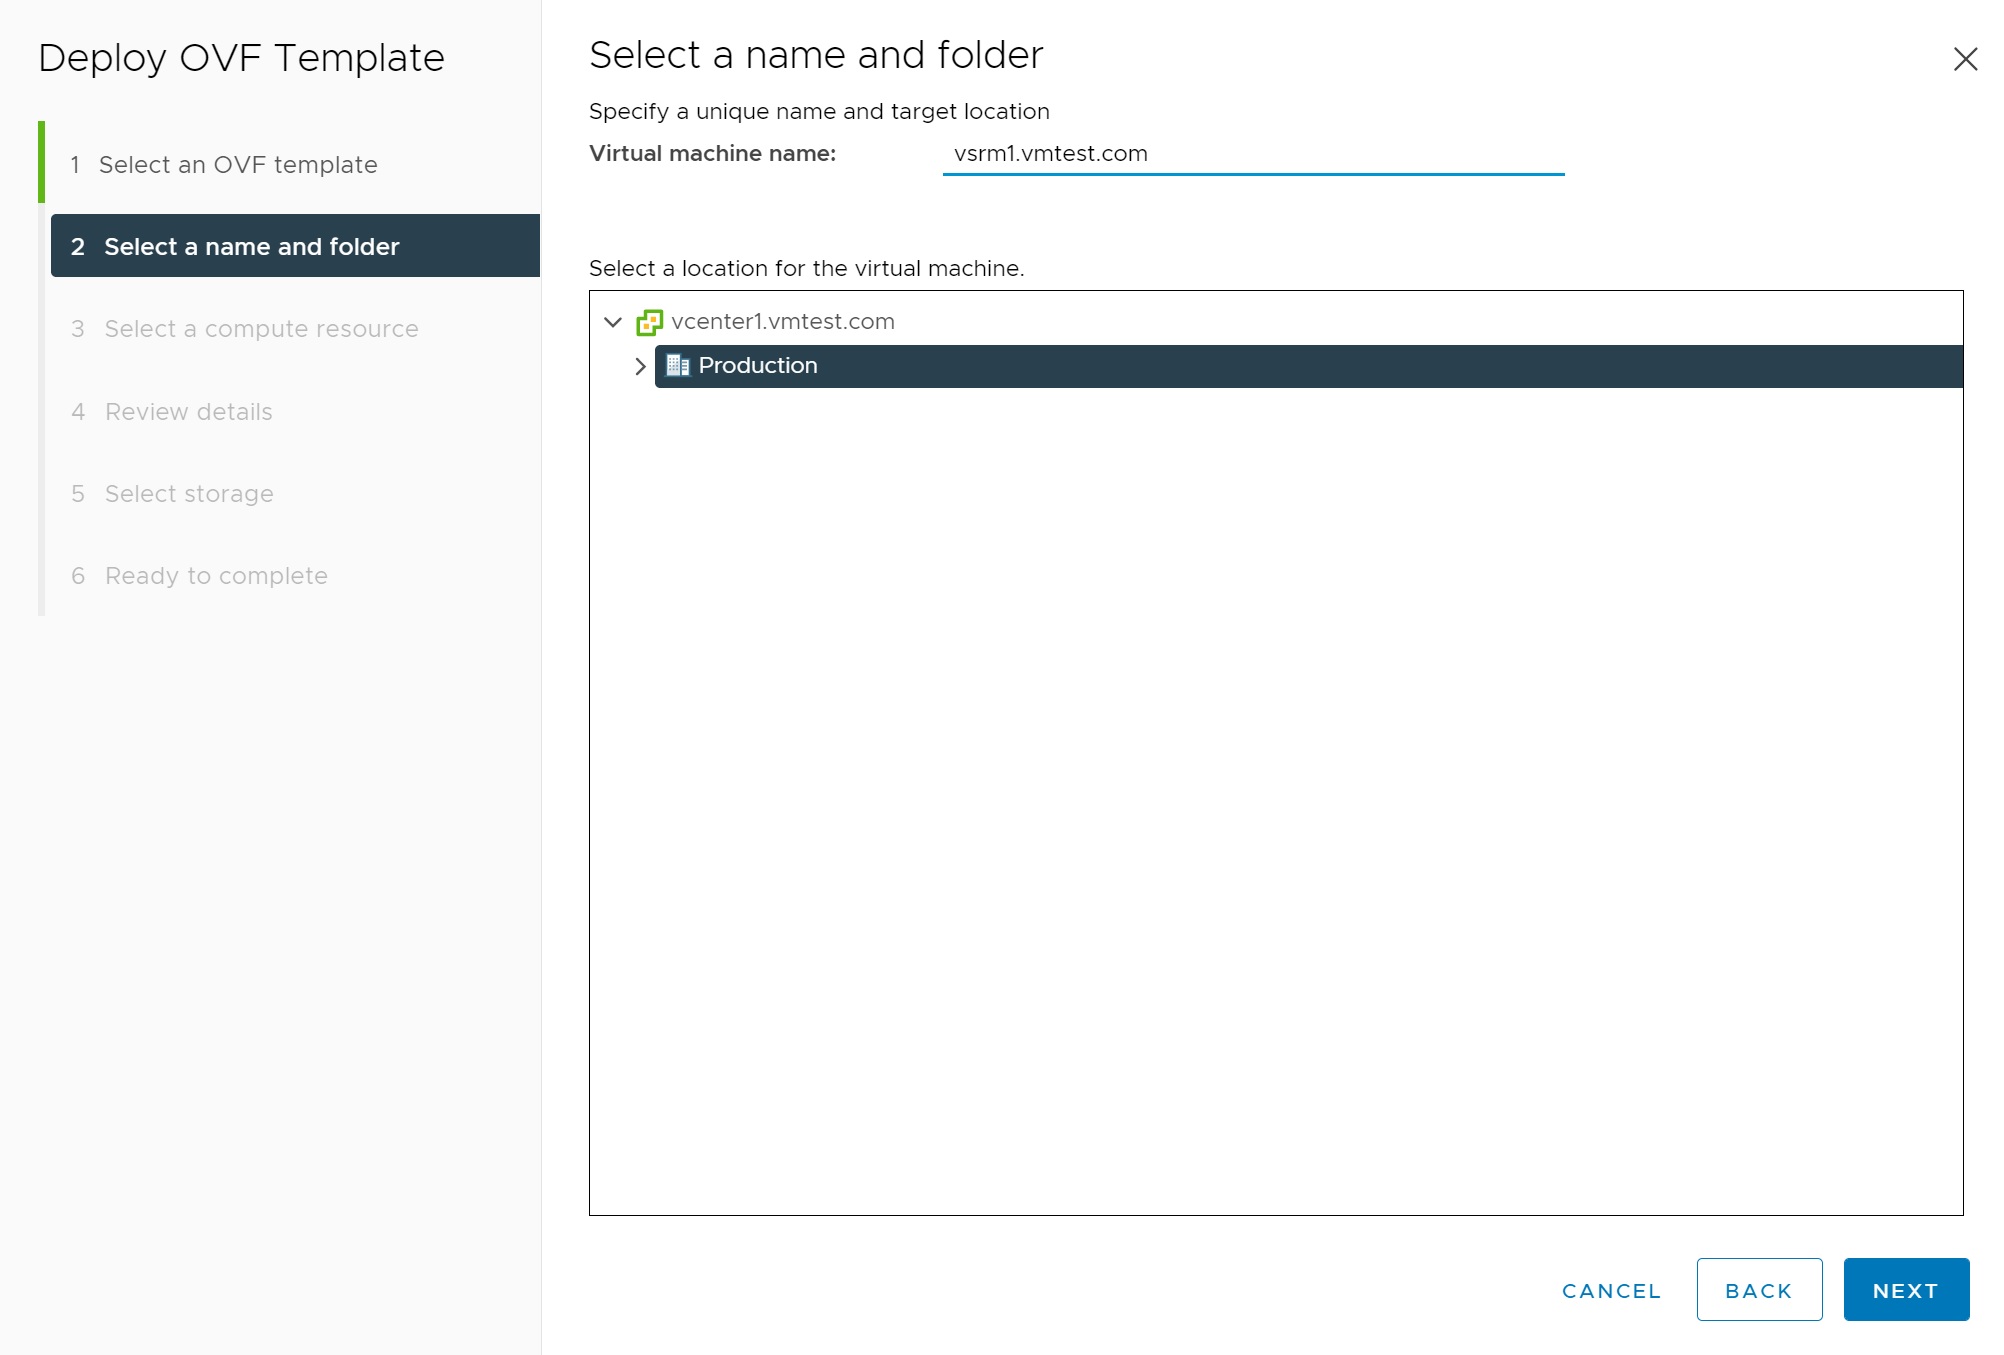
Next we specify the server, using the fully qualified domain name, we select the location of the VM
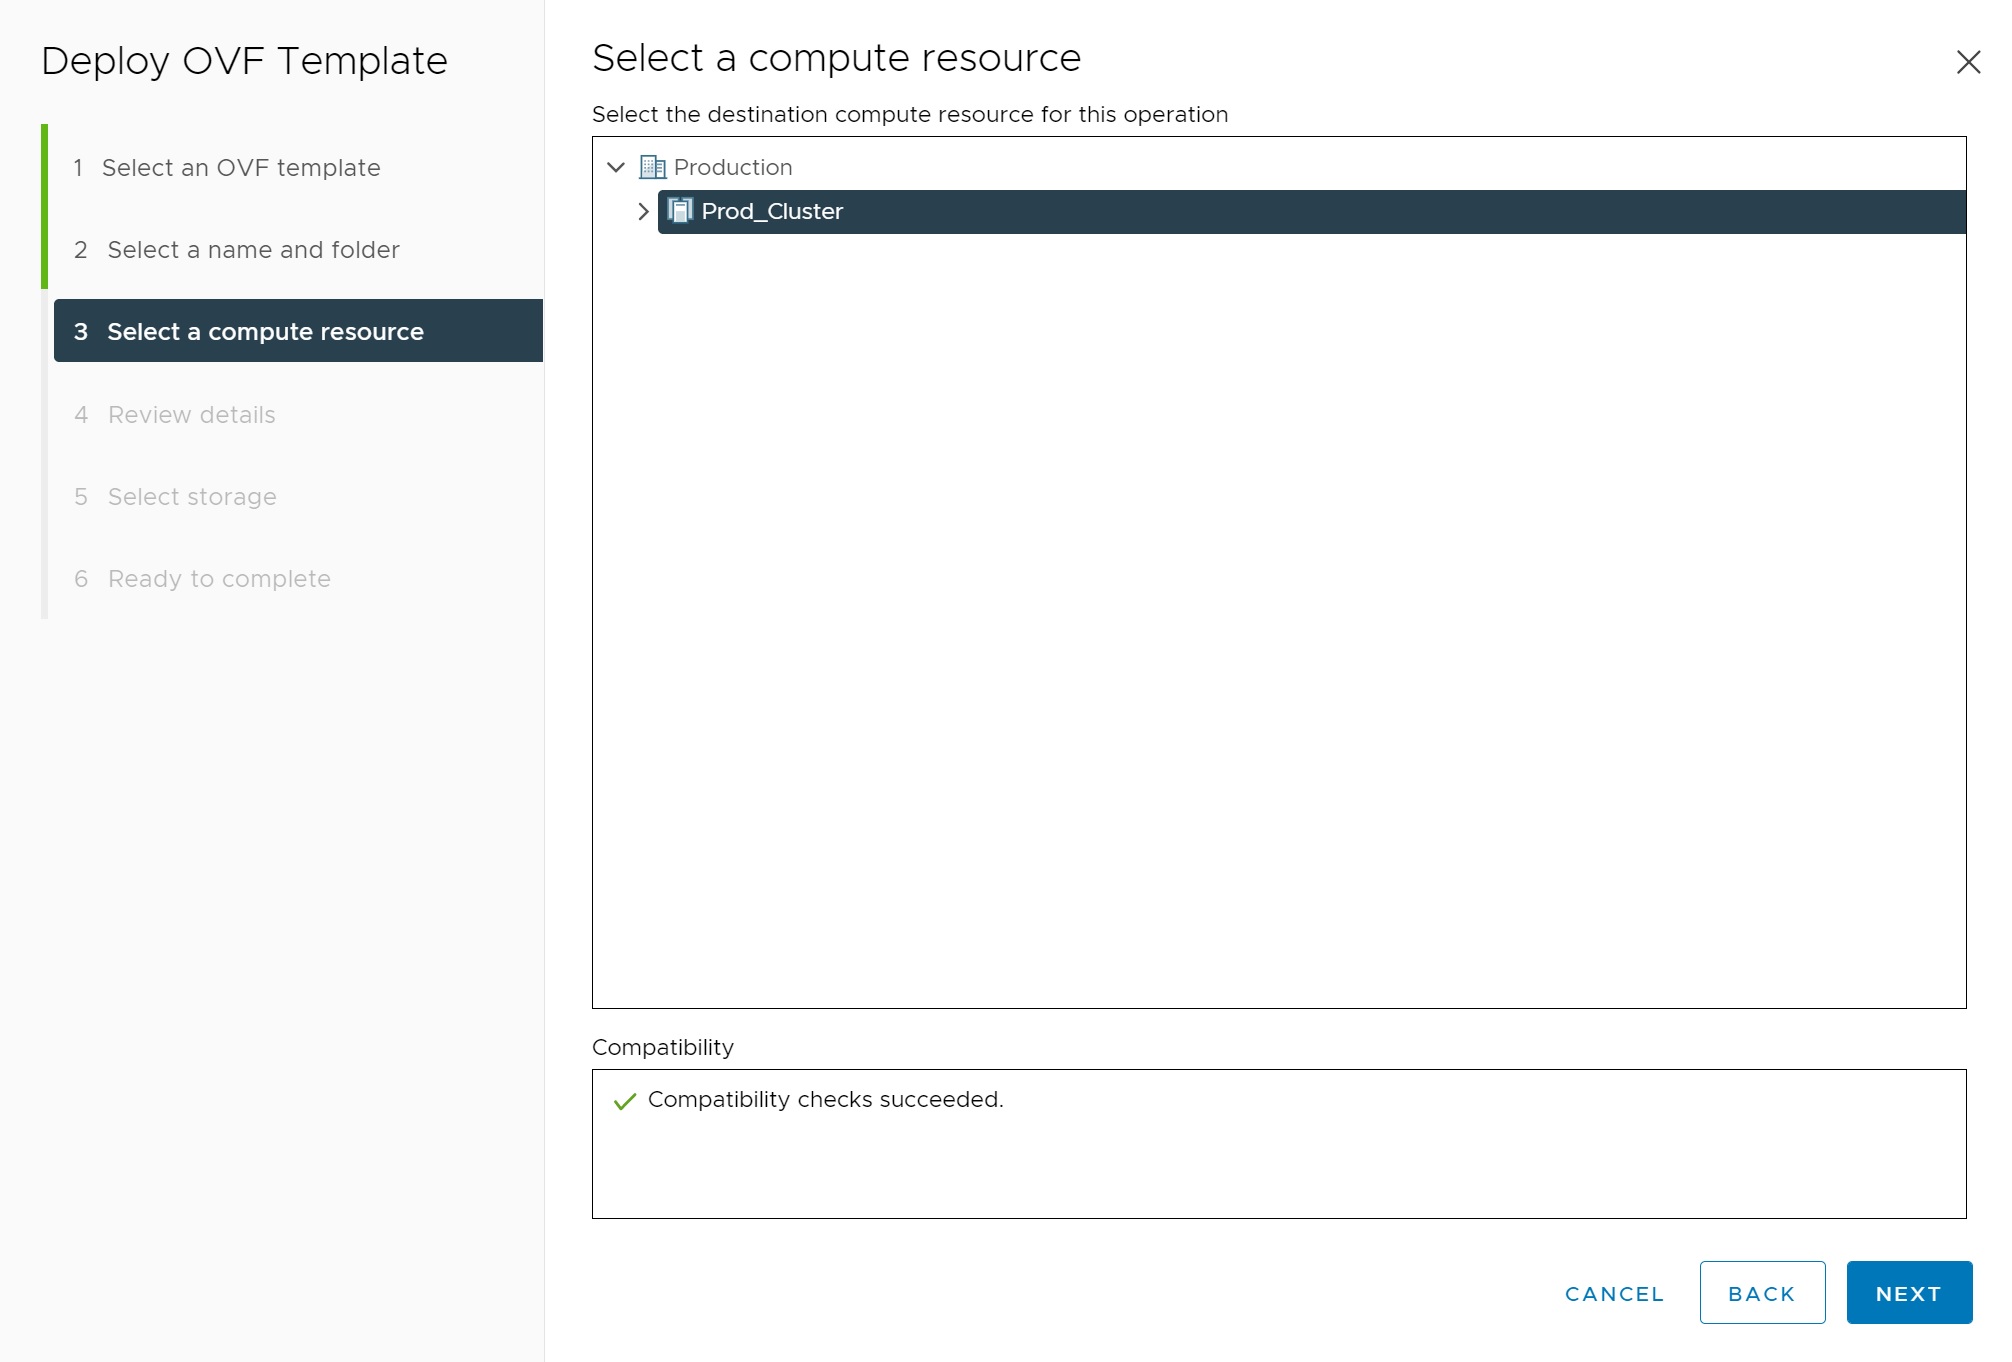
Next we select the compute resource
Then we come to the first review screen

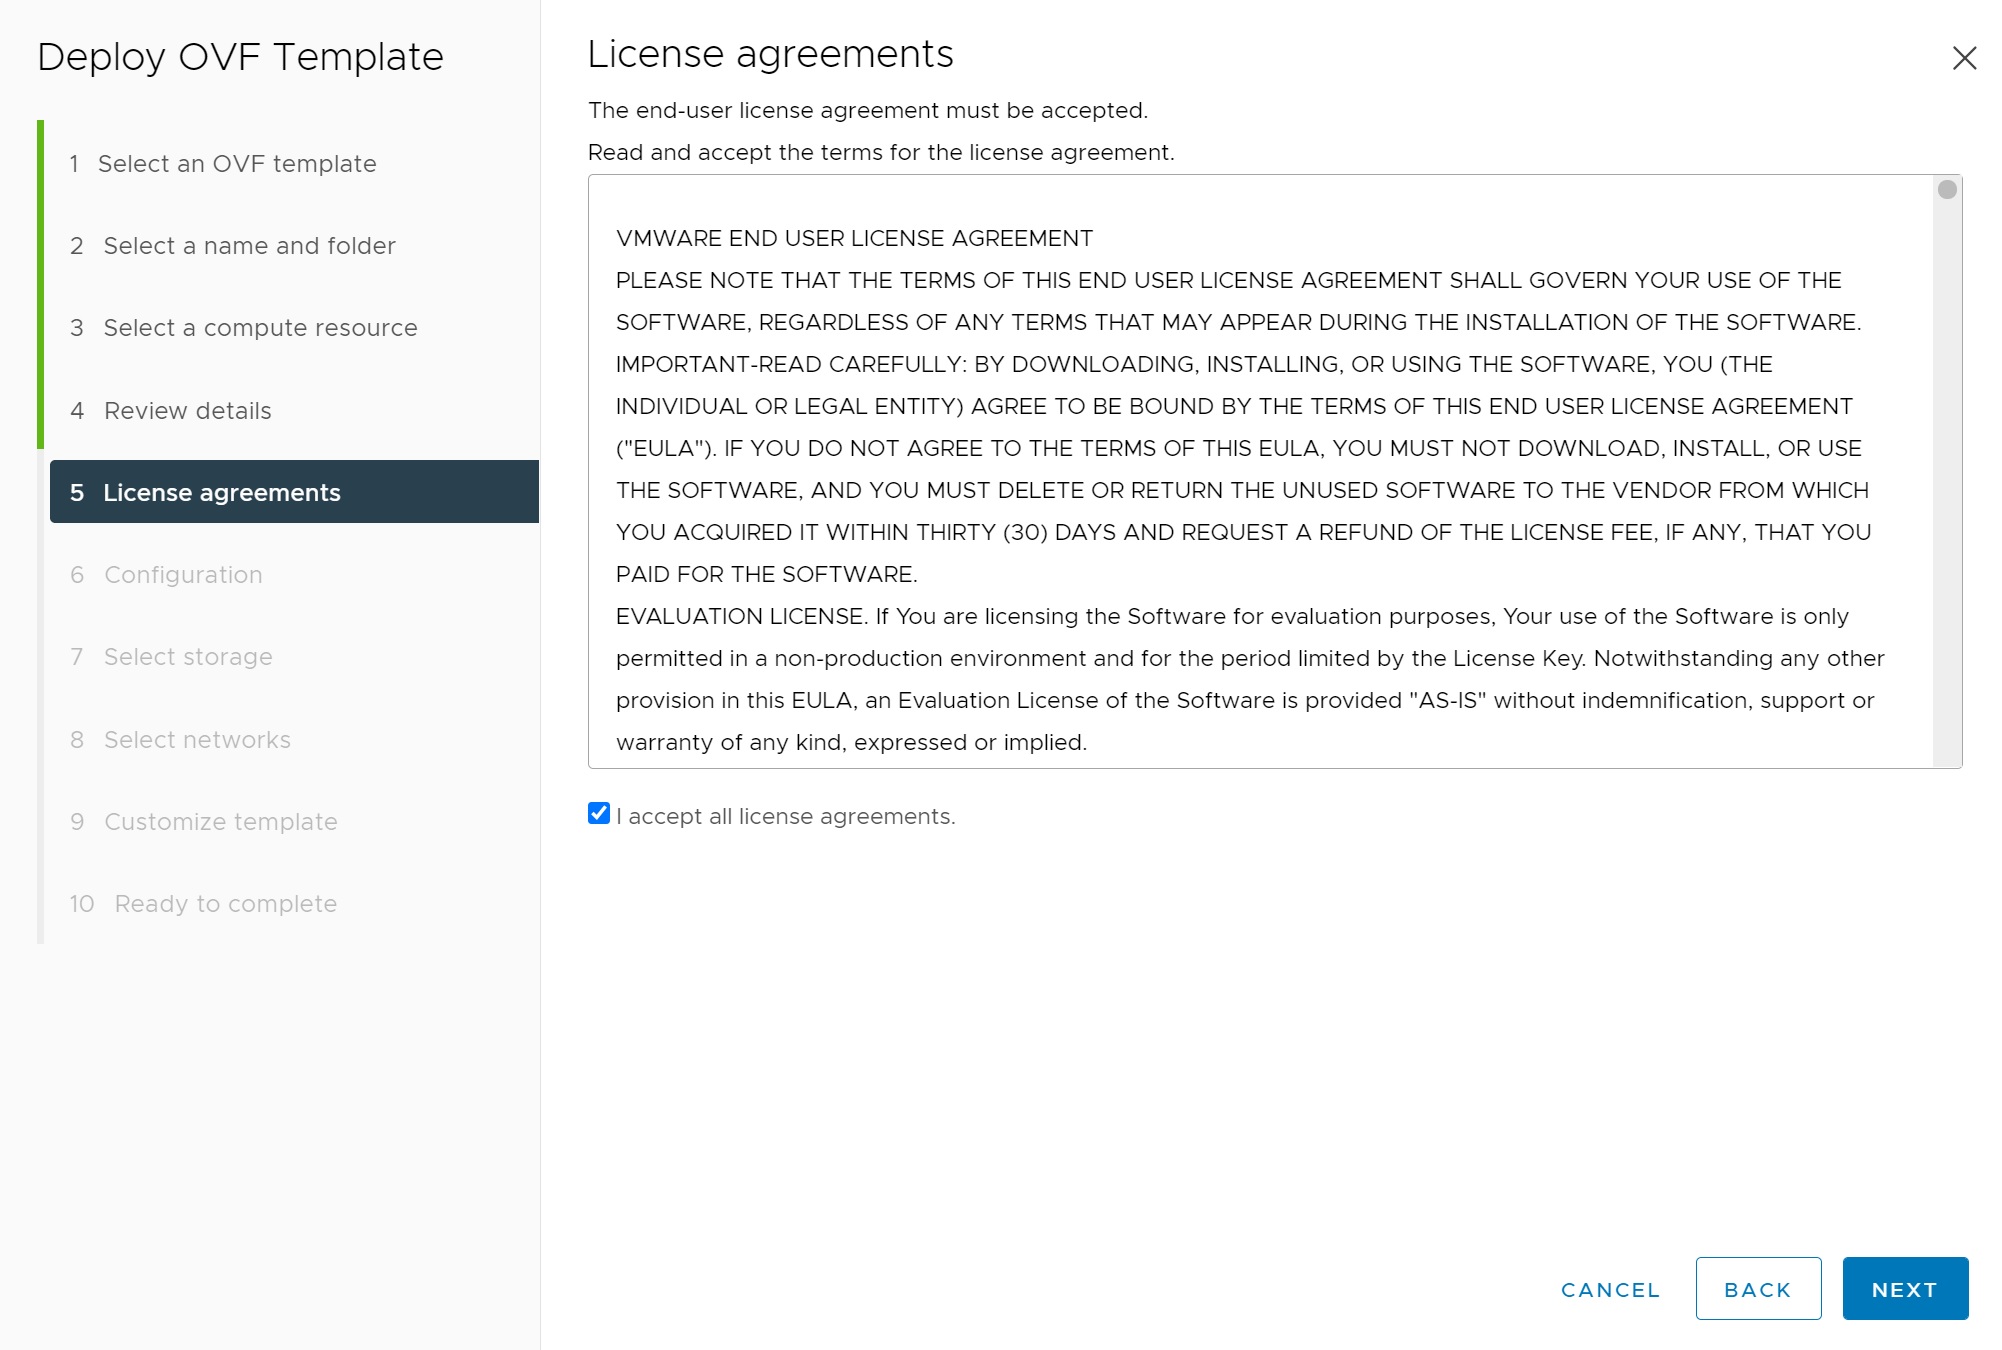
Next comes a license screen, accept it and select next
I have selected the minimum resources to reduce the load on my server as this is only a test environment

Next I select the NFS datastore we have setup to host the SRM server

Next we make sure that we use the correct network and in my case I will be using a static IP address

Lastly we have to customerize the SRM server itself, this requires password, IP address, NTP server, gateway, etc

this screen is a continuos screenshot of the above one

again this is a screenshot of the above

We finally come to the last summary screen before the installation starts

You can check on the progress in the recent tasks list at the bottom of the vCenter login page

Finally the SRM VM is built but not started, click on the start green button and give it a fews minutes to allow the server to start and start its services.

The console login is as below, it also identifies the SRM GUI interface information in my case https://<IP address or FQQDN>:5480

Going to the URL we see the below screen, login as admin using the password you entered during the setup phase above

Once logged in you will see a basic menu on how to configure the SRM server, one note is to make sure that all components (vCenter, Replication and SRM) are in sync in regards to the time, make sure NTP is configured, you might during the next few screens get a time sync error. To start the process of hooking the SRM server into the vCenter server we select the CONFIGURE APPLIANCE button, again this will start off a series of setup screens

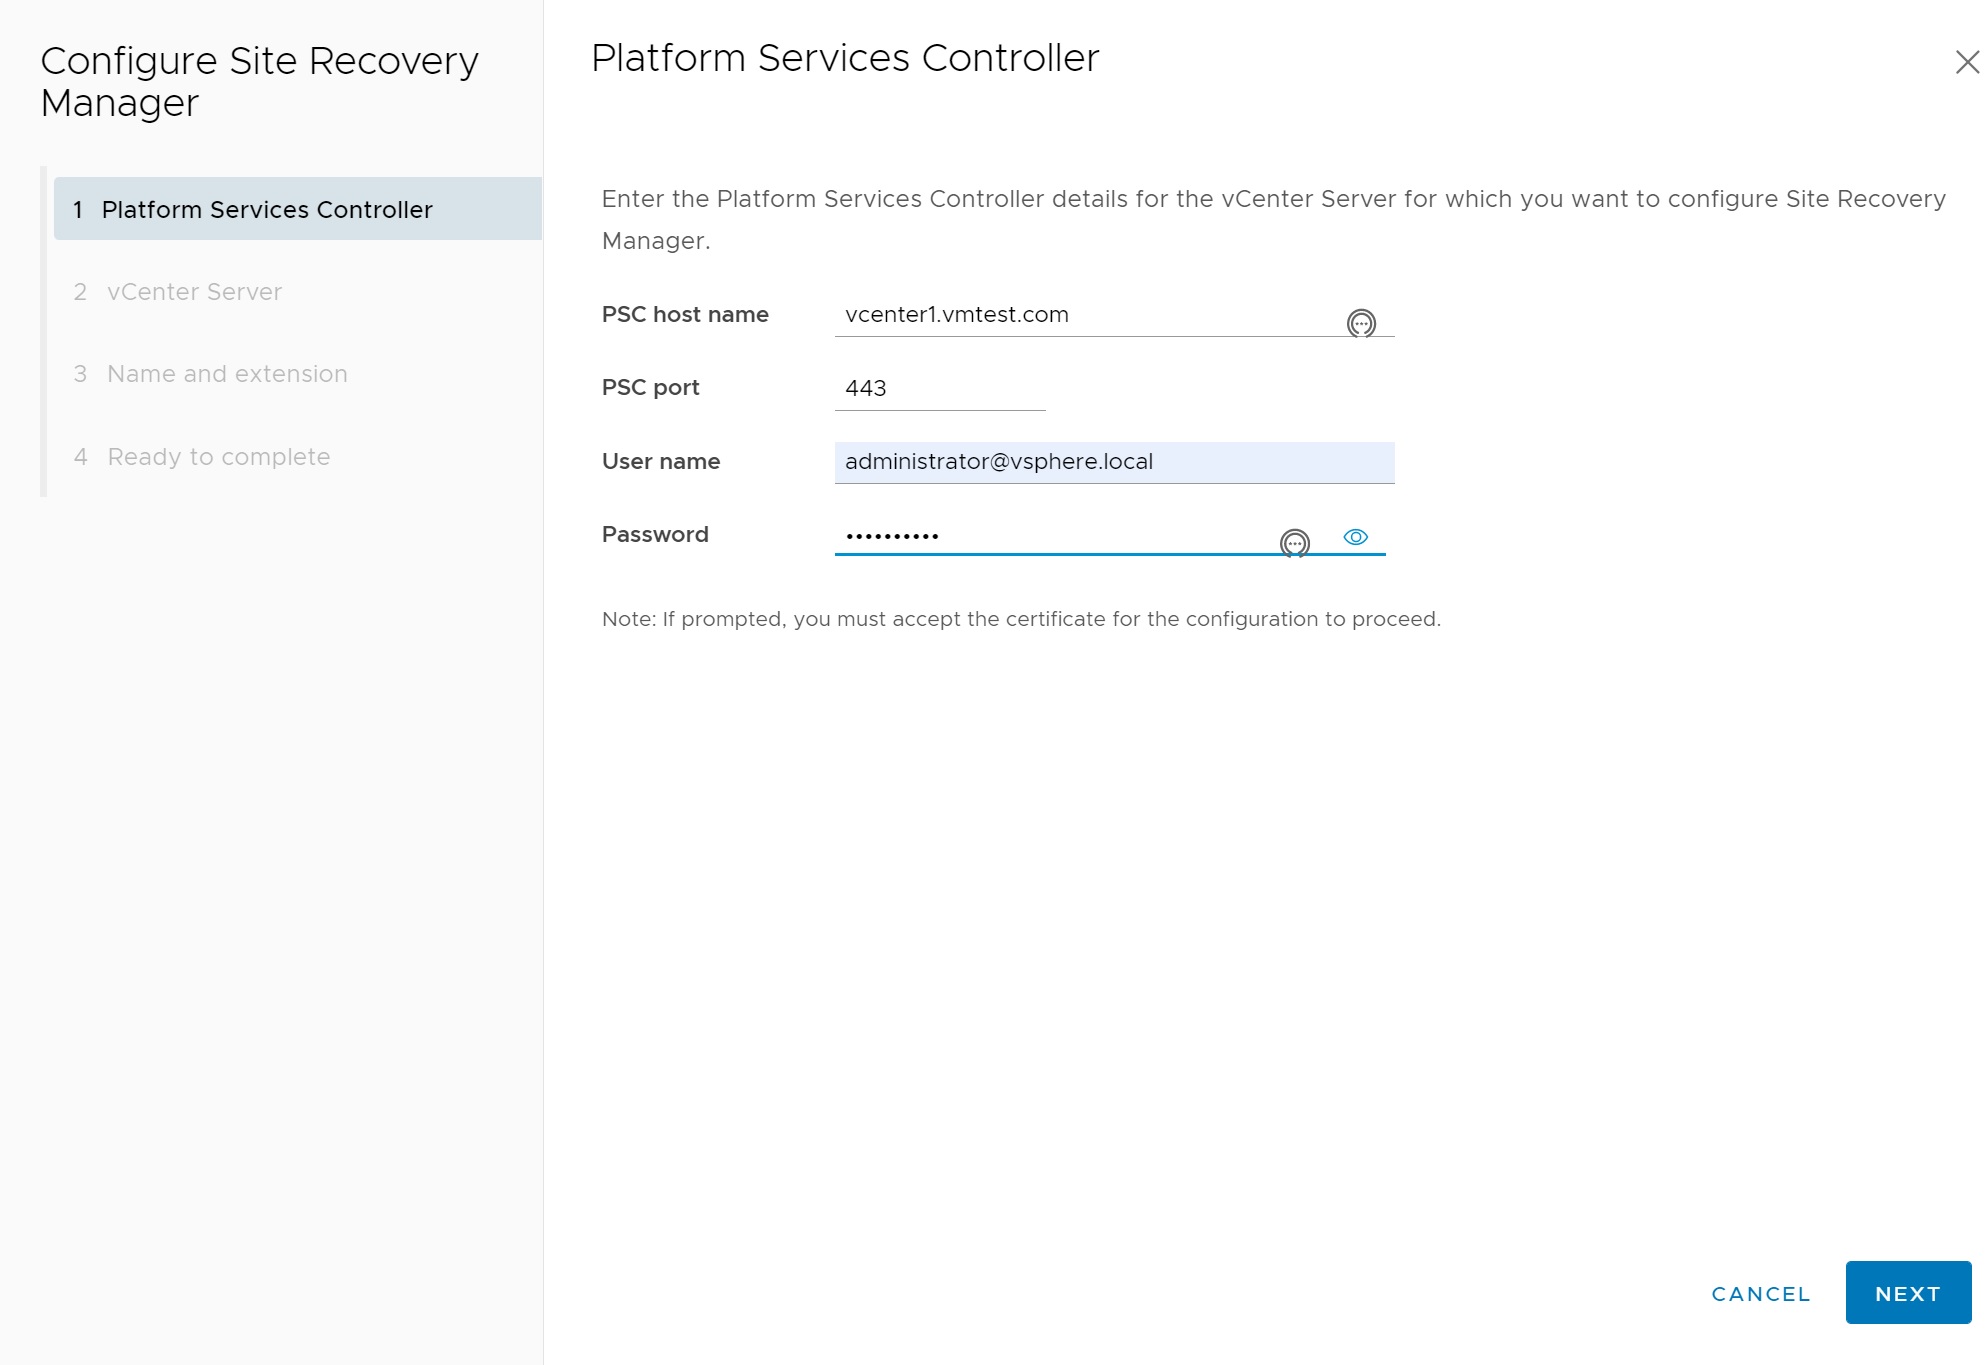
The first setup requires us to enter the vCenter server details (Platform Services Controller (PSC)), try and use FQDN
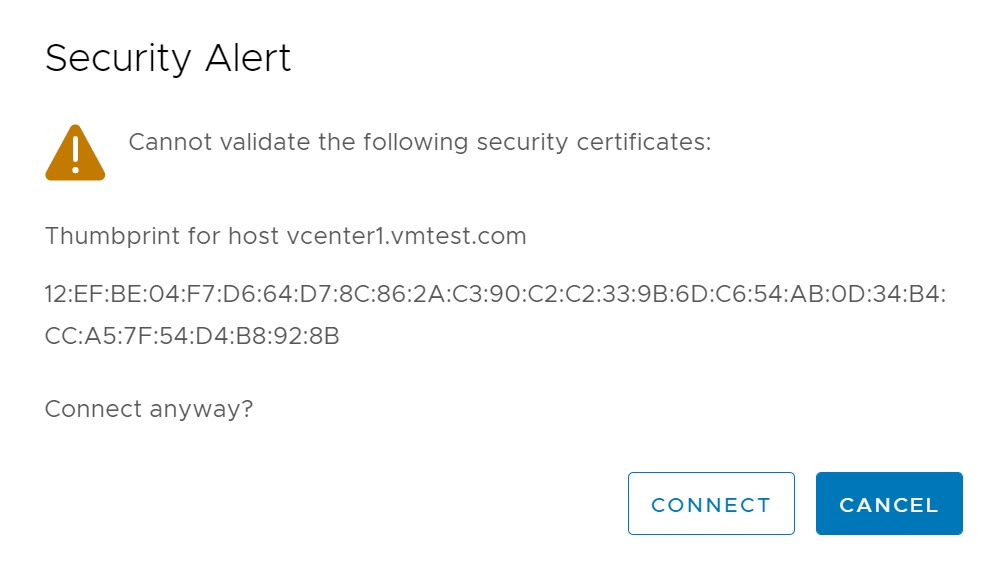
Next comes a certificate confirmation screen

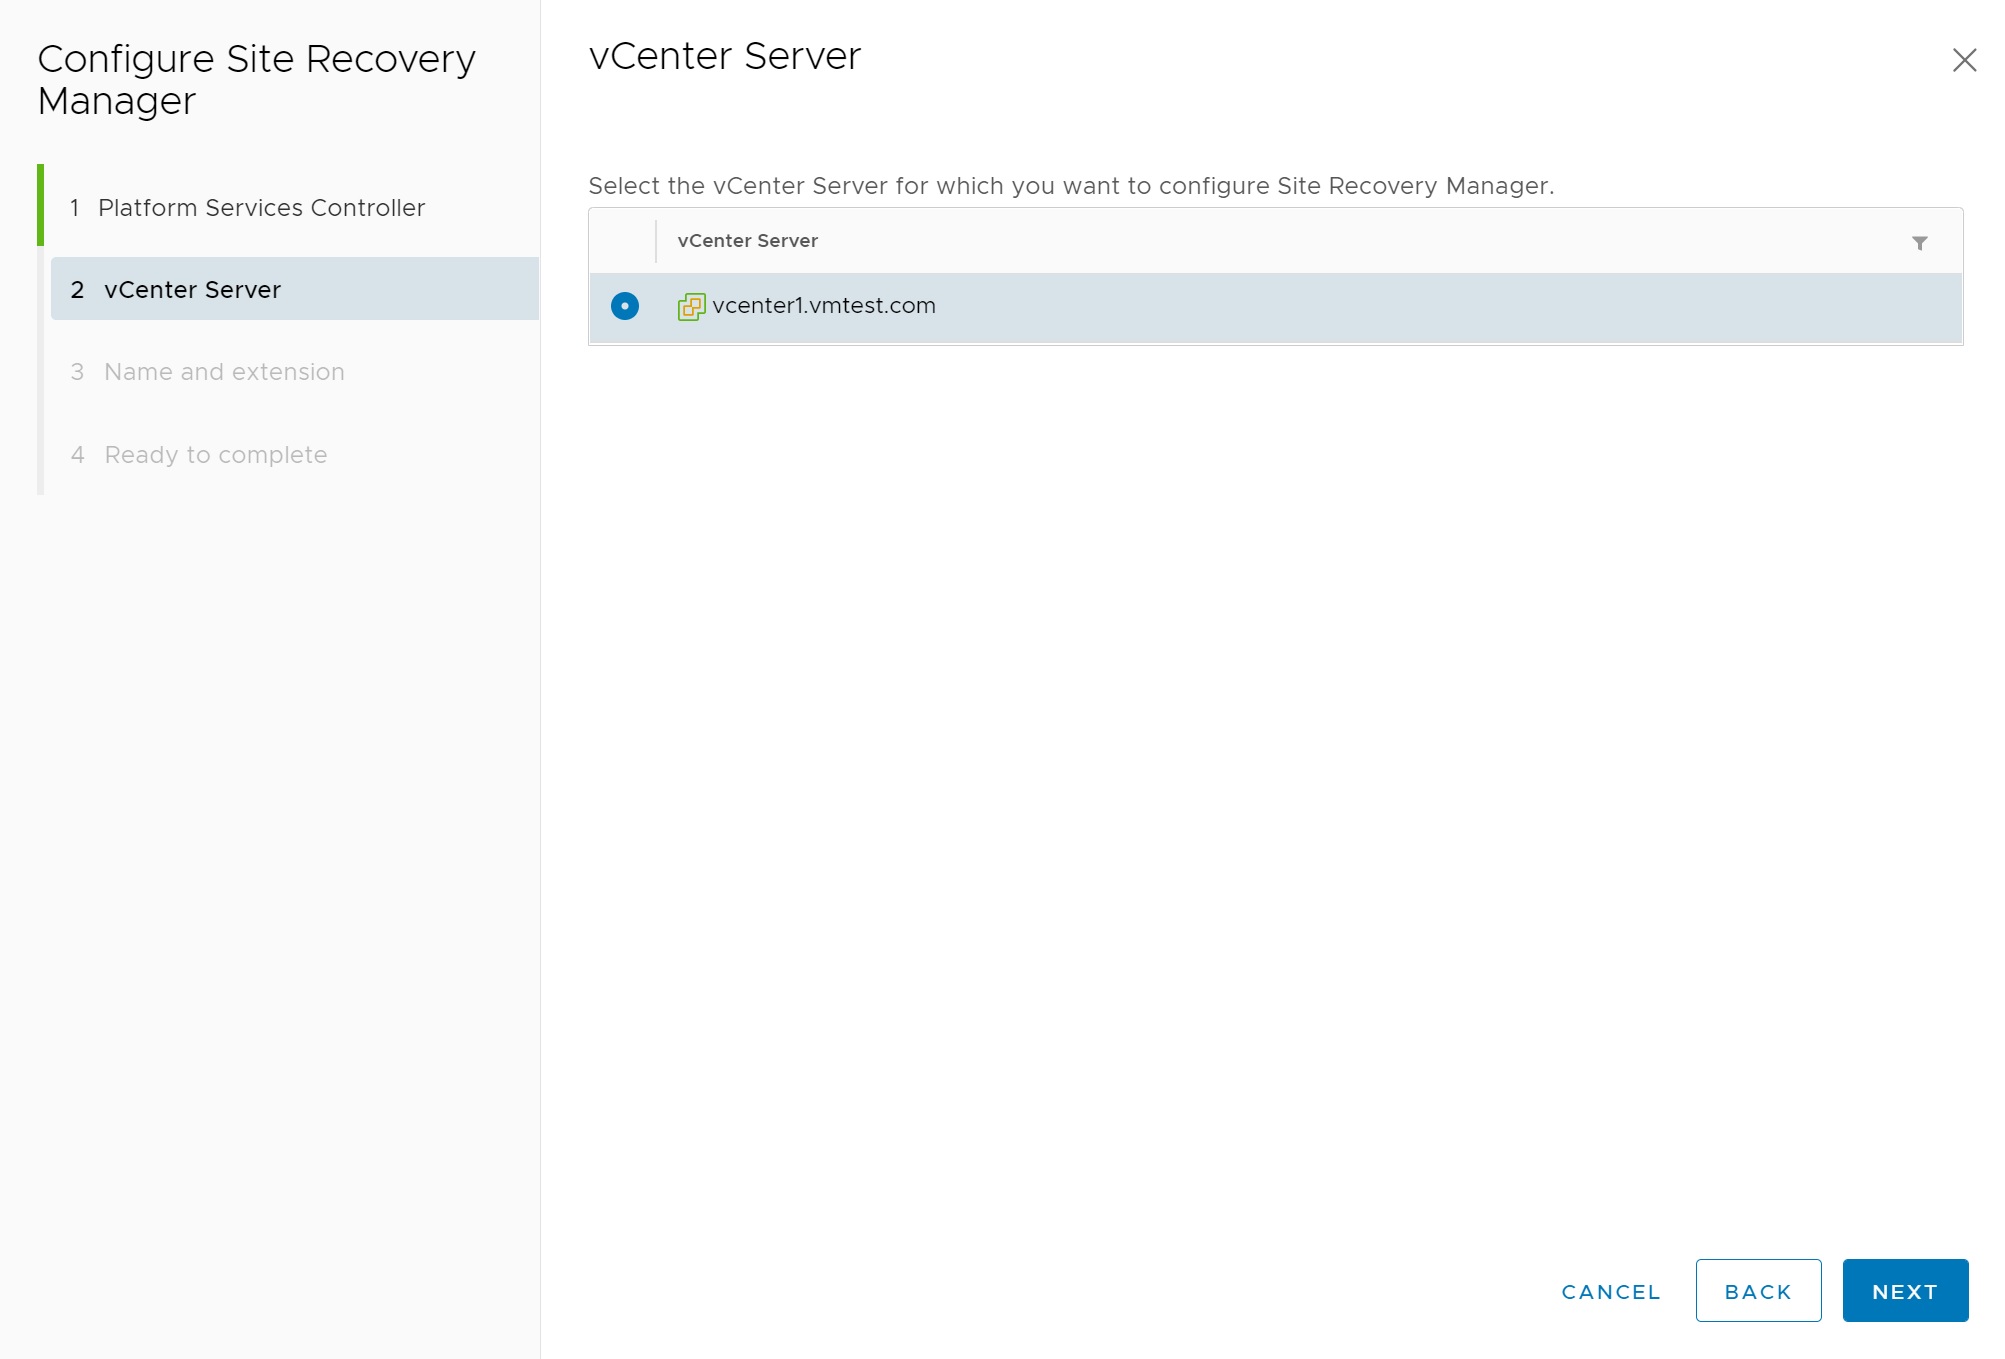
The next screen requests us to identify the vCenter we wish to attach too
Then another certificate confirmation screen
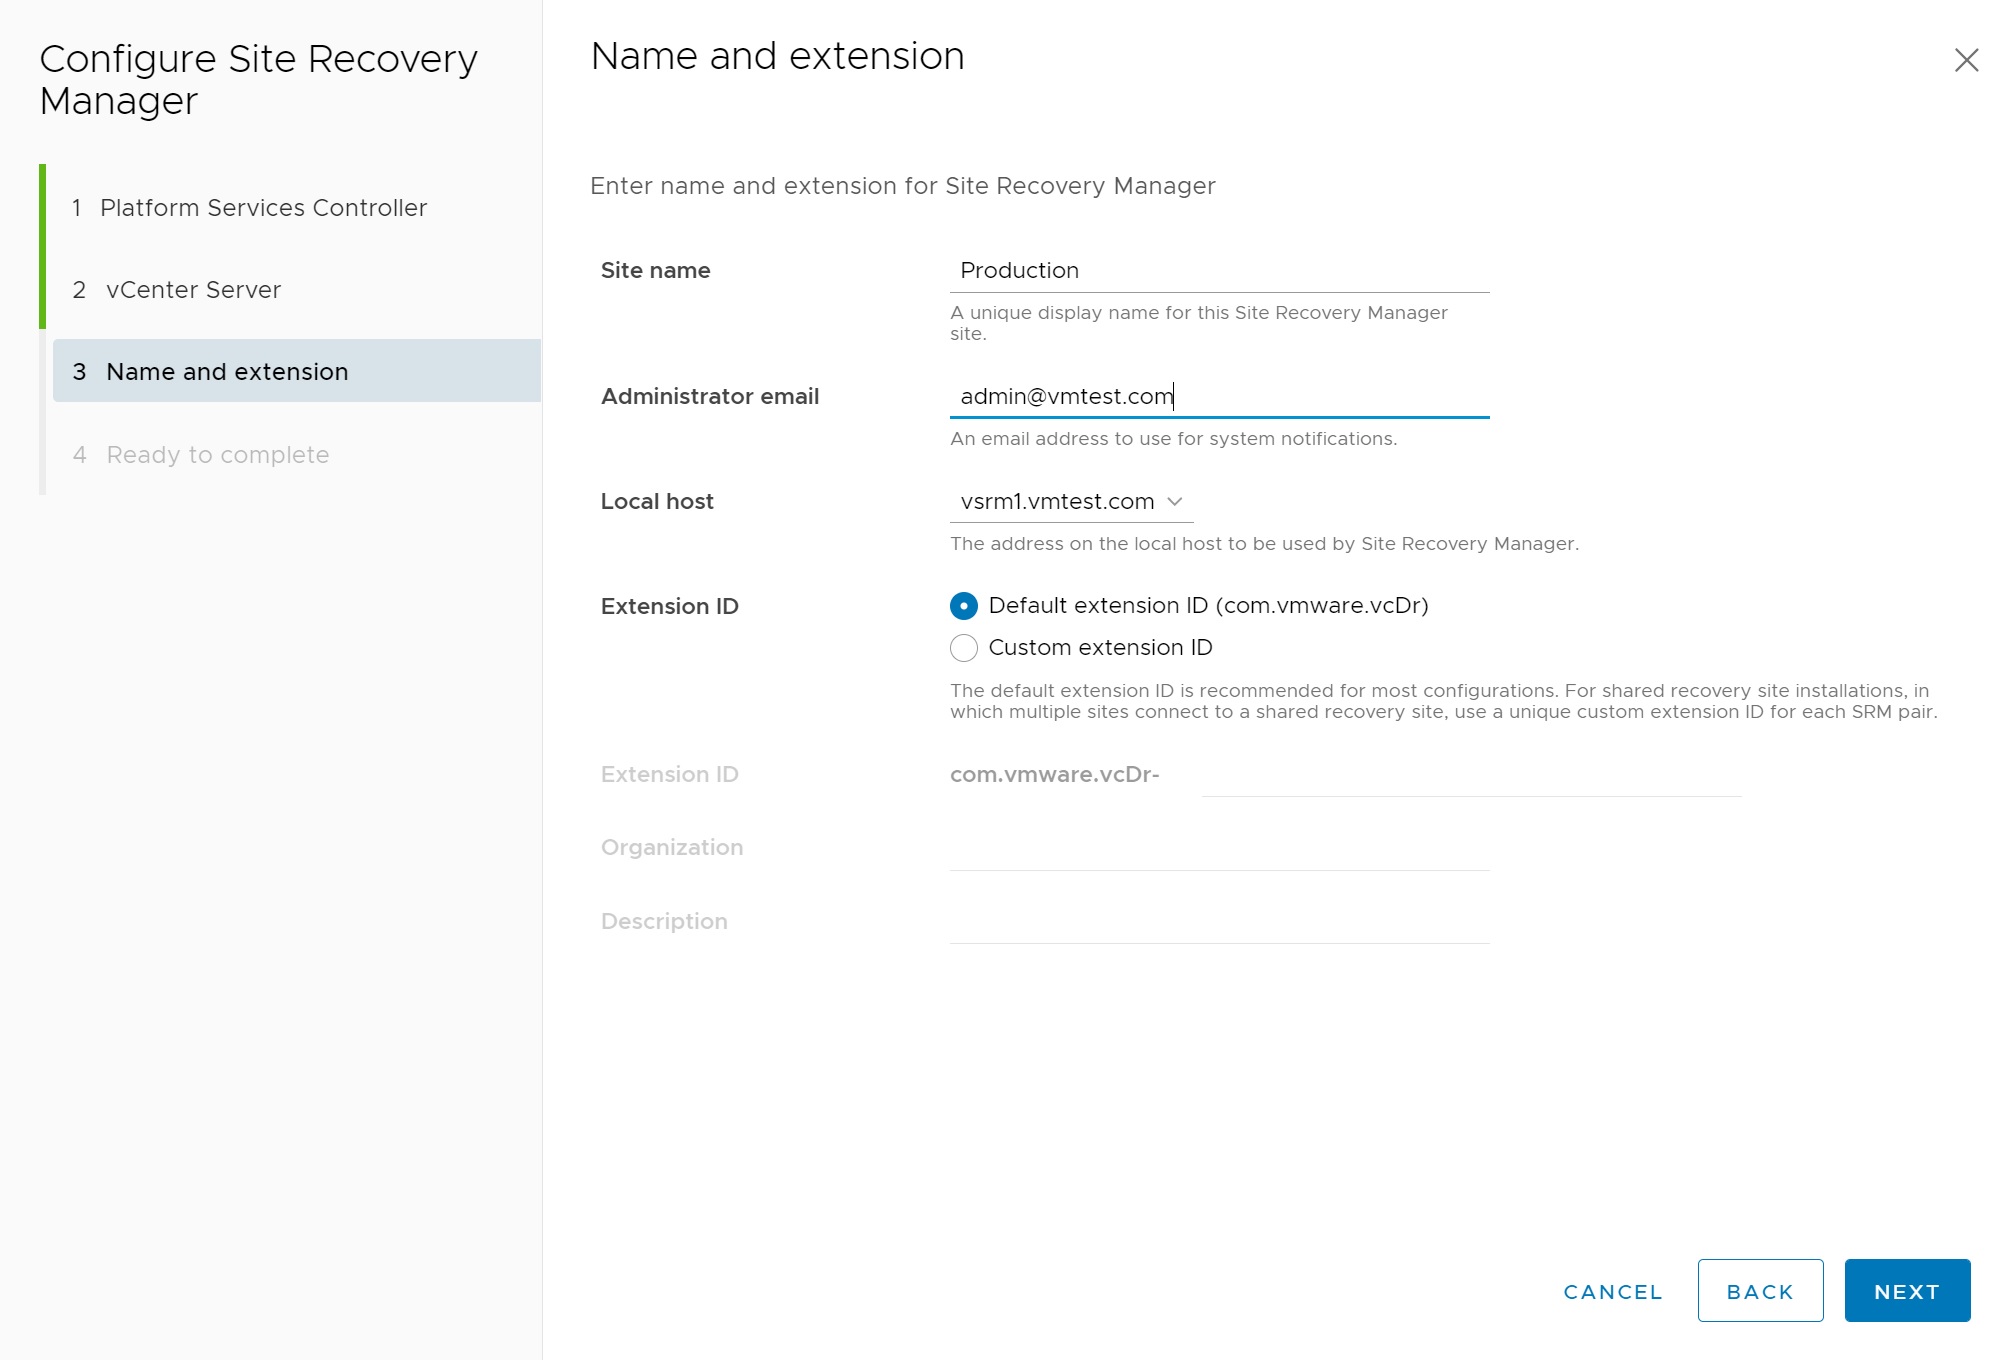
In the next section we create a site name, add a email address for notifications, the remaining options I used the default values
Finally we get to a summary screen, click finish to complete the configuration

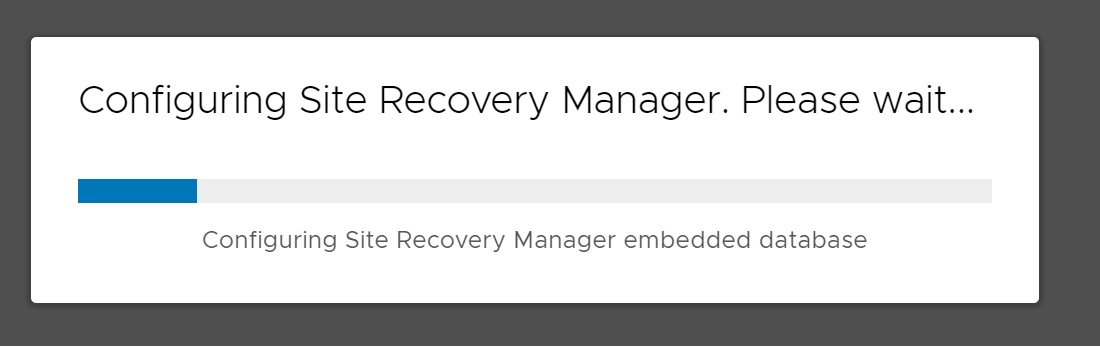
A progress modal will pop-up regarding the configuration
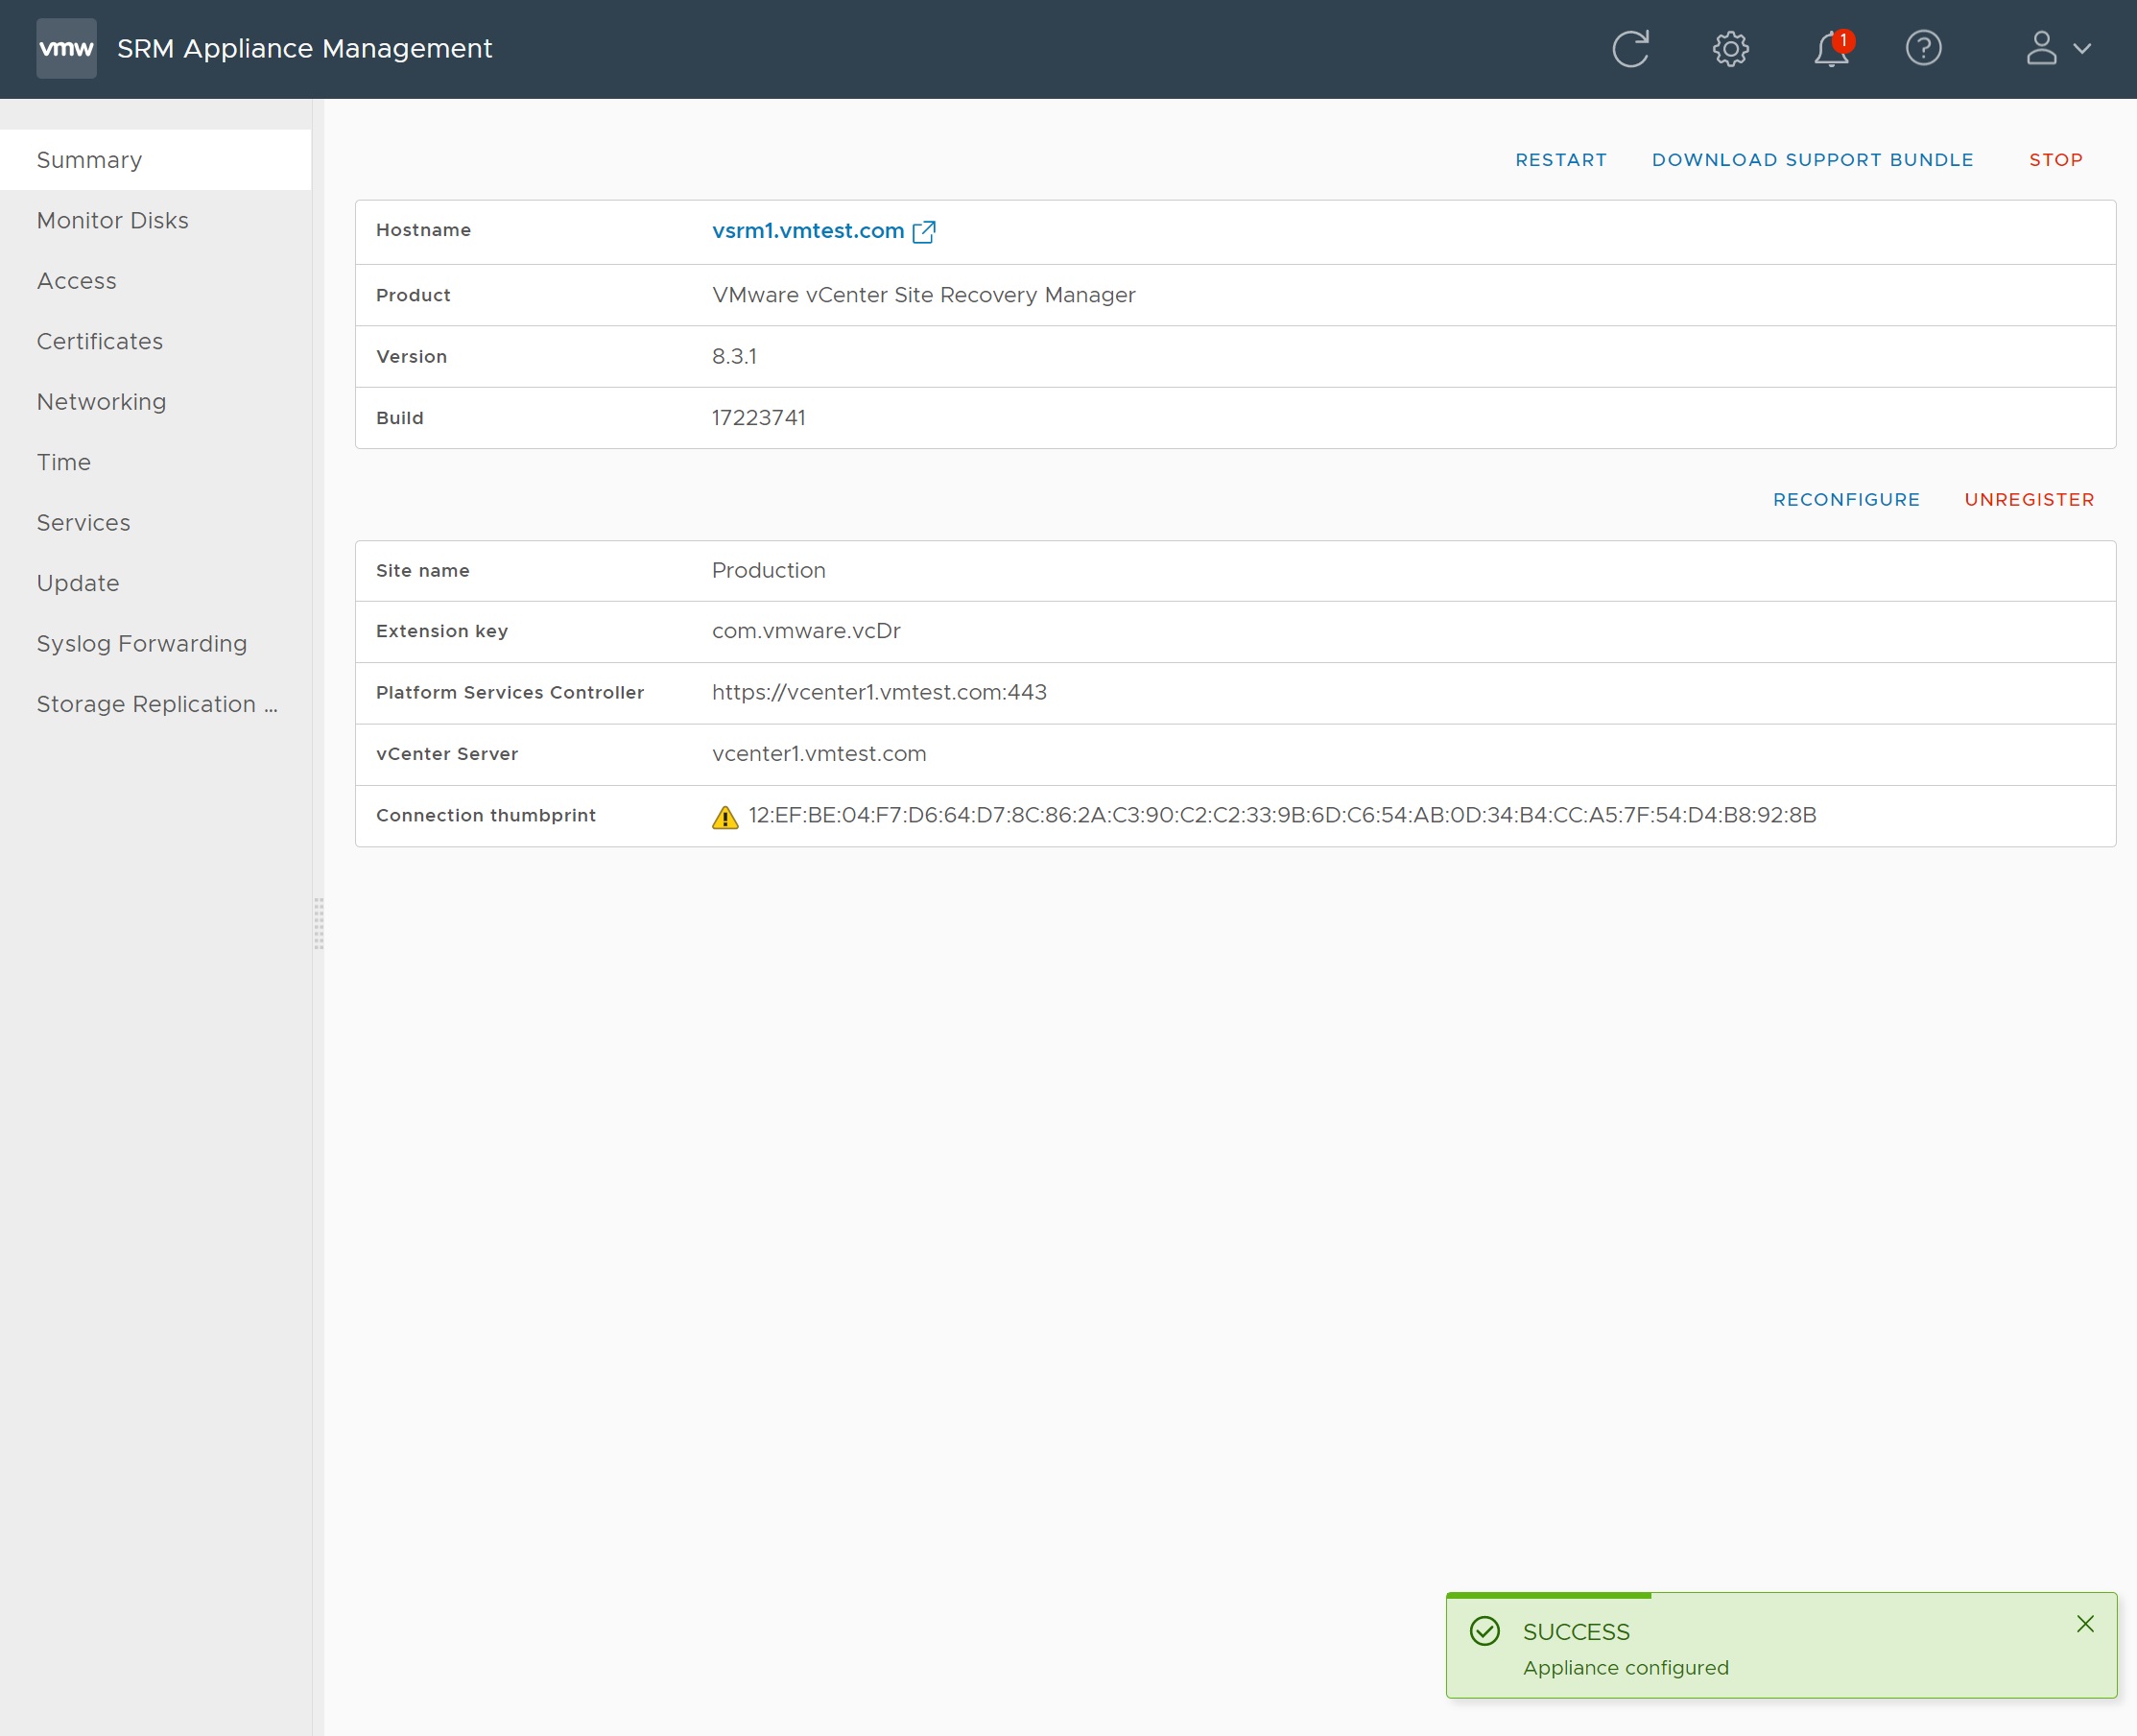
If all goes well you are returned to the management GUI and you will notice that we have a registered a vCenter server and a green success status at the bottom
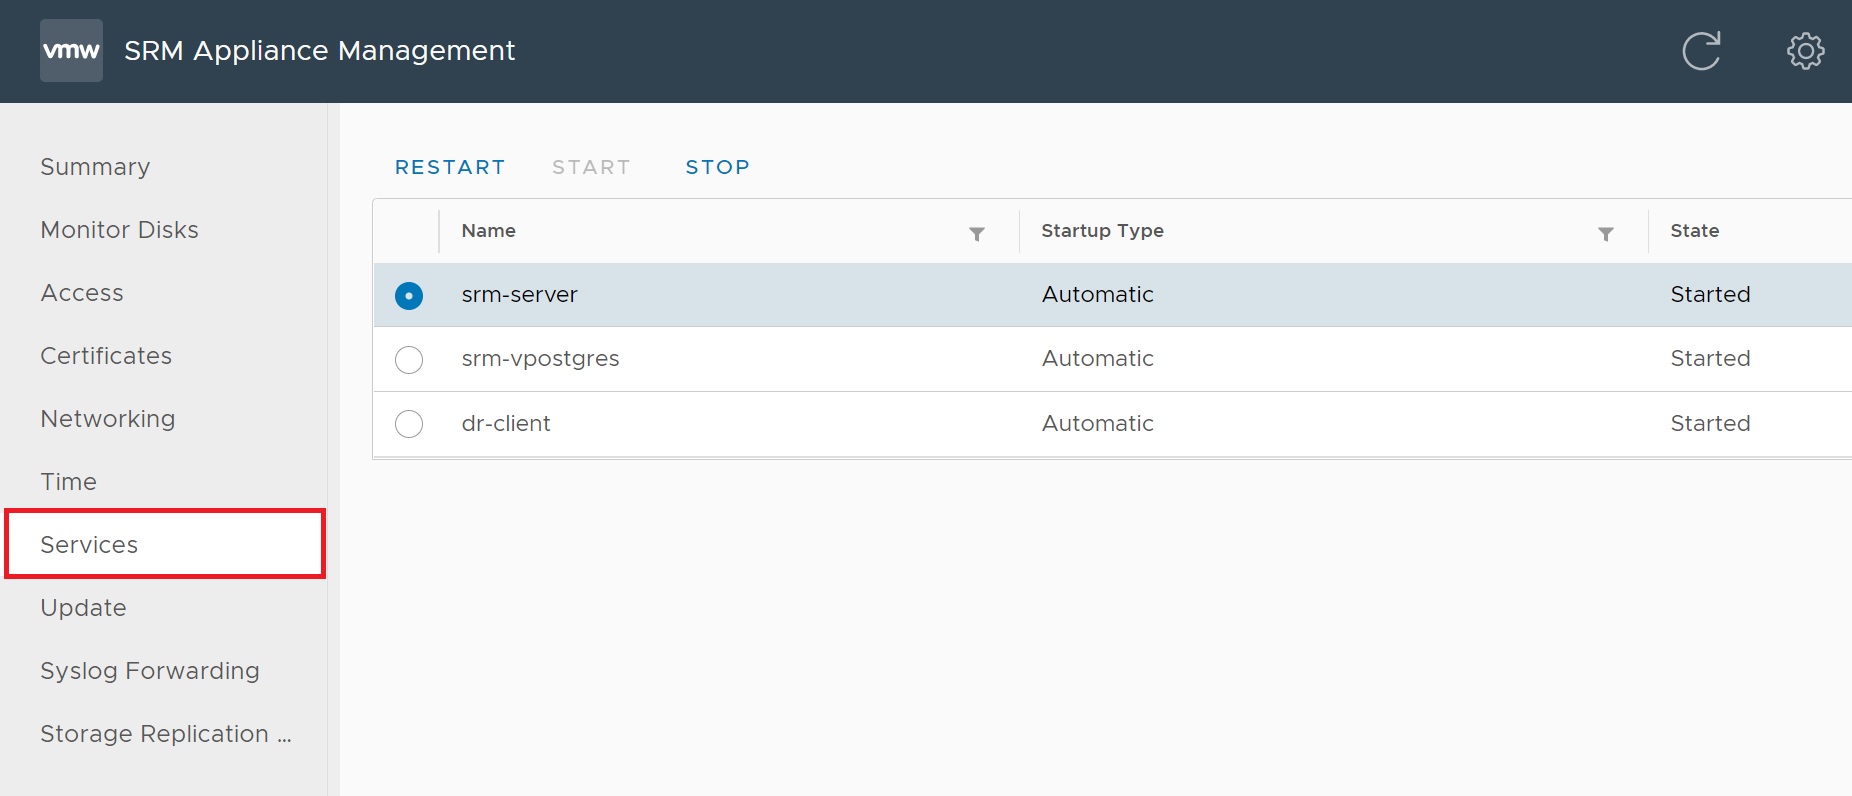
You can check that the SRM services are running by selecting the Services tab
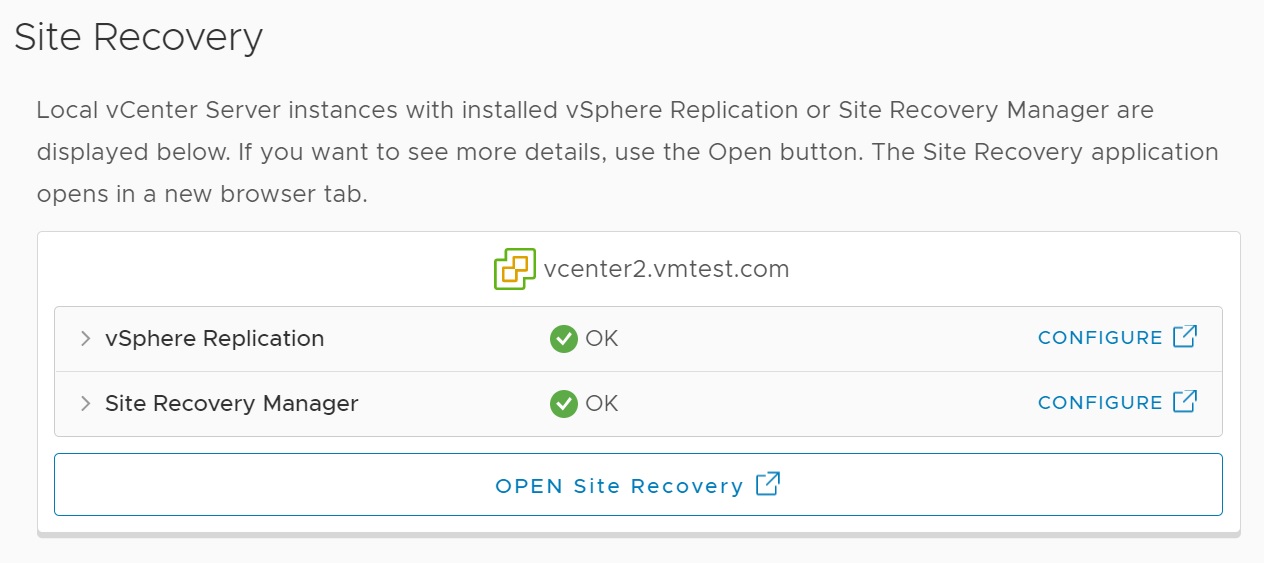
Now if we return to the vCenter and the Site Recovery menu you can see that both the Replication and SRM servers are configured and are in a OK state.

We now need to pair the two SRM servers at each Data Center (DC), click the OPEN Site Recovery
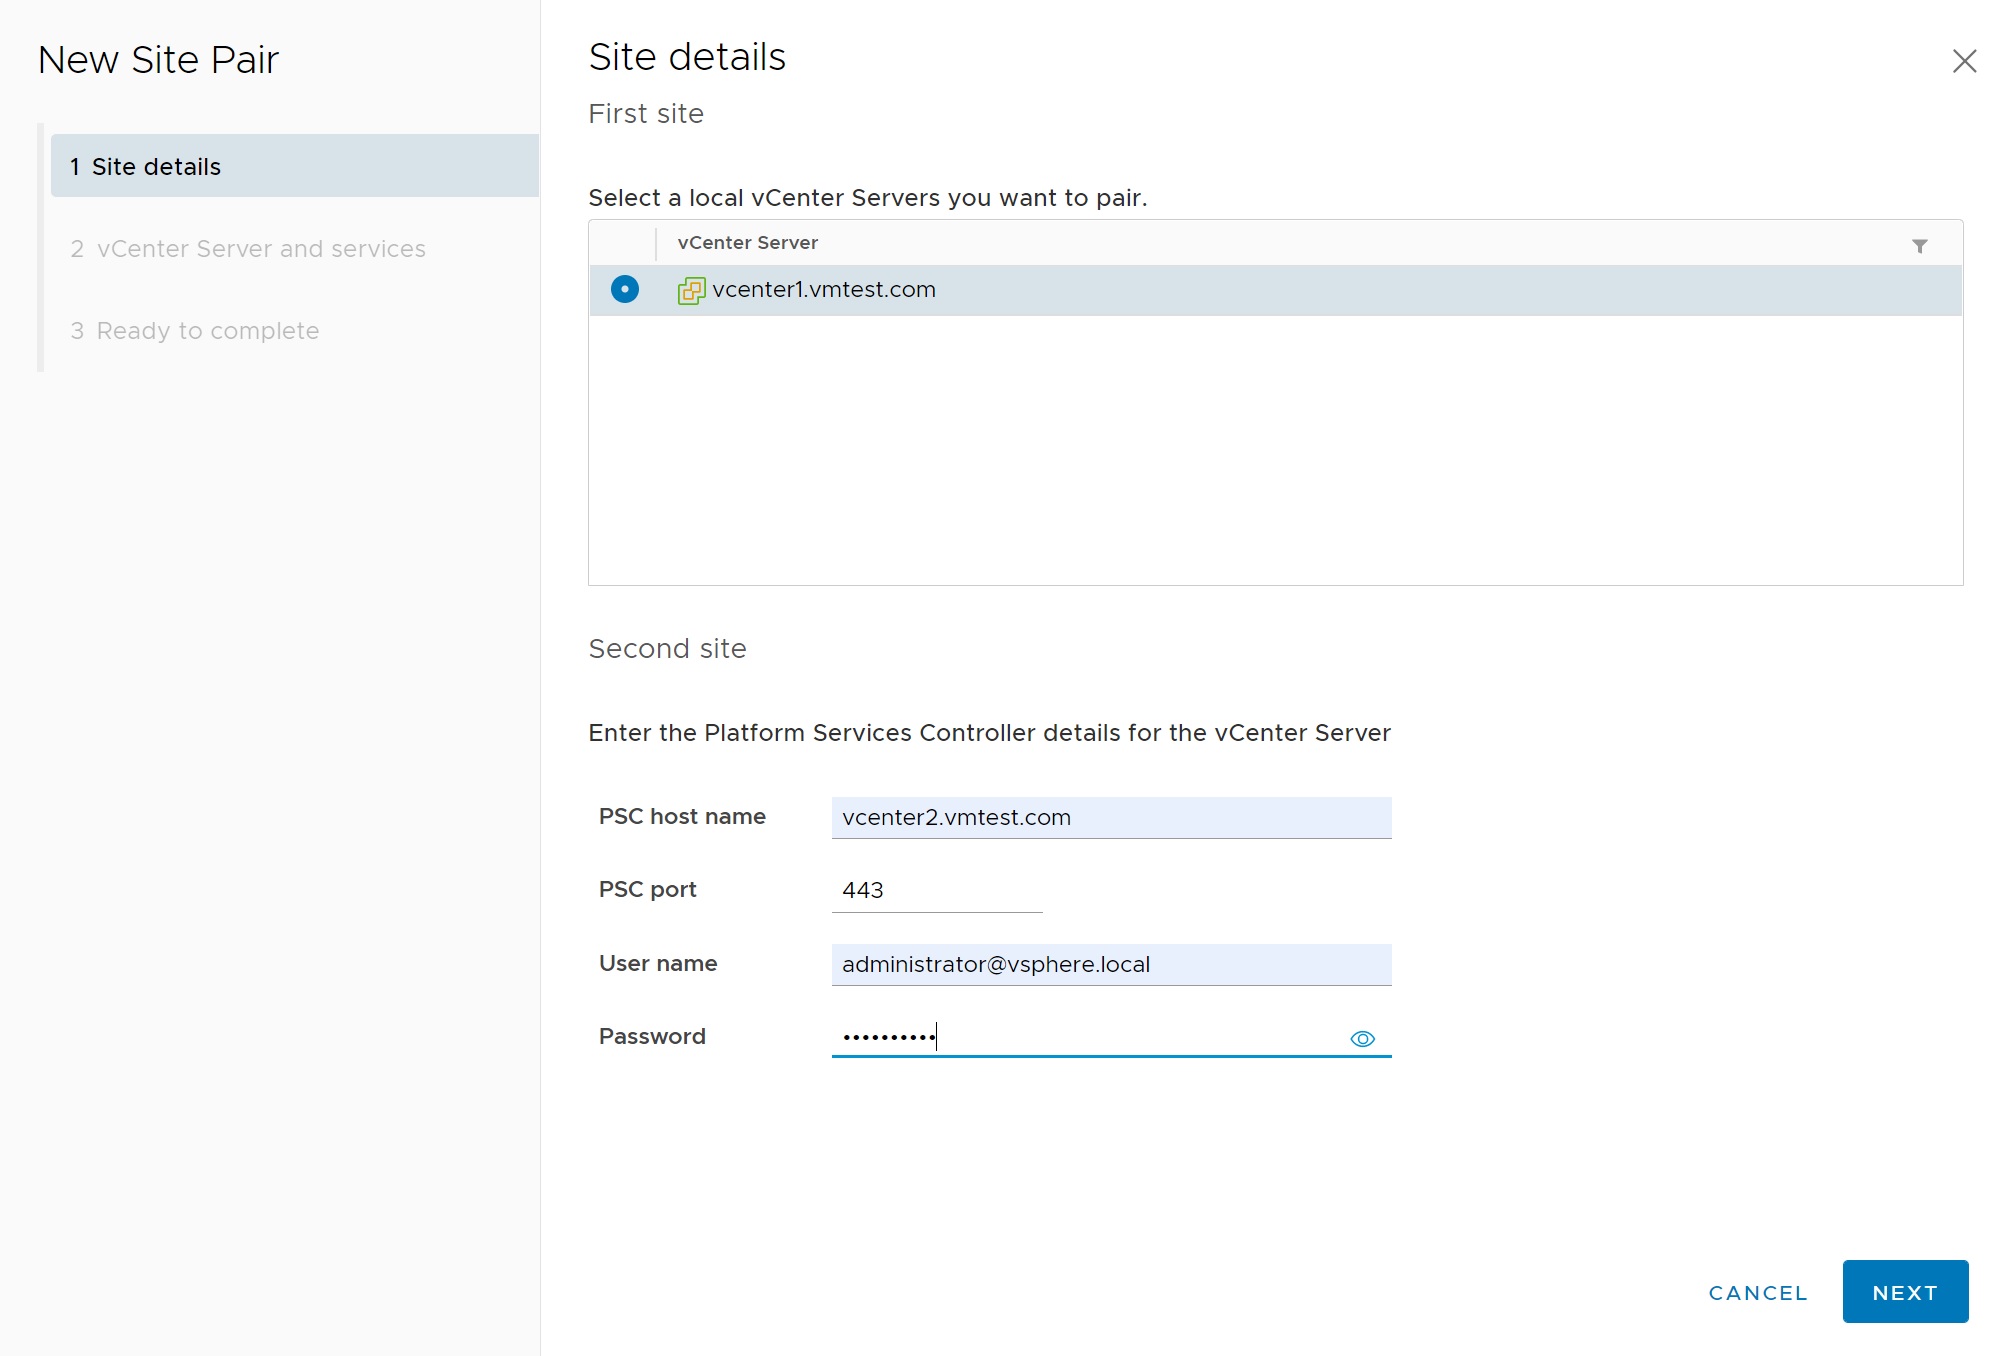
Select NEW SITE PAIR, we will be taken to a series of setup screens

In the first setup screen we identify the vCenter we wish to pair with, we can see the local vCenter (vcenter1) and the secondary site vCenter (vcenter2)
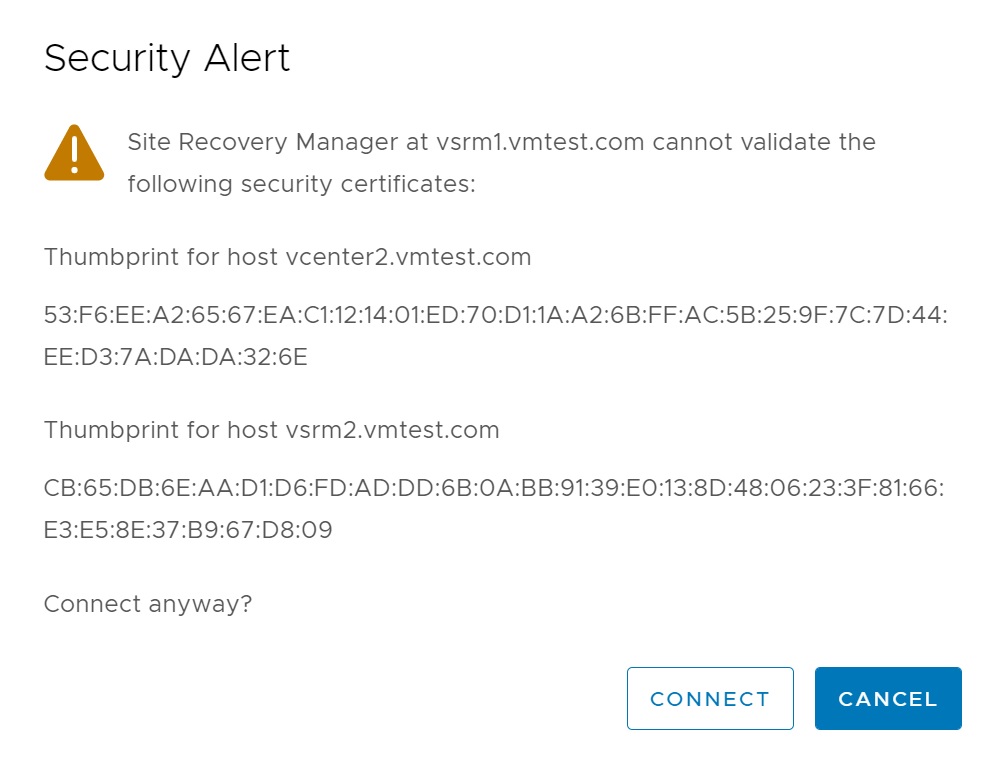
We confirm the certifcate

We select the SRM service on the secondary vCenter server, so that the two SRM services may communicate with each other

We again confirm the certifcate
Finally we get to the summary screen, click Finish to pair the two SRM servers

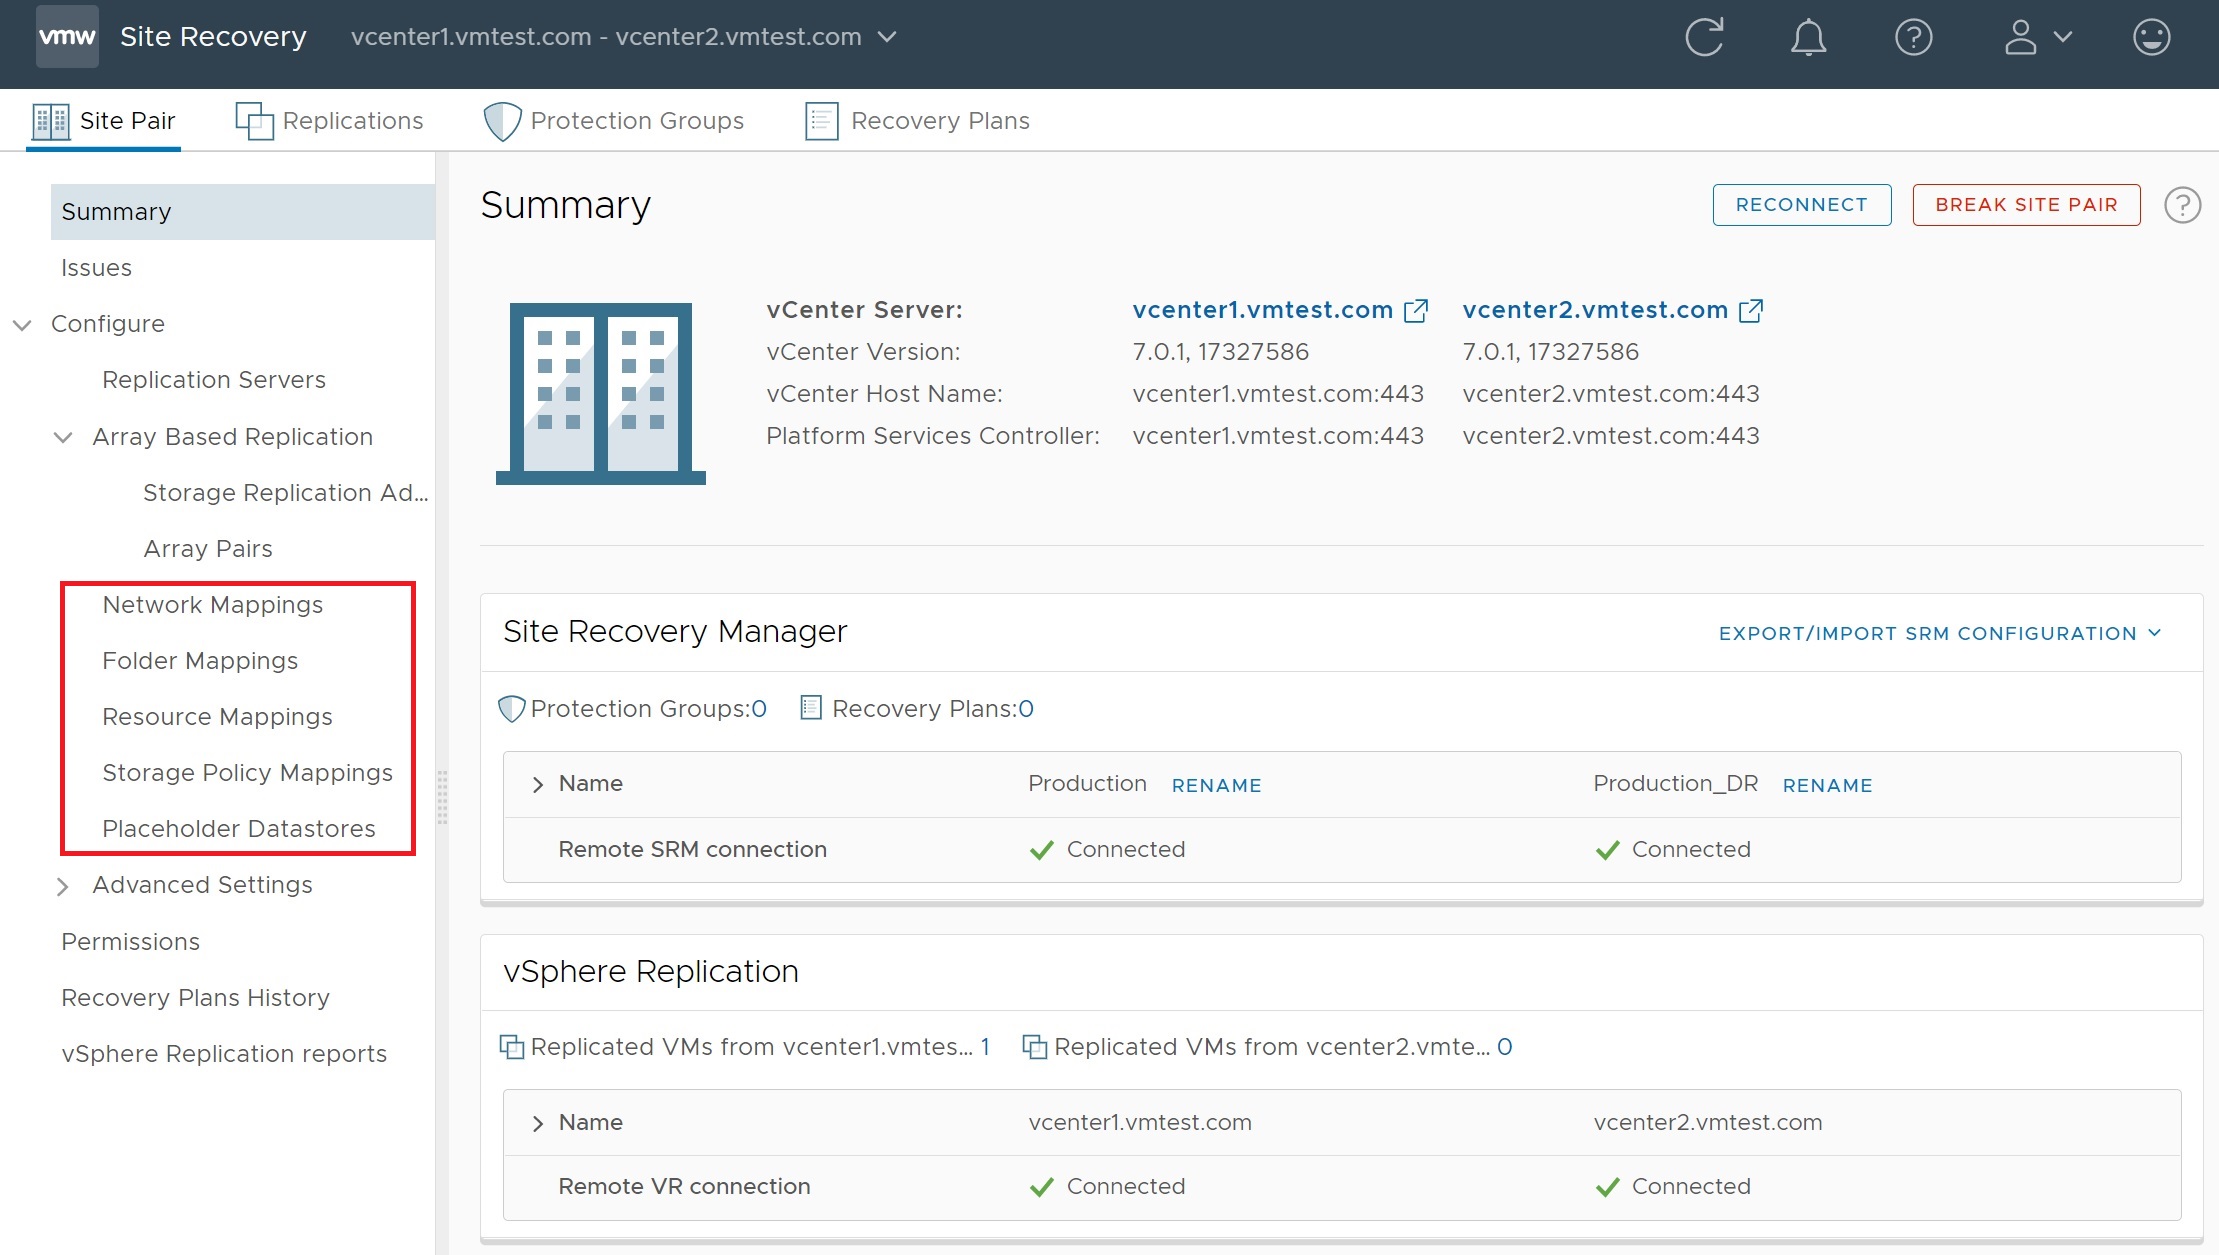
Returning to the pairing screen you will notice now that we have the Site Recovery Manager pairing, which you will see a protection group and recovery plans fields.
- Protection Group - is a way of grouping VMs that will be recovered together
- Recovery Plan - contains all the steps required to run tests and to perform a planned migration or disaster recovery

Selecting the View Details button we are taken to a SRM management screen, here we can create protection groups, recovery plans, setup networking, folder resource and storage mapping/policies. In a moment we need to perform 5 setup steps as highlighted by the red box in the sceenshot below, once compleetd we can then move onto creating a protection group and finally a recovery plan. There is lots of detail on this screen which can be used to identify any issues that you may have with your setup.
Looking at the other vCenter server we can see the pairing, notice the bidirectional arrow meaning we could recover VM's in both directions if we need too.

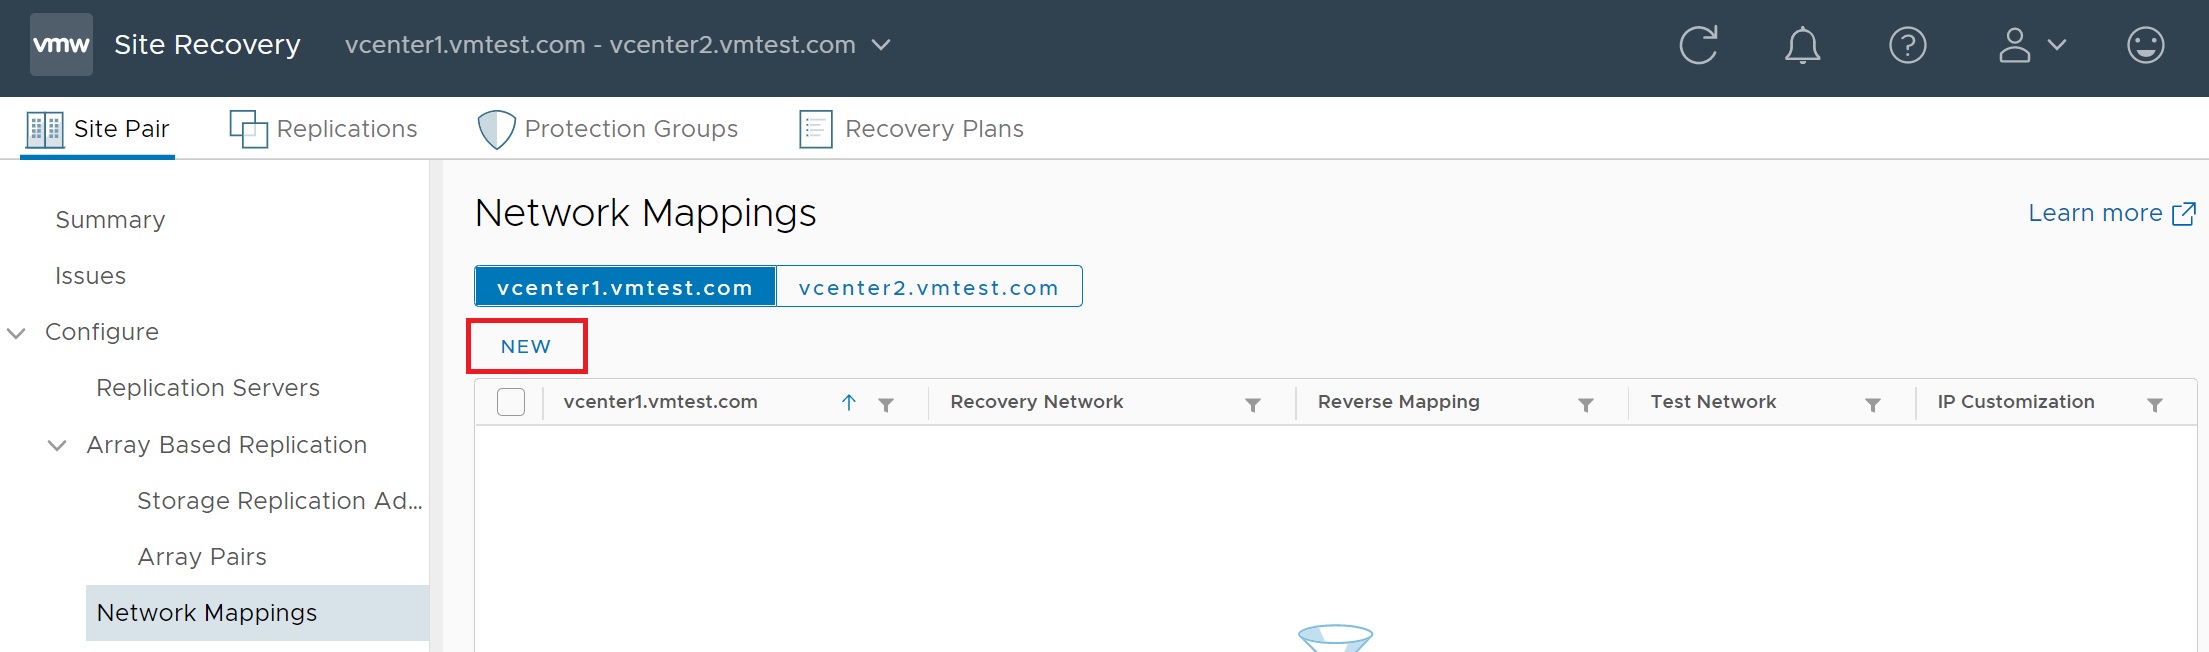
We start by configuring the network mappings, select the network mappings tab and then select NEW, we will be taken through a number of setup screens
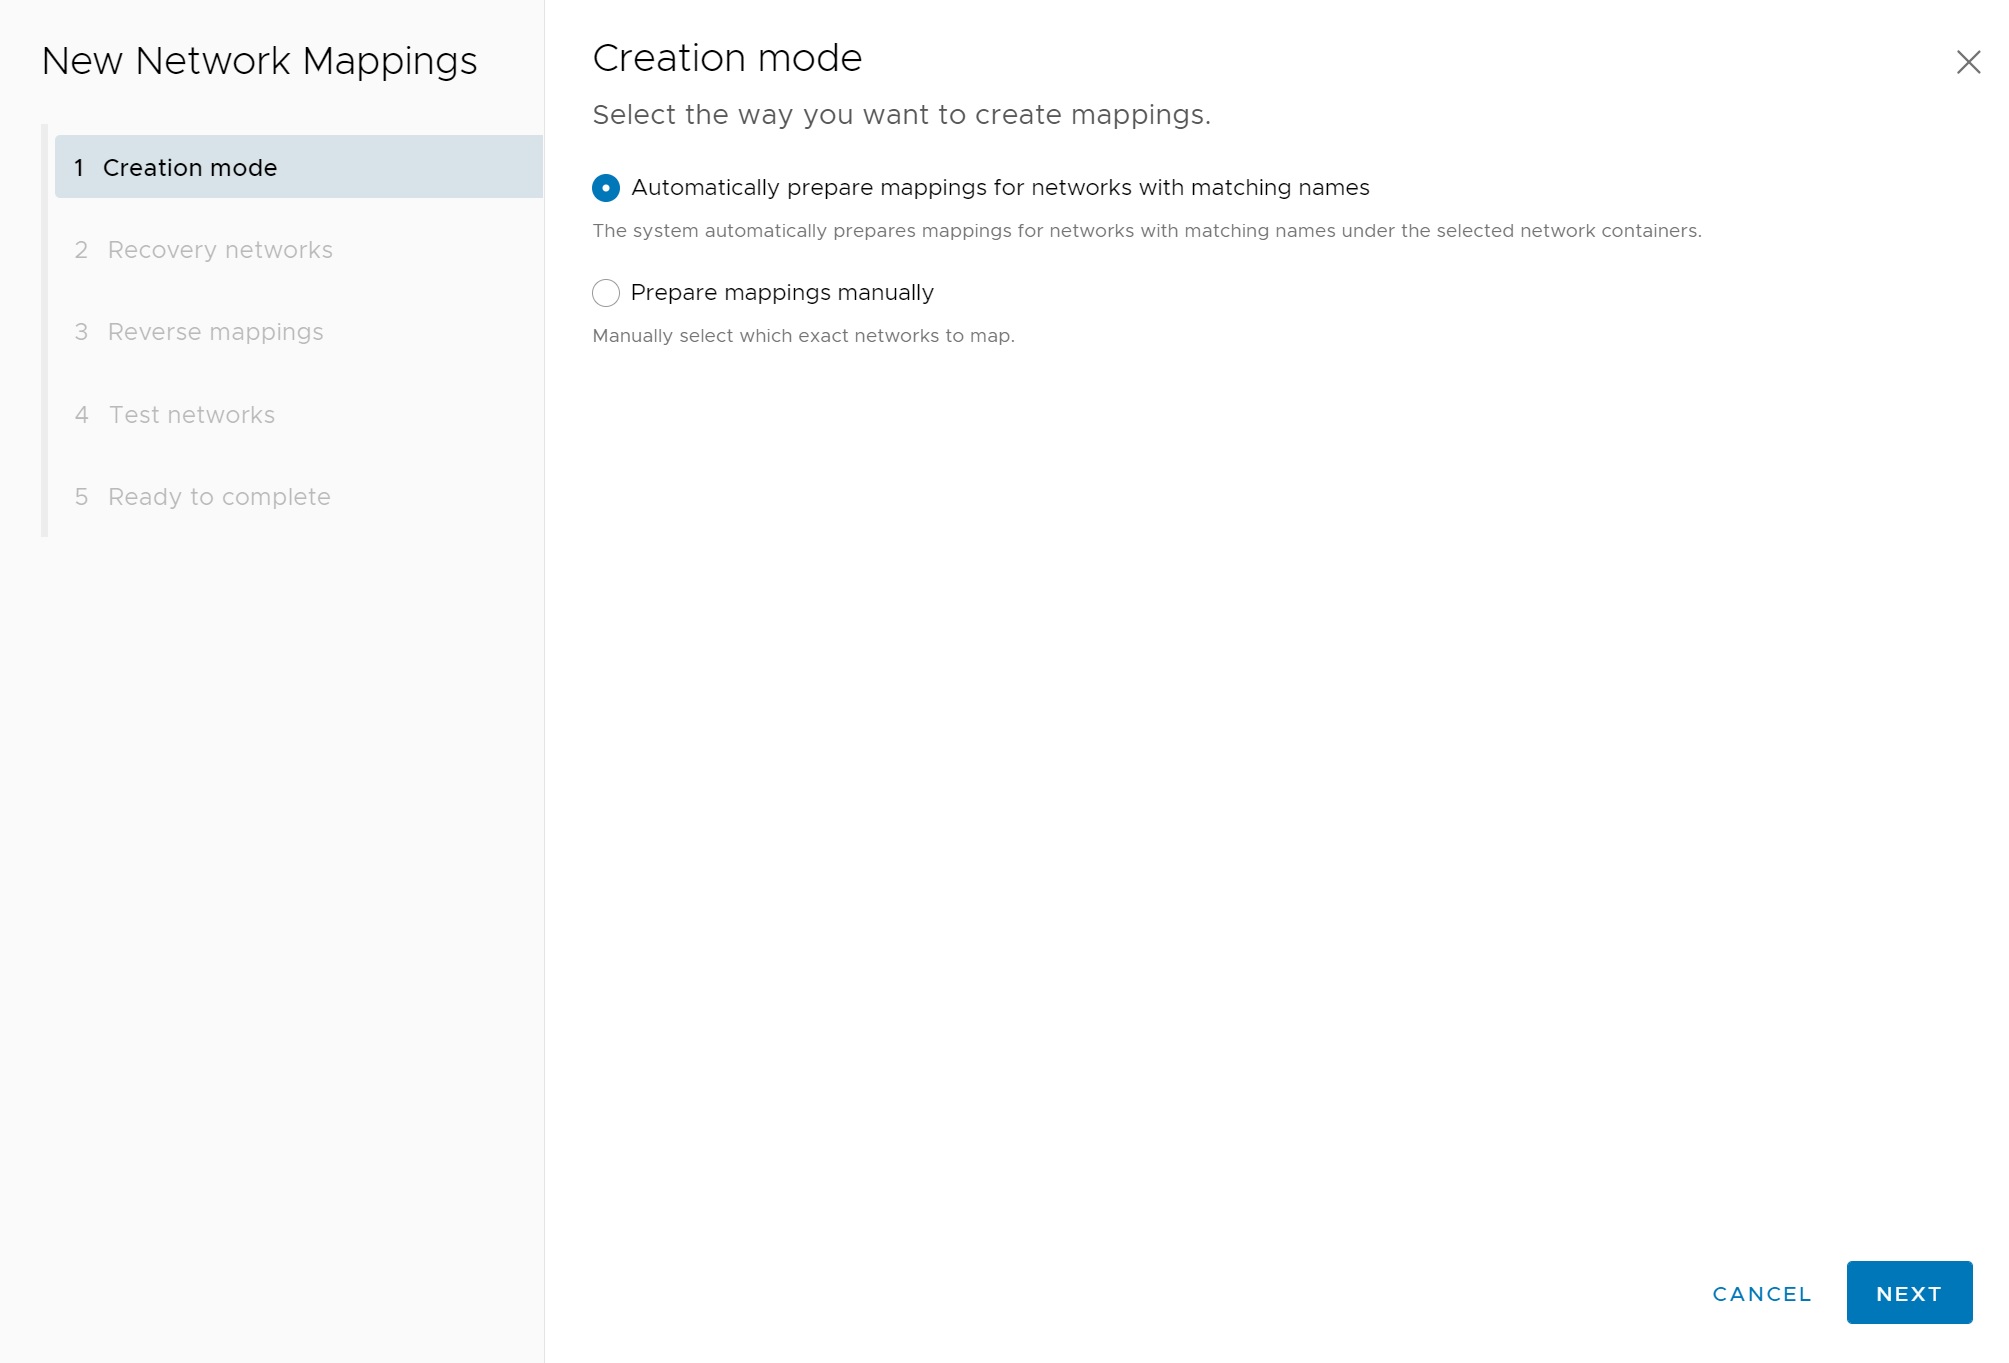
The first setup screen I went with the default of using the automatic setup
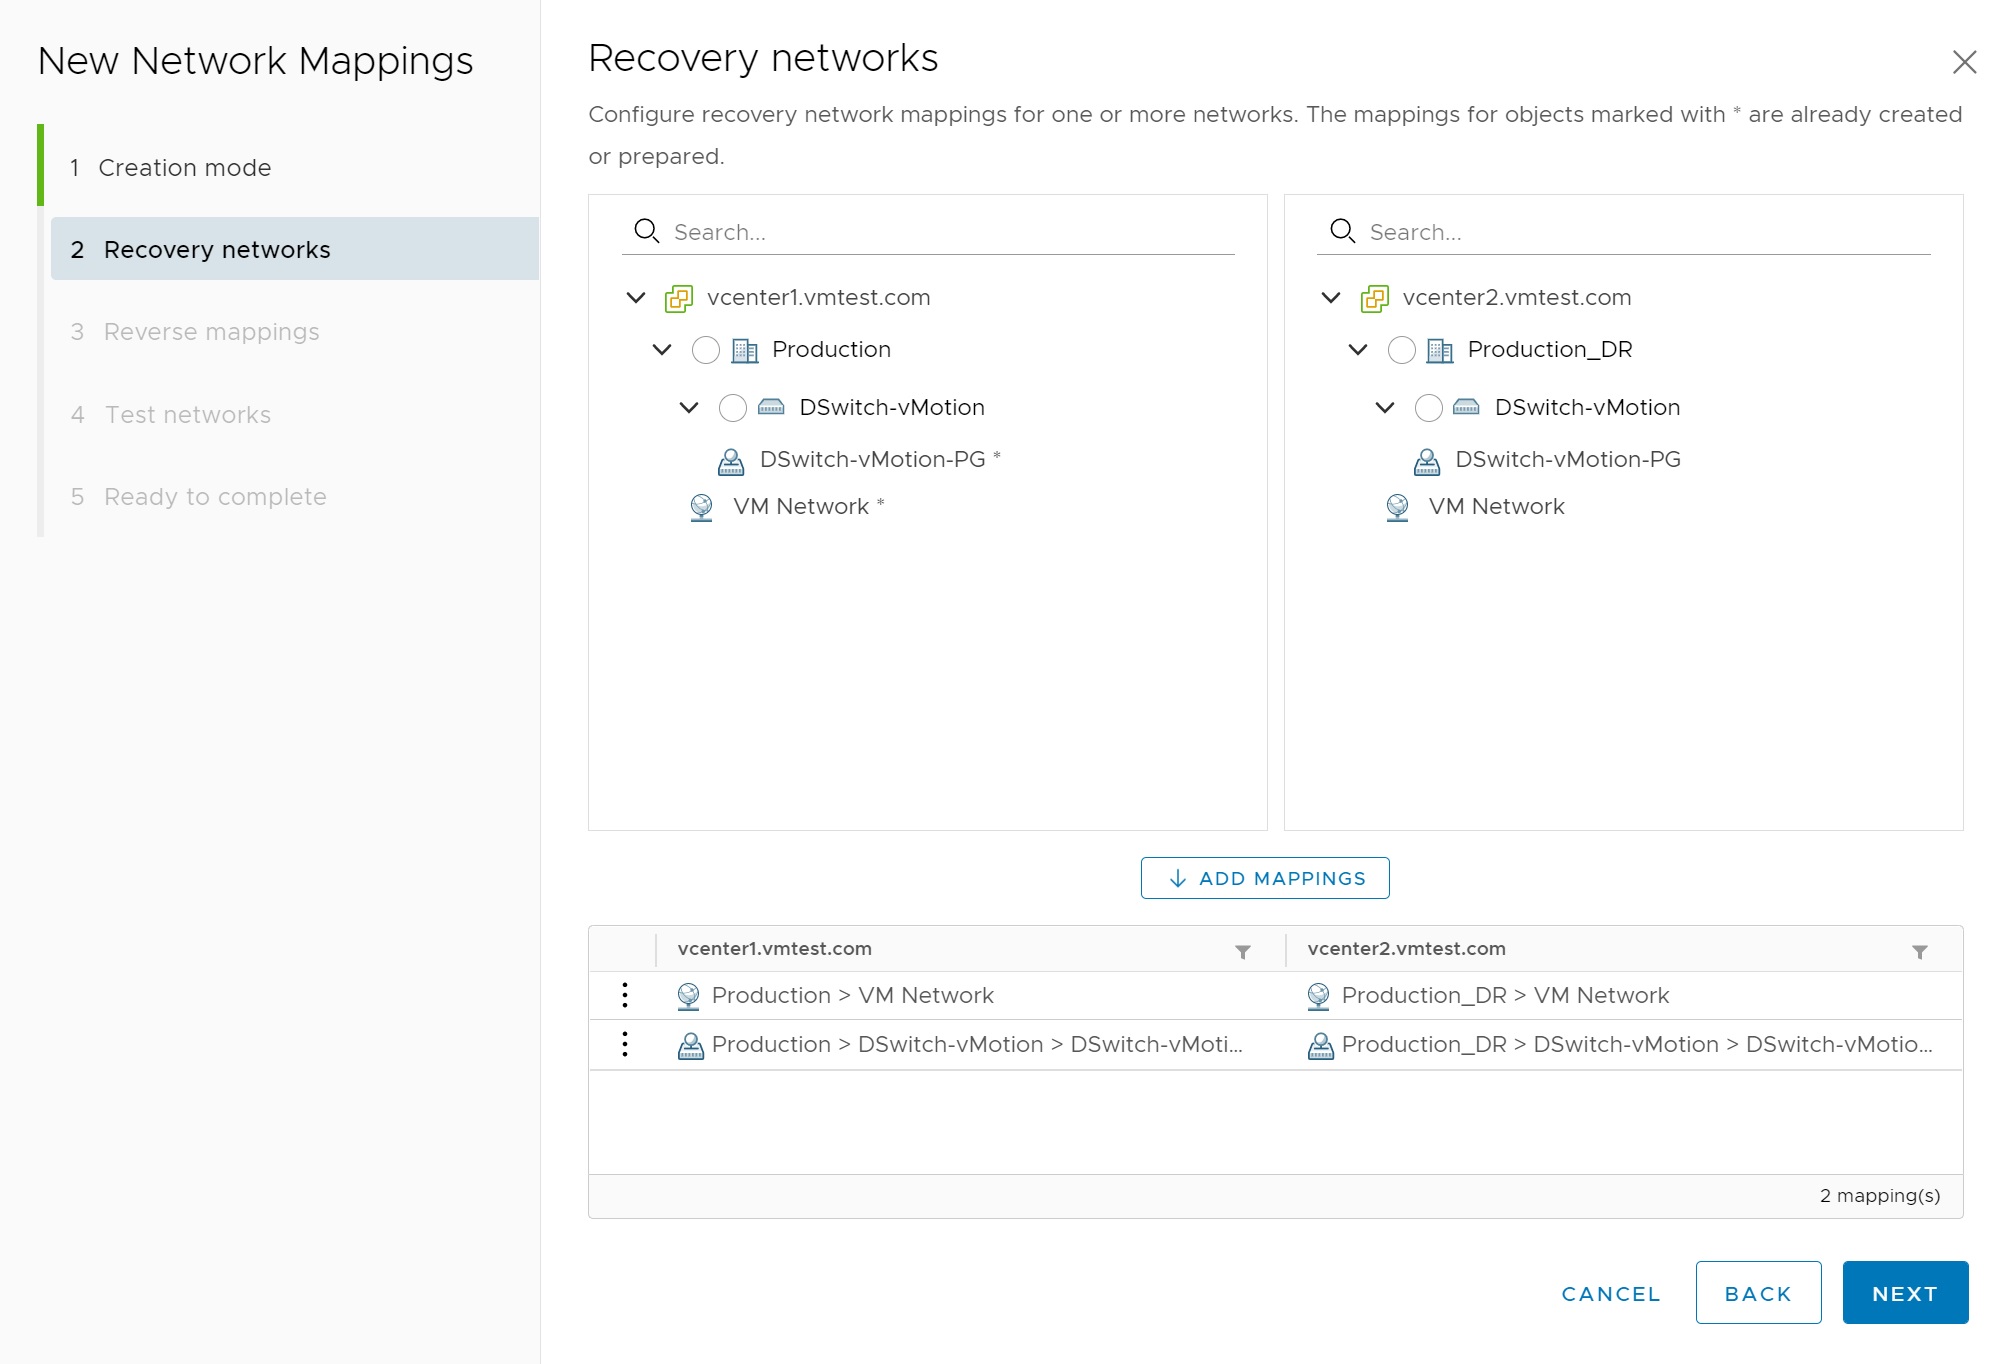
Next we identify the networks that will be used for recovery, try and use more than one network for redundancy. Once identified don't forget to select the ADD MAPPINGS button

A pop up will appear, click ok to confirm

Notice that the mappings have now been added (look at bottom in the mappings sections)
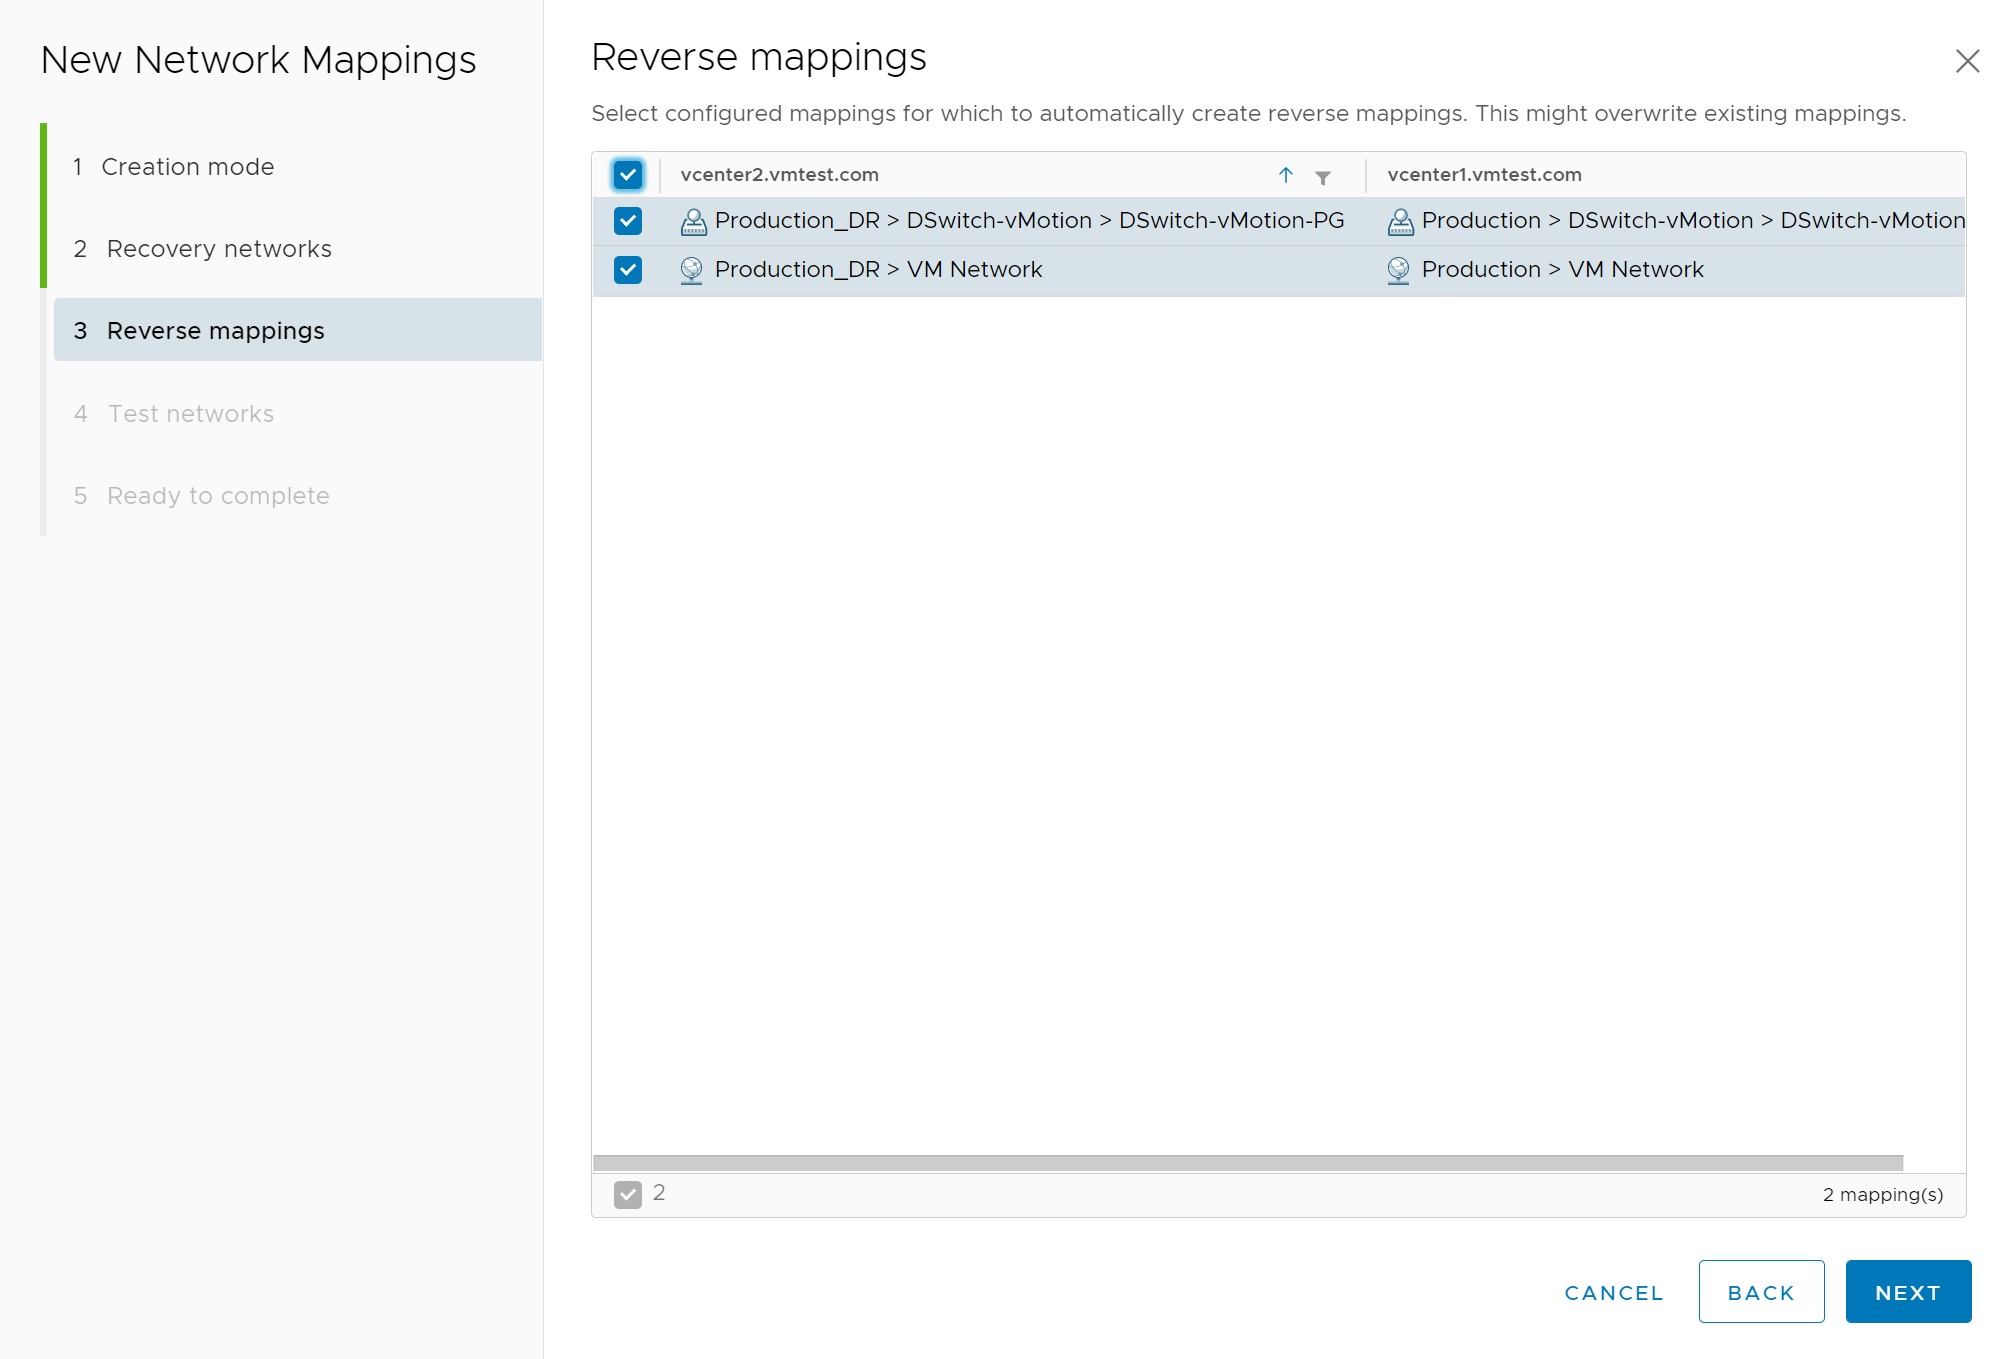
Next we identify the Reverse mappings, here I selected all options presented to me
Its a good idea to create test networks when and if you want to perform a test recovery of a VM, this means it will be isolated away from the LIVE VM, here I used the default values but you can use other networks if you want to try and connect to the Test VM

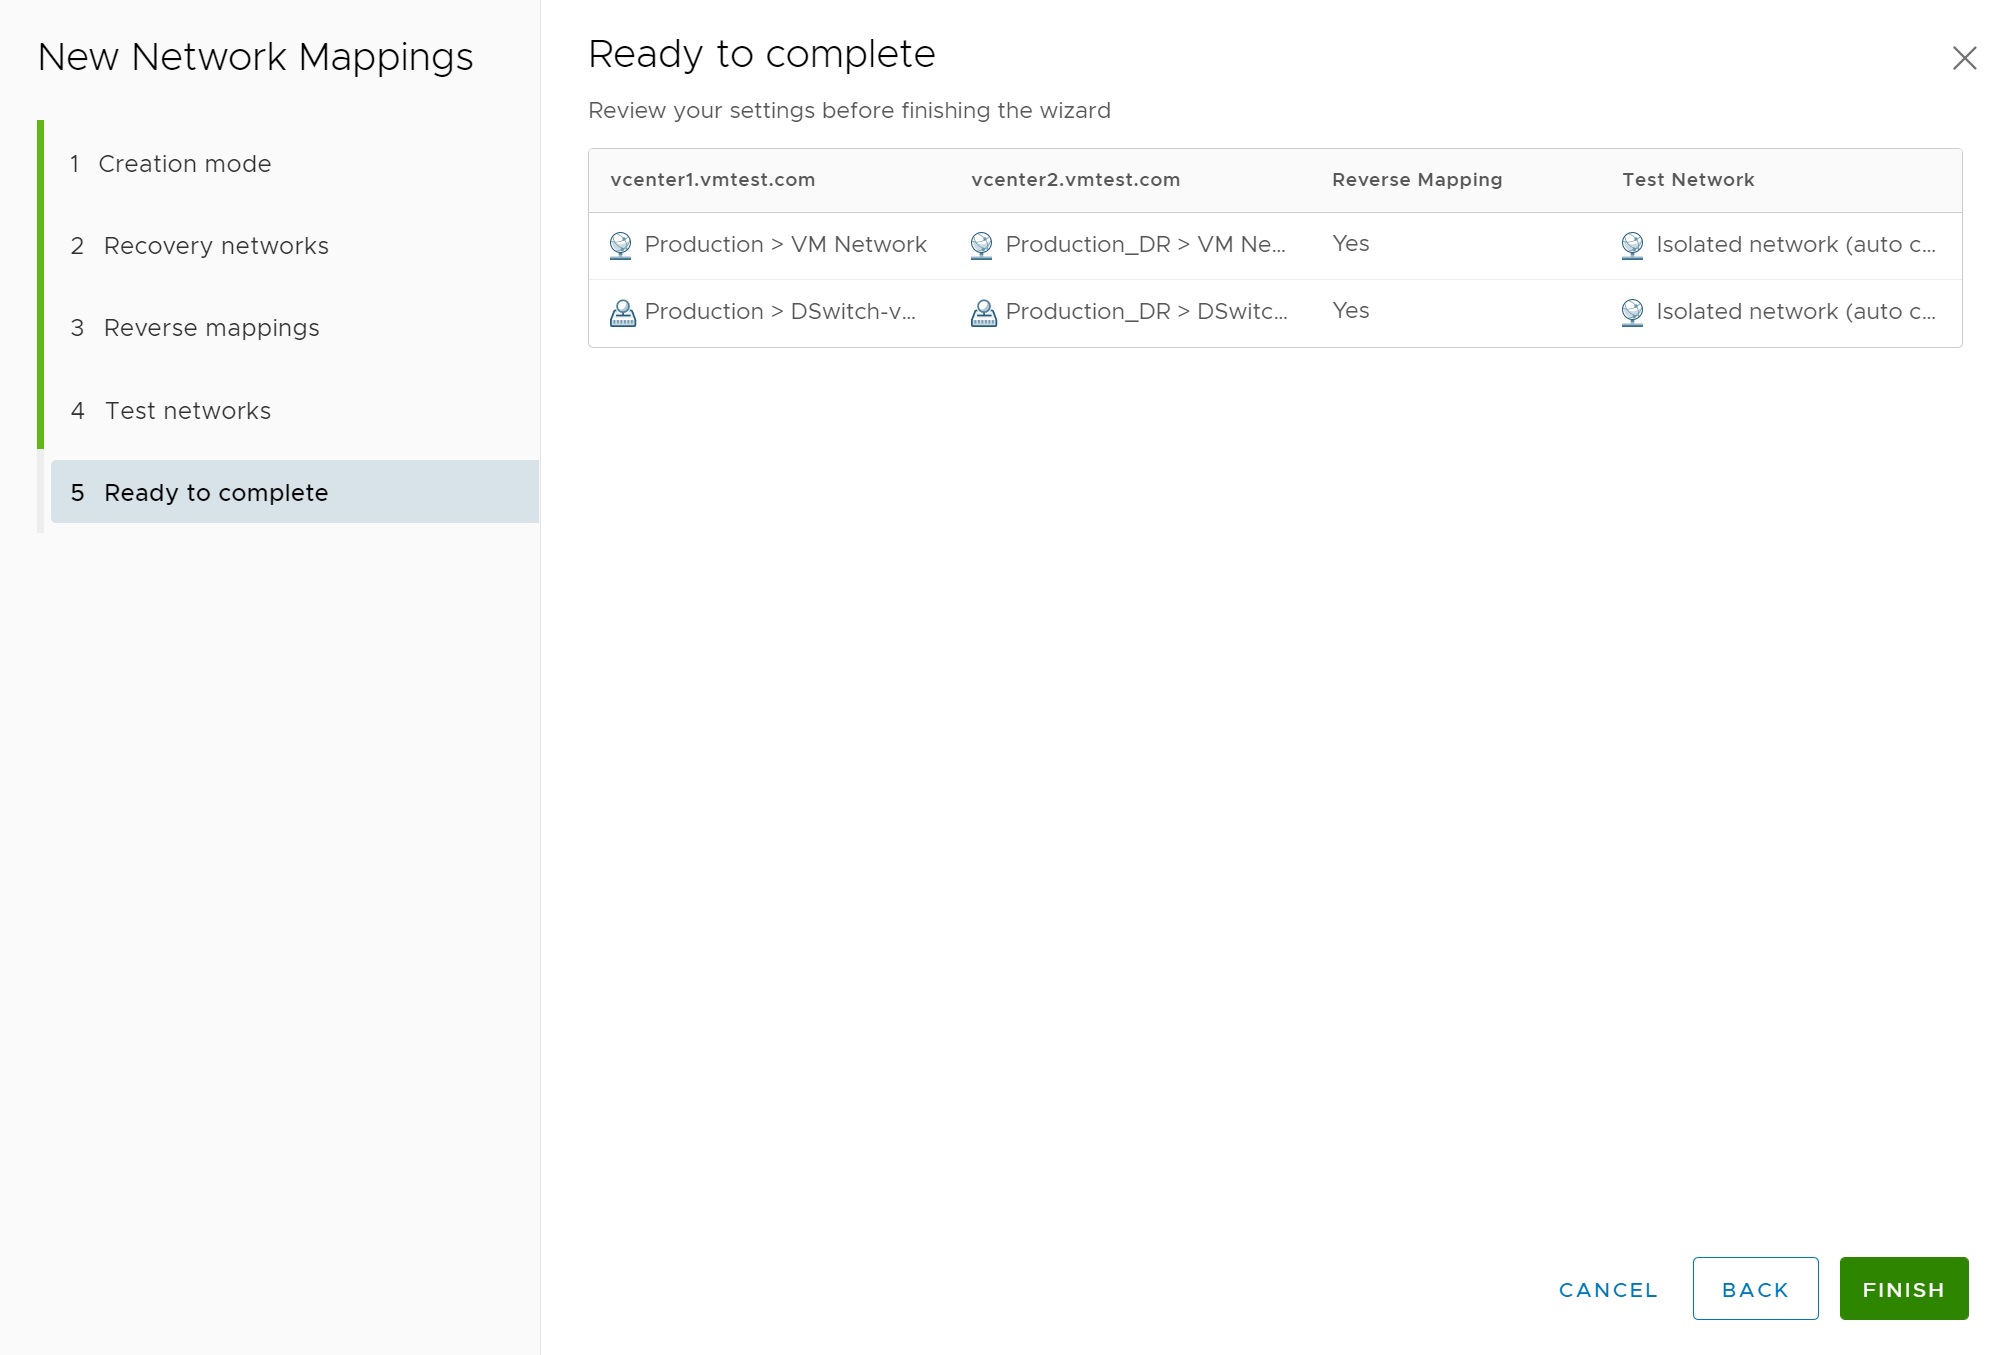
Finally we get to a summary screen, click Finish to complete the network mappings
Once the network mapping is complete you can add a network rule to it, here you see me creating a simple rule as all my networks reside on the same network (192.168.1.0 (24)).

The network mapping can then be viewed from the network mapping page, you can see that two network mappings have been created, the rule is at the bottom of the page, you can edit or remove the rule.

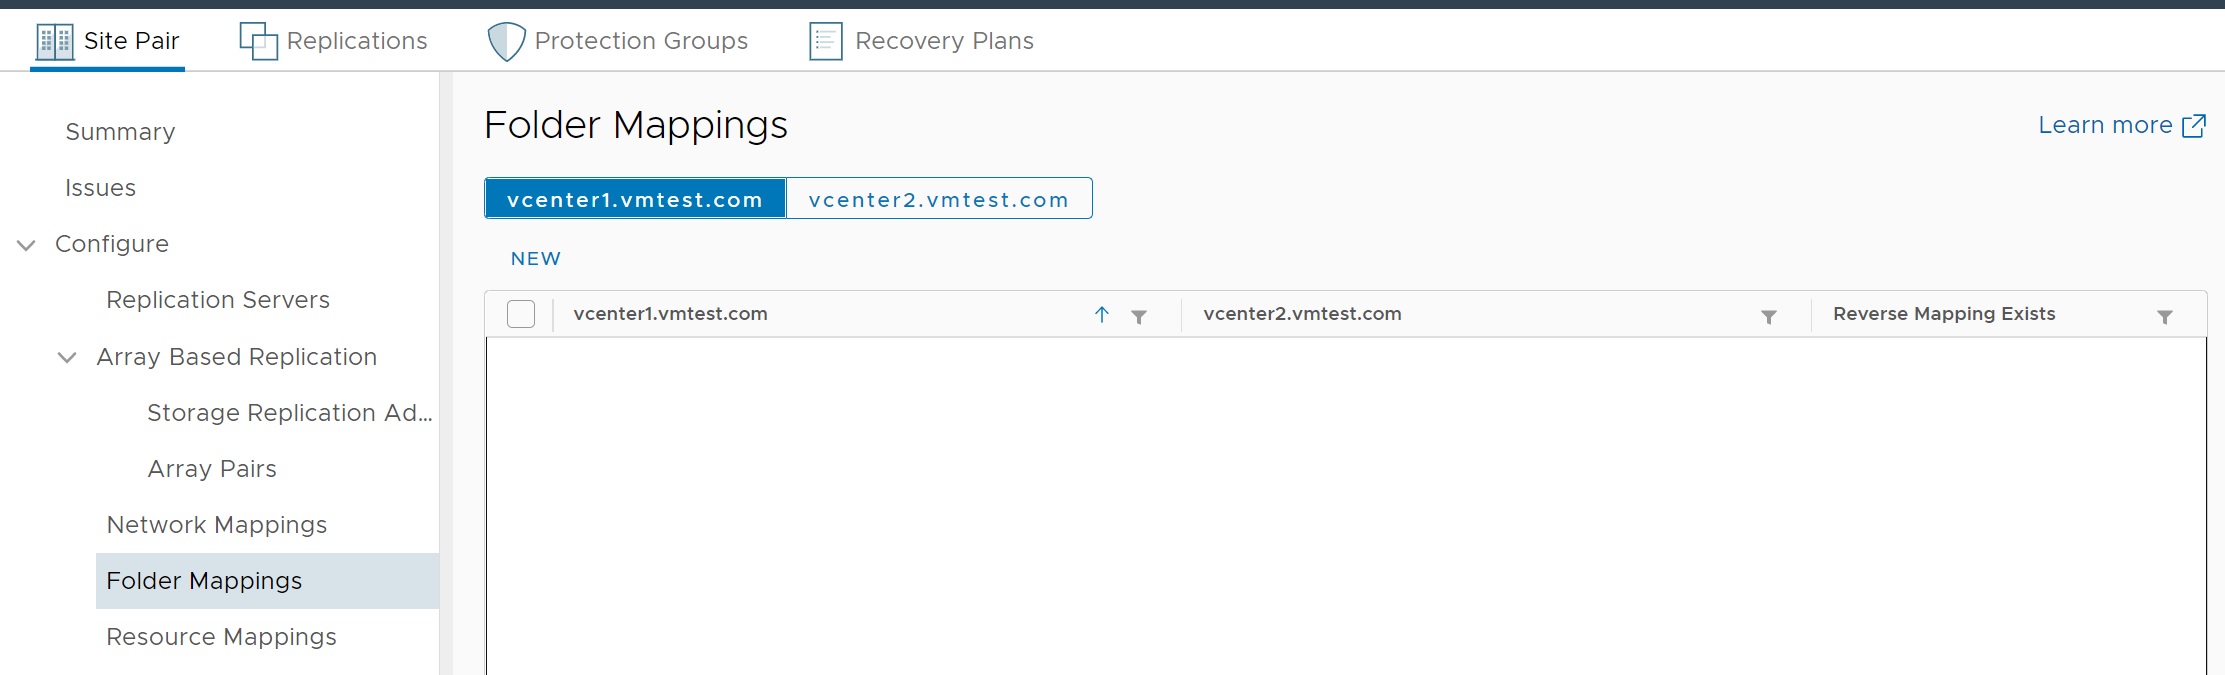
Next we move on to setting up the folder mappings, here we Map datacenters or virtual machine folders on the protected site to datacenters or virtual machine folders on the recovery site.
Again I choose to use the automatic mapping (default)
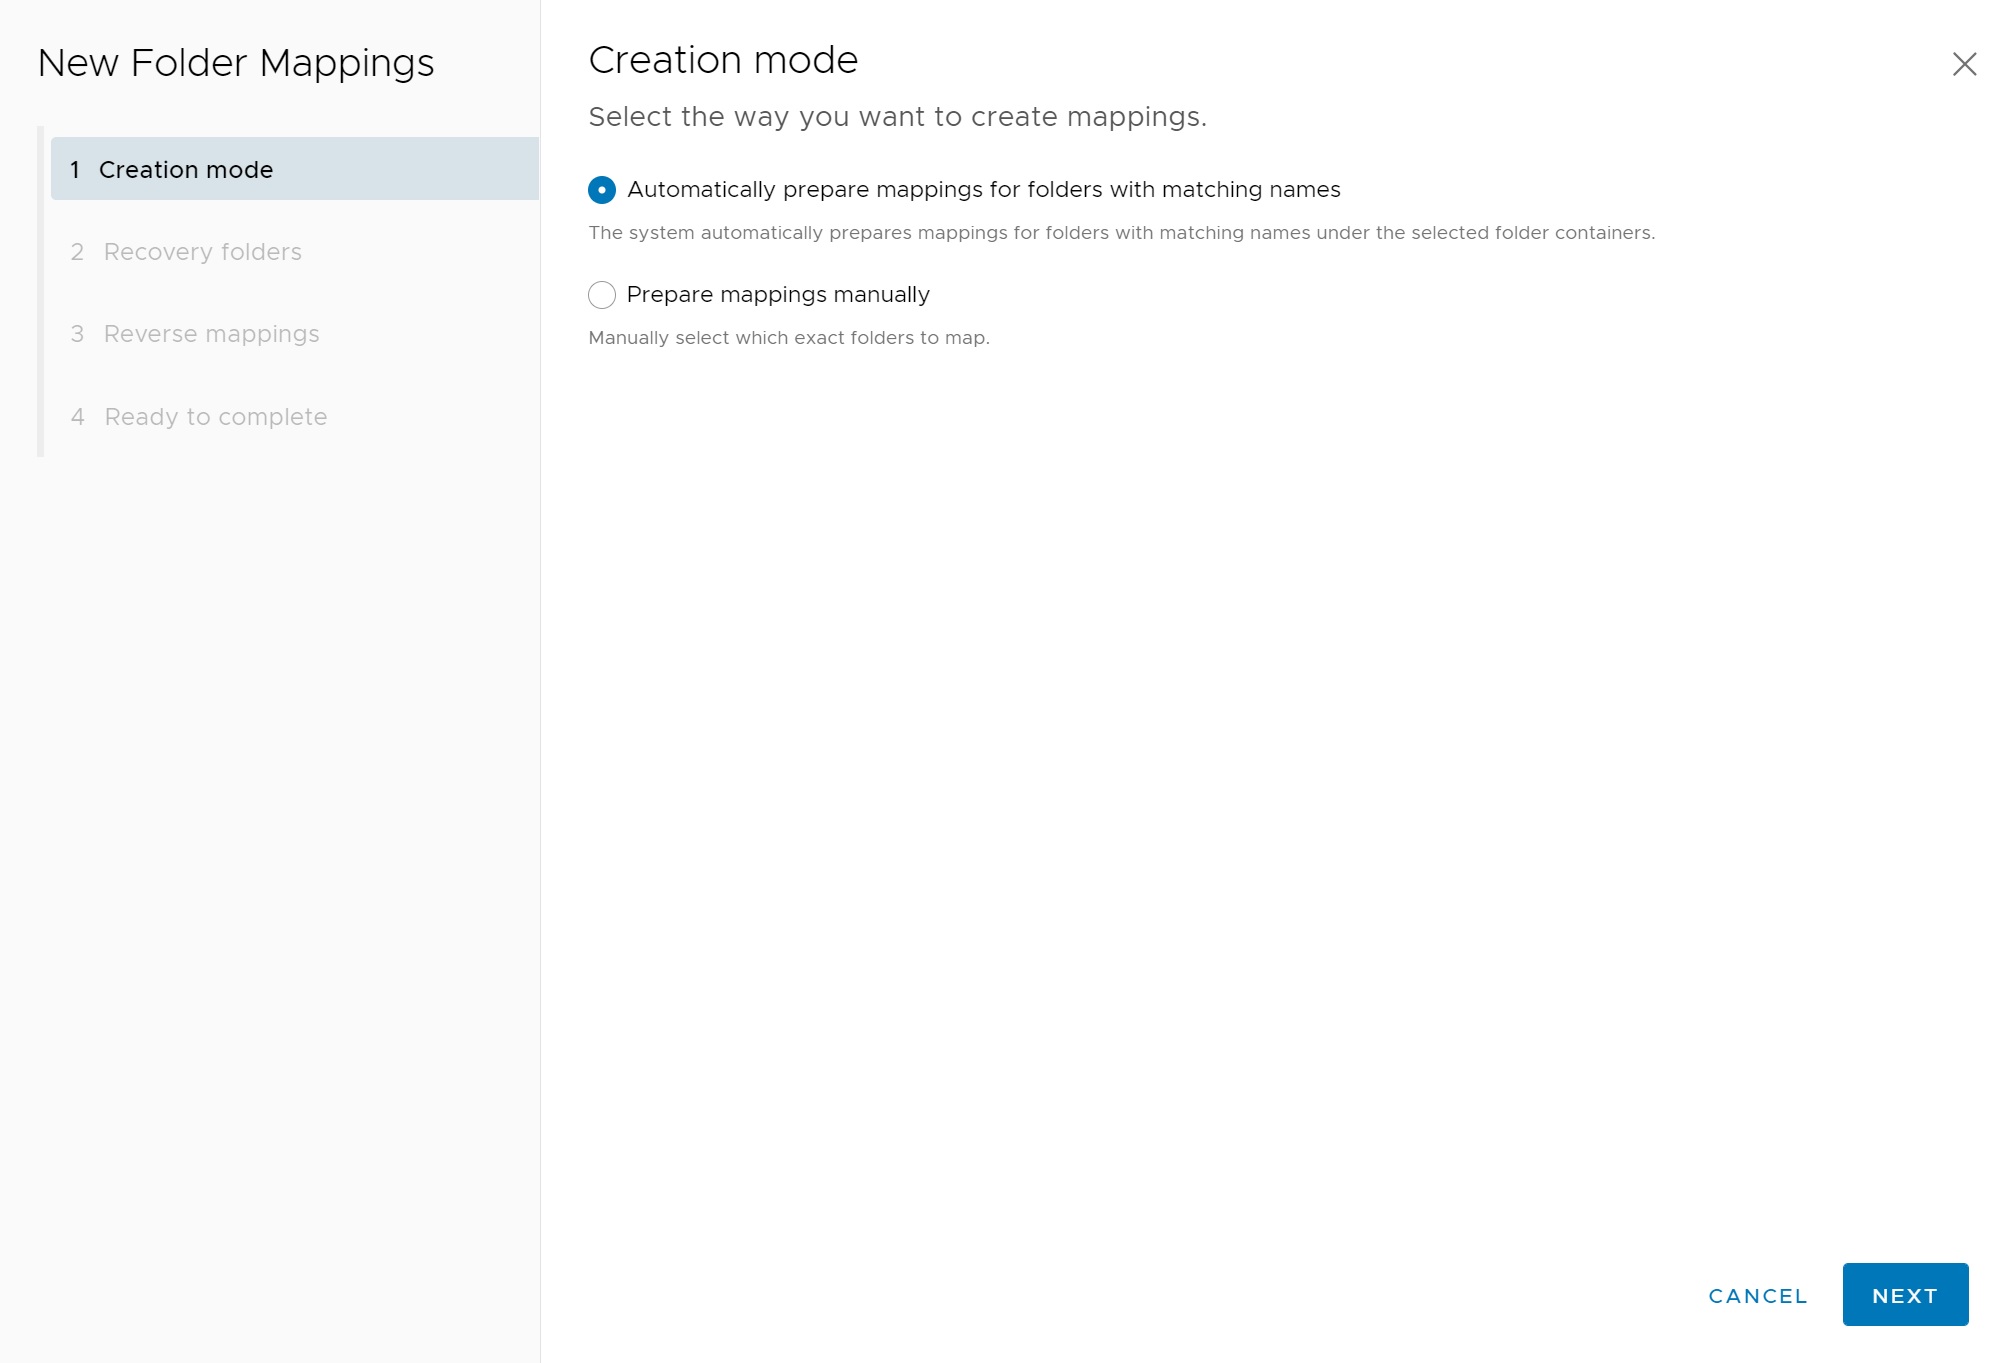
We select the folders and then click the ADD MAPPING to add the folder/s

Confirm the mappings

We are returned to the folder mappings screen and as you can see at the bottom the folders have been added

The next screen deals with the reverse mappings here I selected what was presented

Finally we get to the summary screen, click Finish to complete the folder mappings
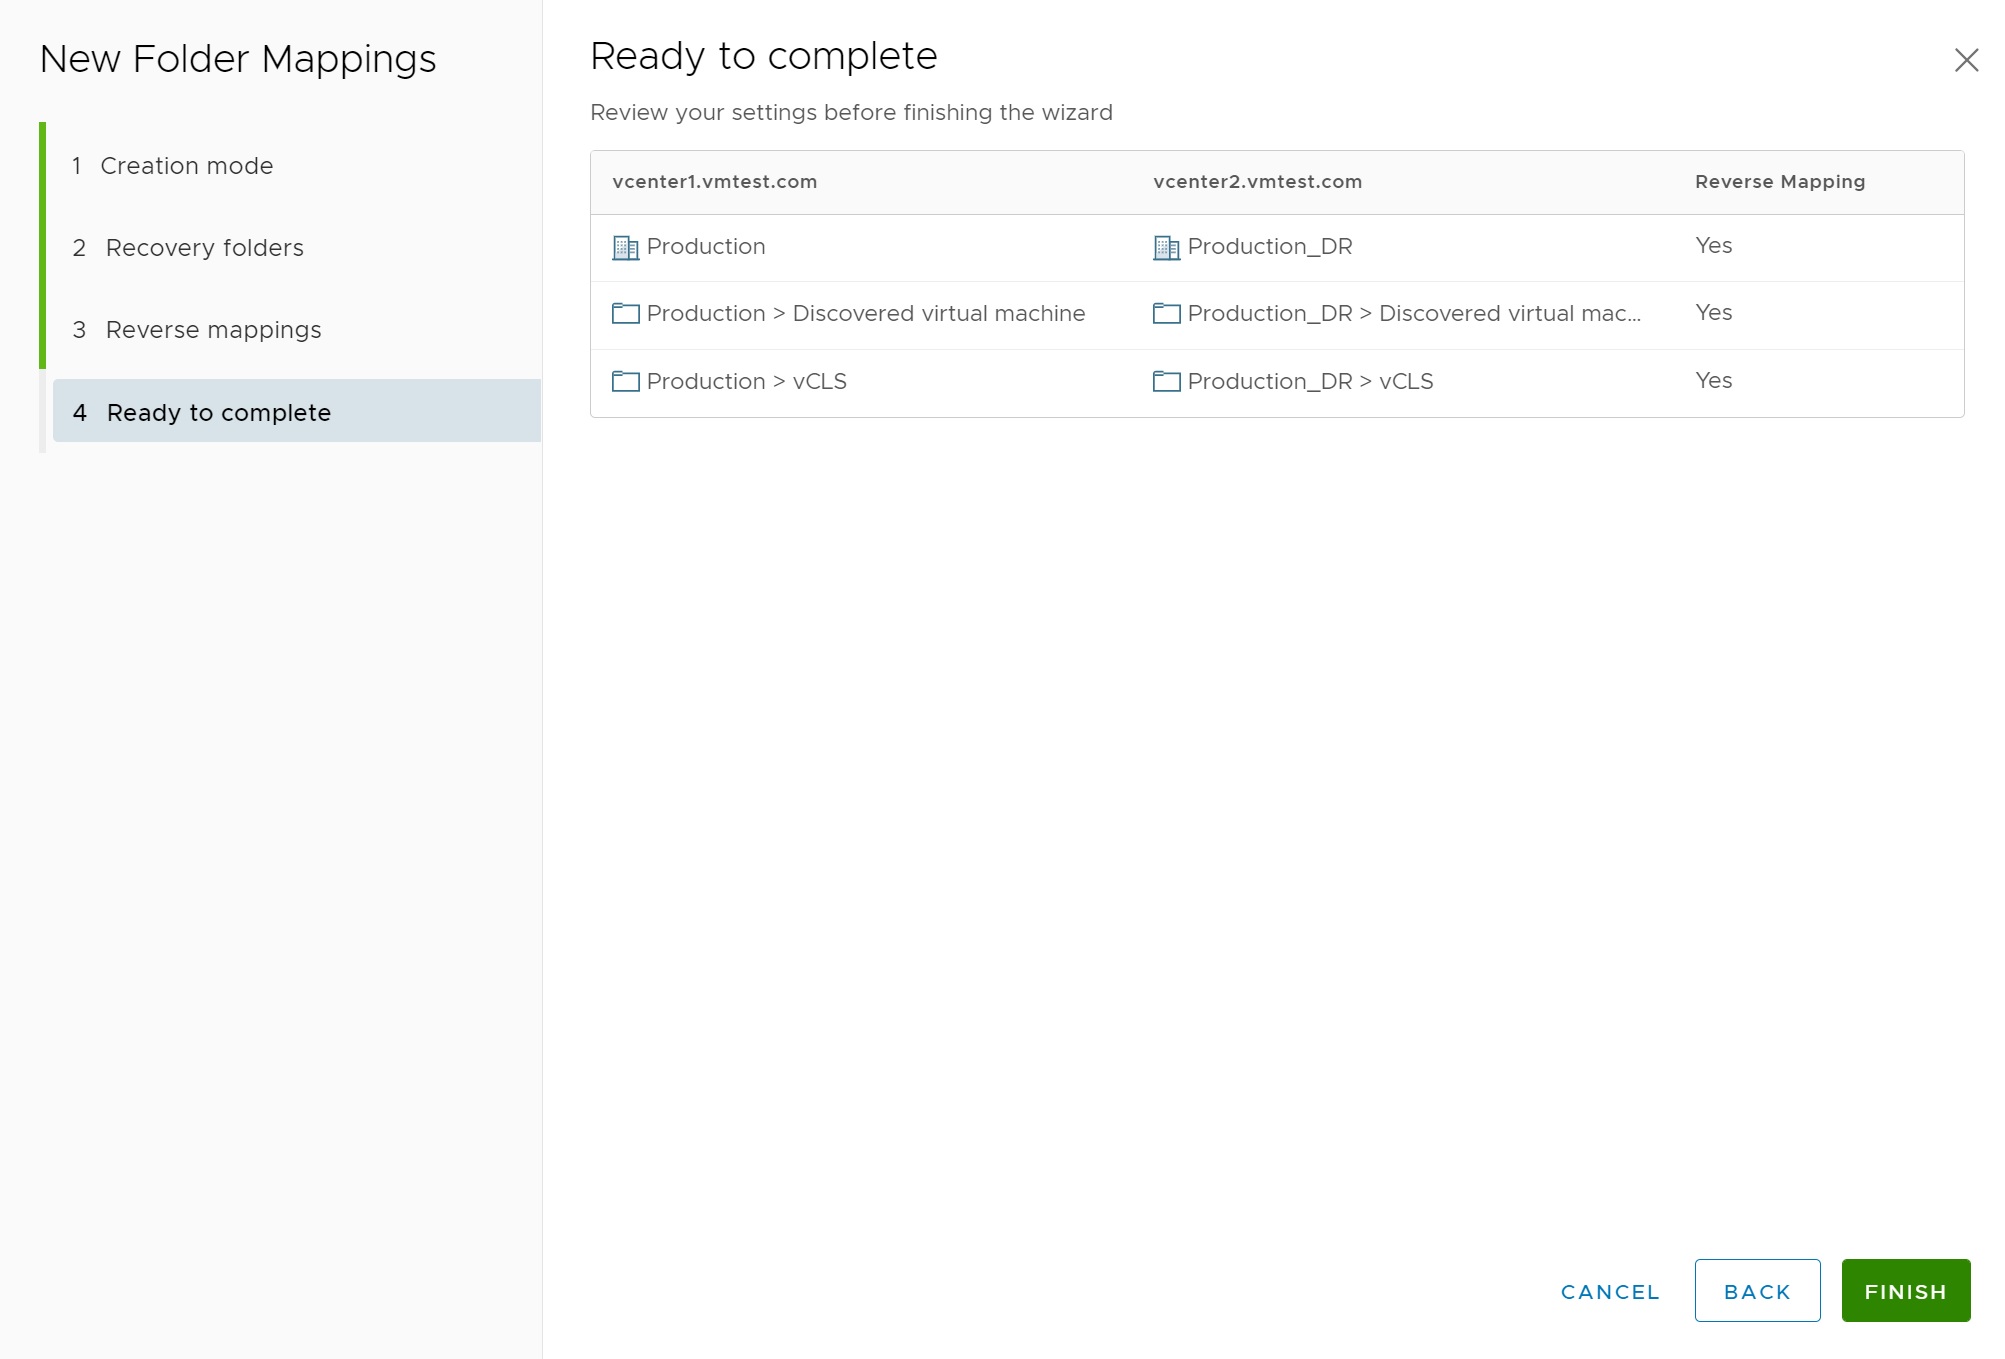
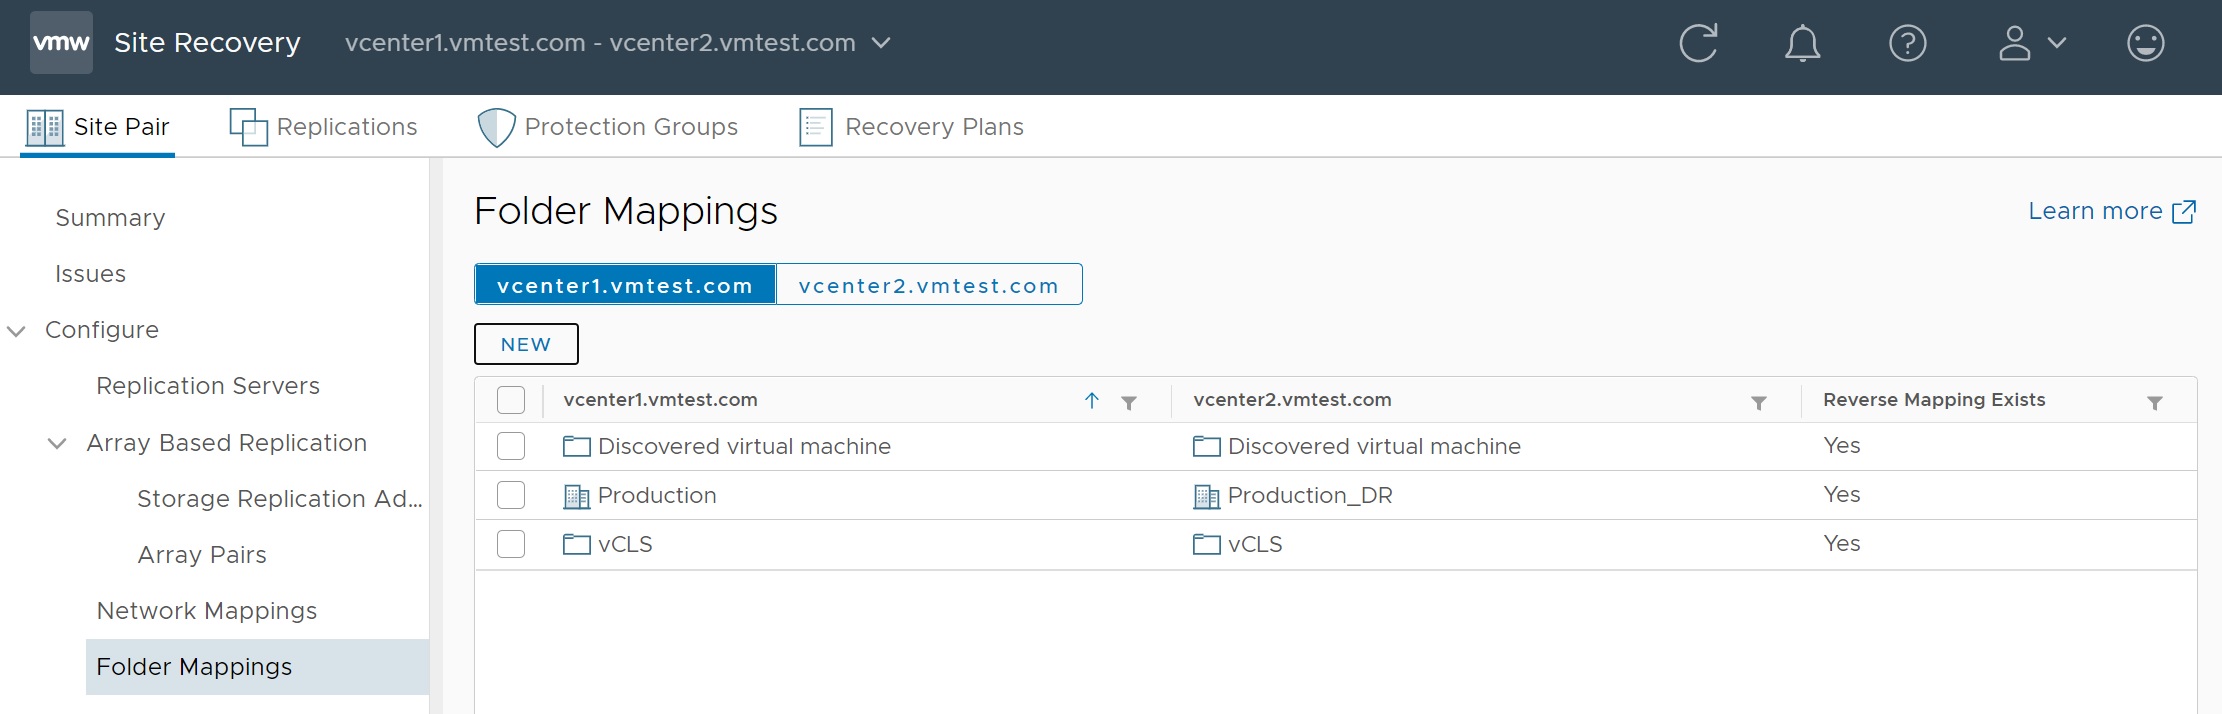
Returning to the Folder mappings screen we can see the created folder mappings
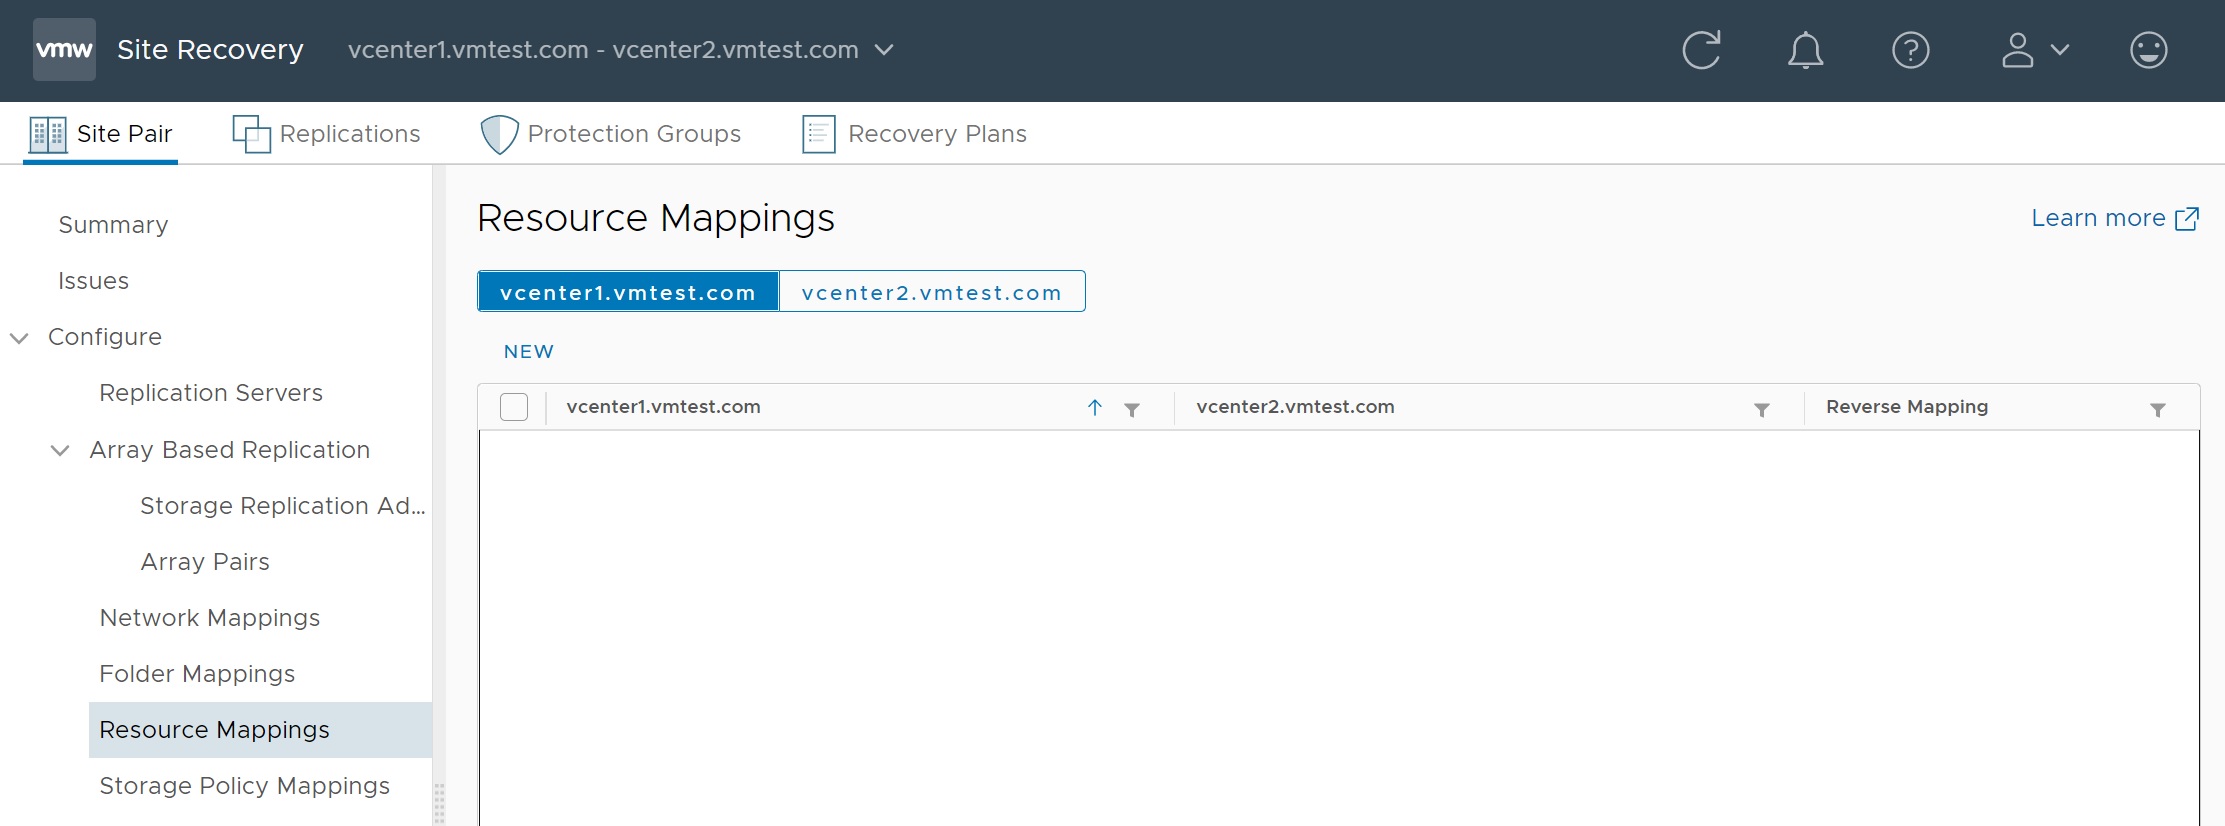
Next we turn our attention to the resource mappings, click new to create resource mapping
I only have one cluster so will use this but feel free to use any resources that you have configured, they can even be different, dont forget to add the mapping

Once added you should see the resource added to the mapping at the bottom of the screen

Next we configure the reverse resource mappings

We then get to the review screen, click Finish to create the mapping

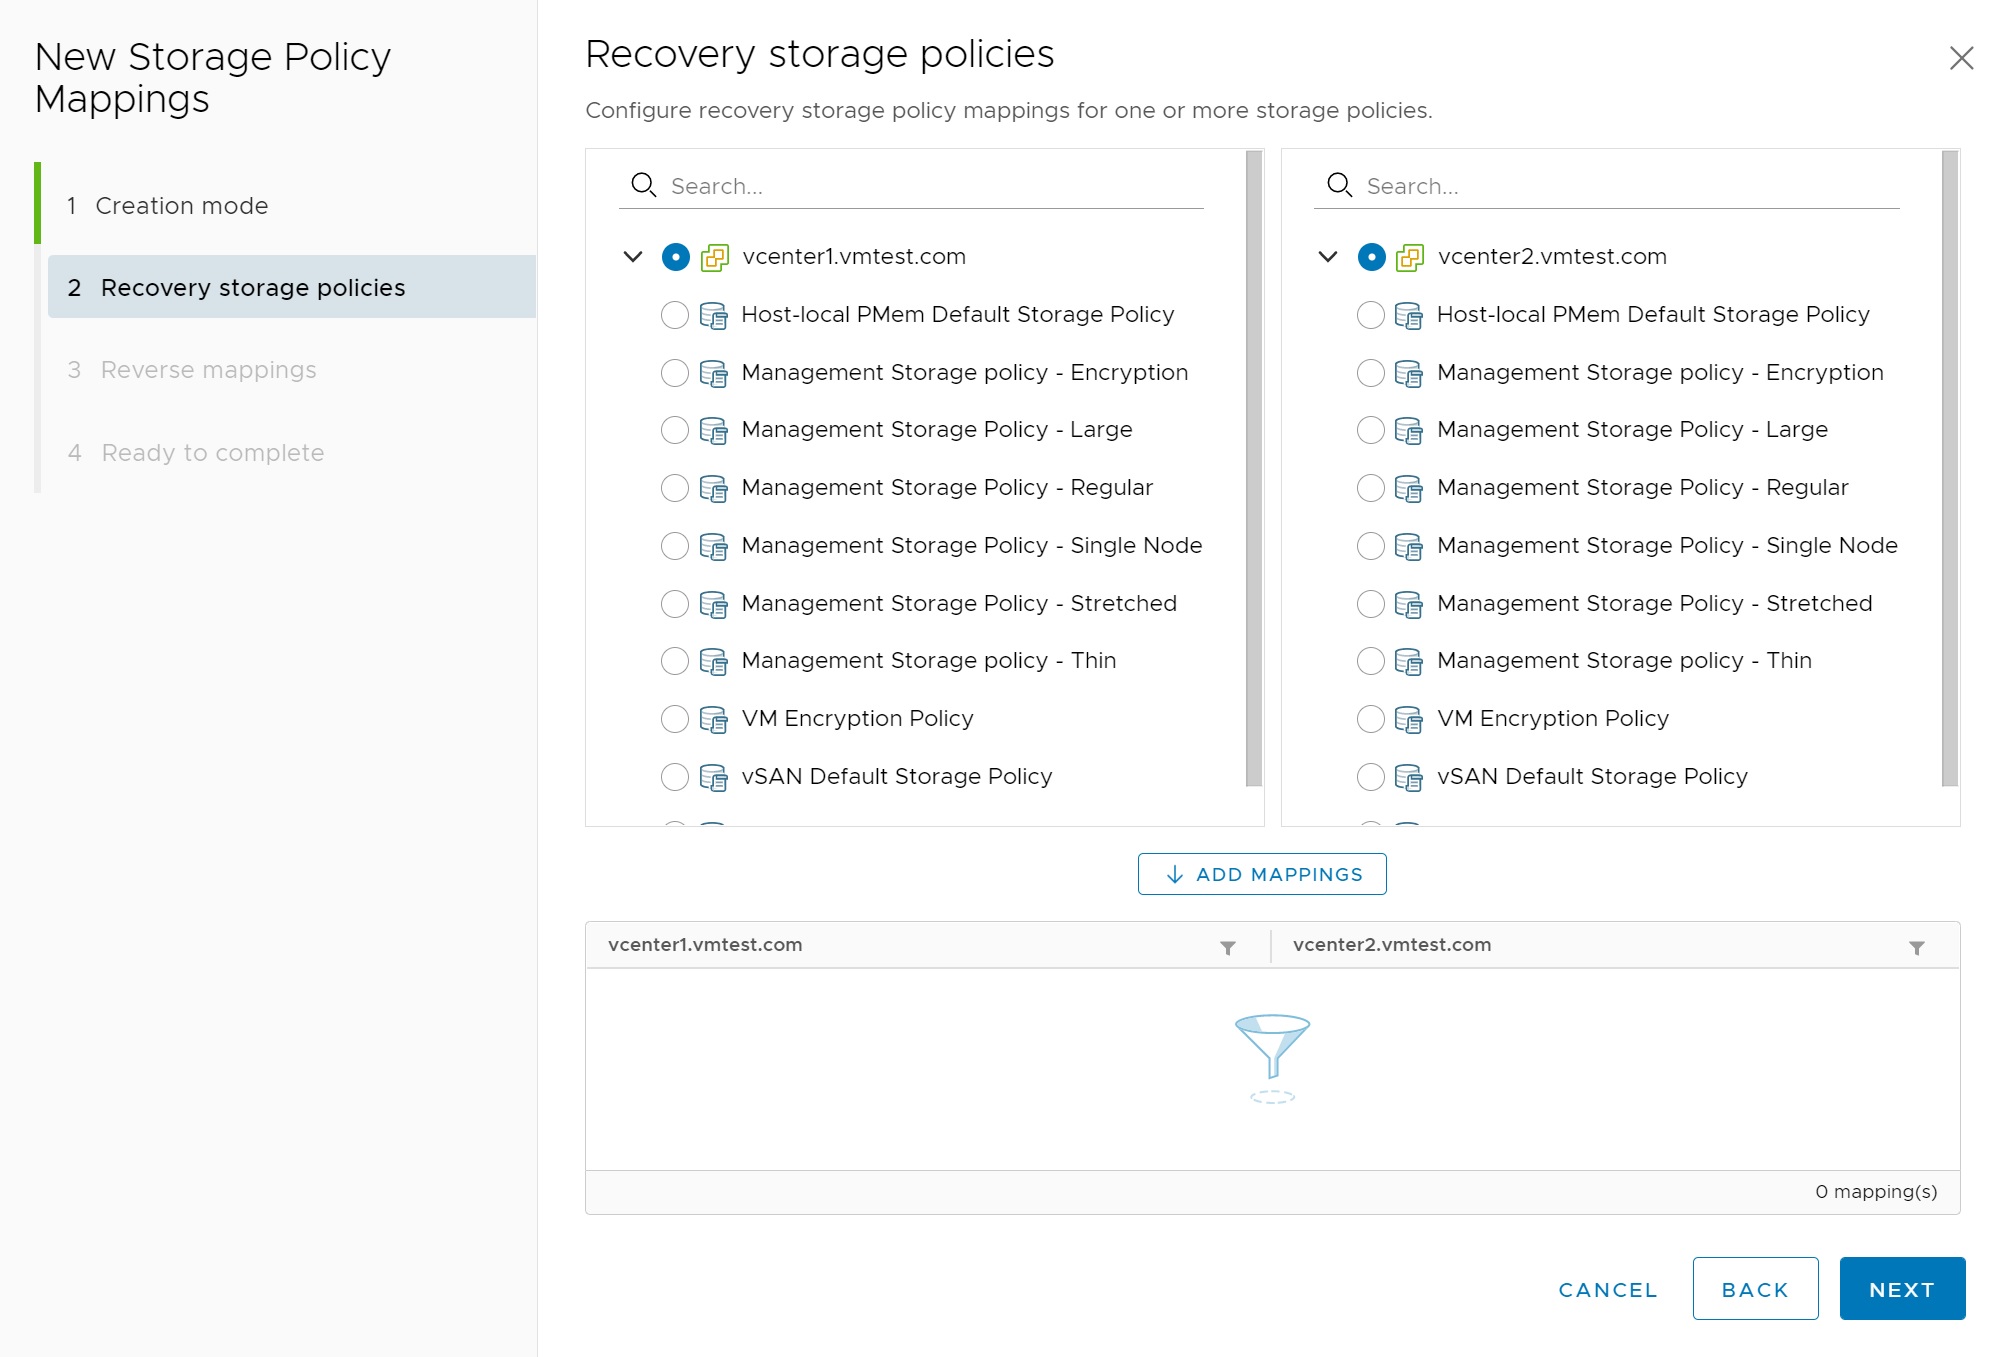
Next we move onto the Storage Policy mappings

In the first setup screen I have used the default automatic mapping

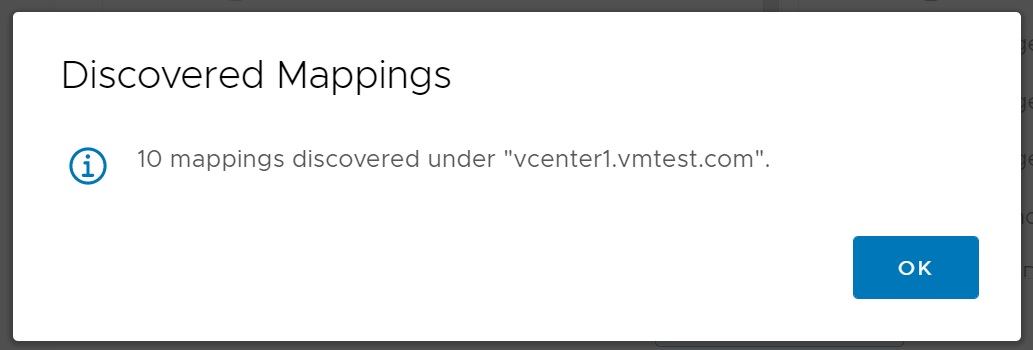
There are already a number of default storage polices that have been created, I select them all and then click on add mappings
A confirmation modal screen appears, click ok to move on
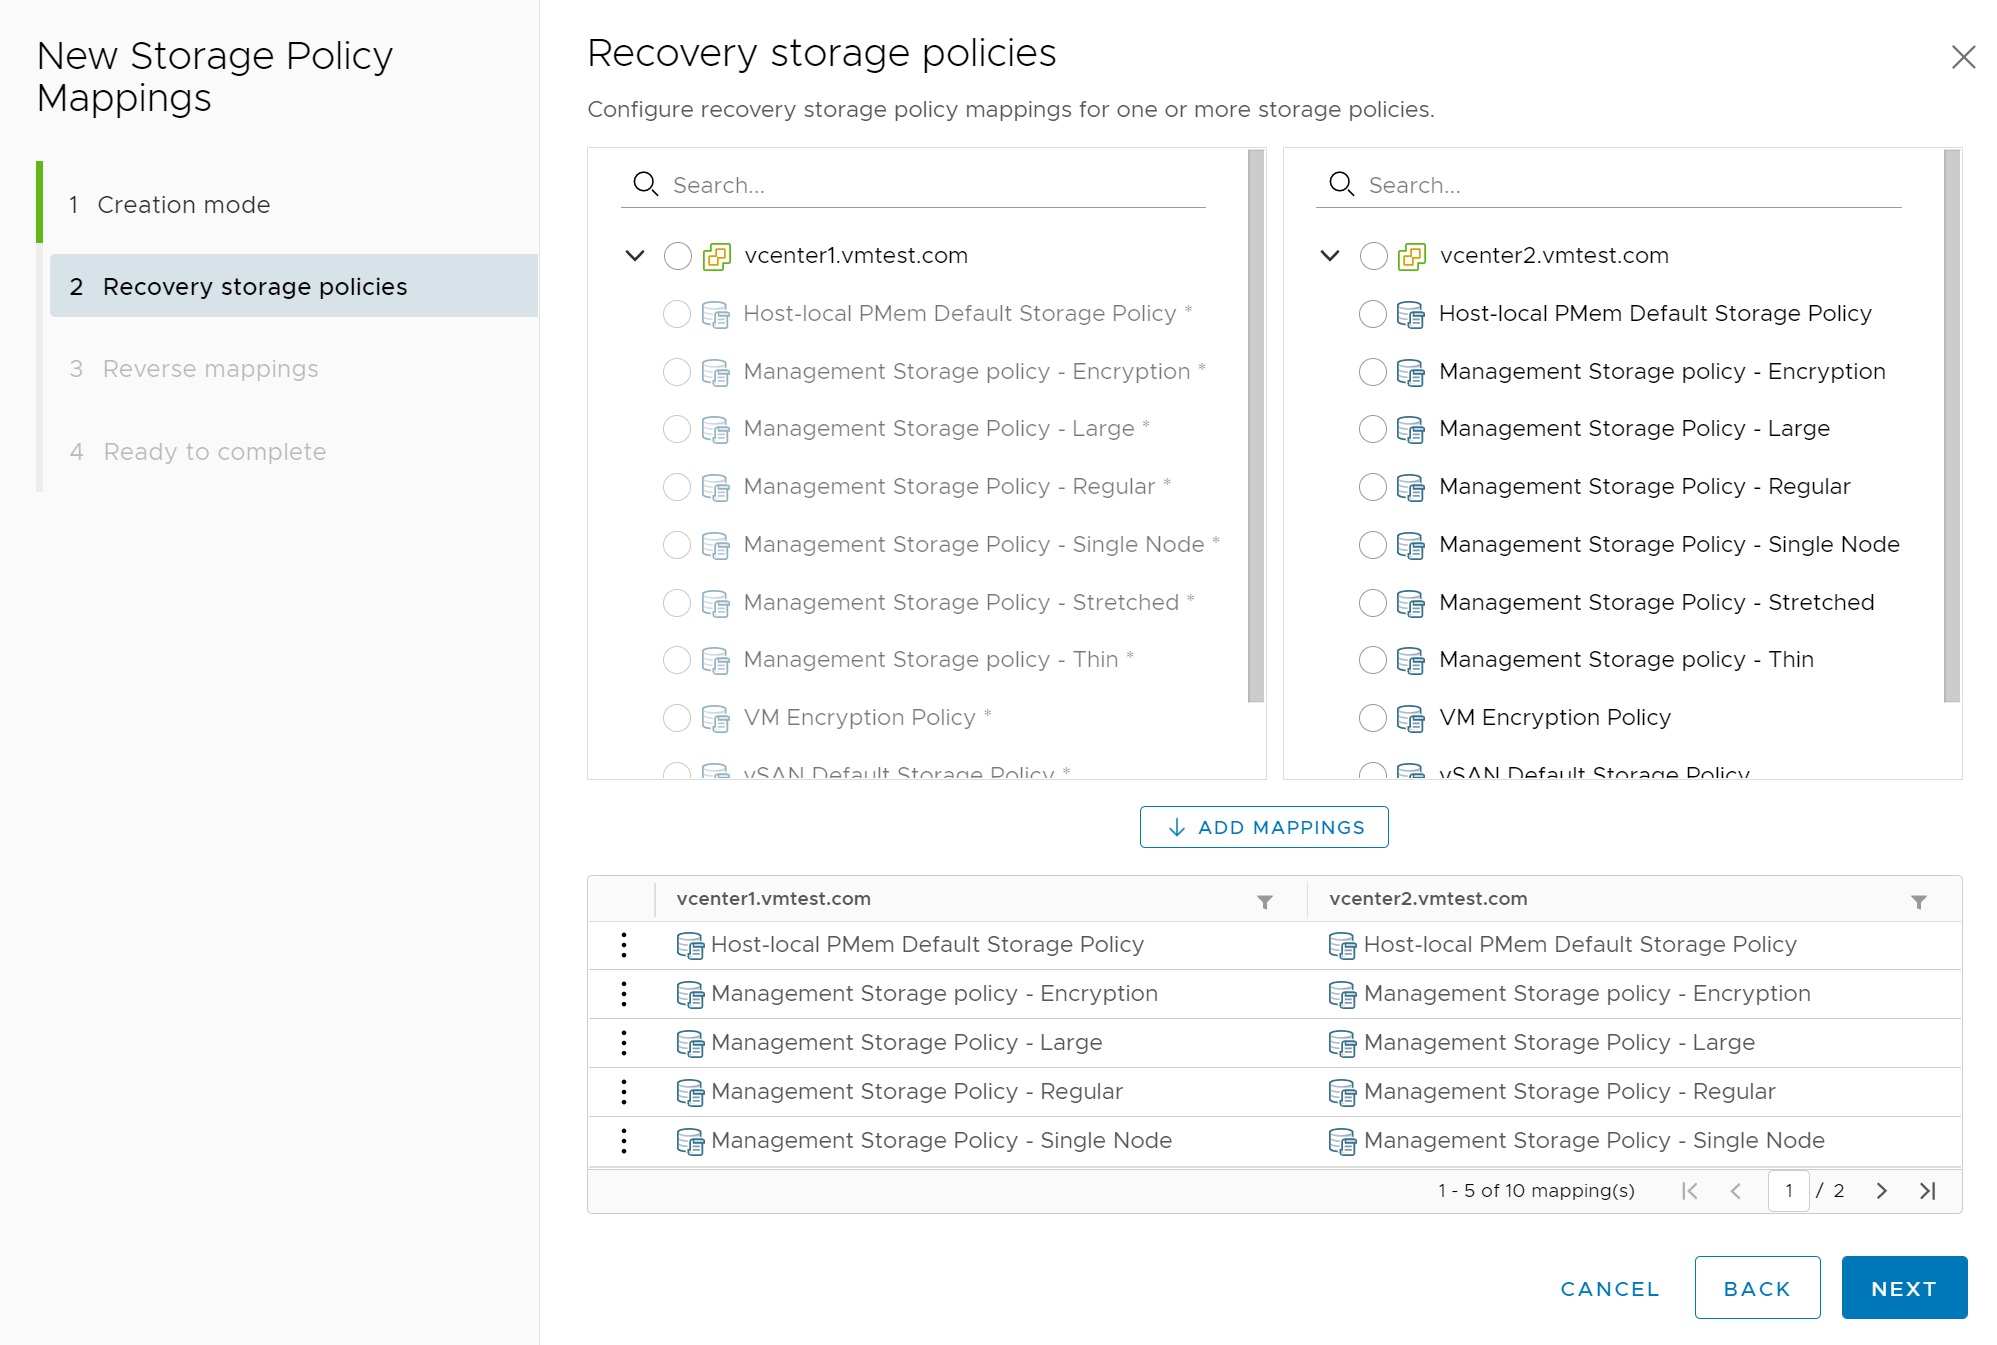
Confirm that the mappings have been added at the bottom of the screen
Next we confirm the reverse mappings

Finally we get to the review screen, confirm and the storage mappings will be created

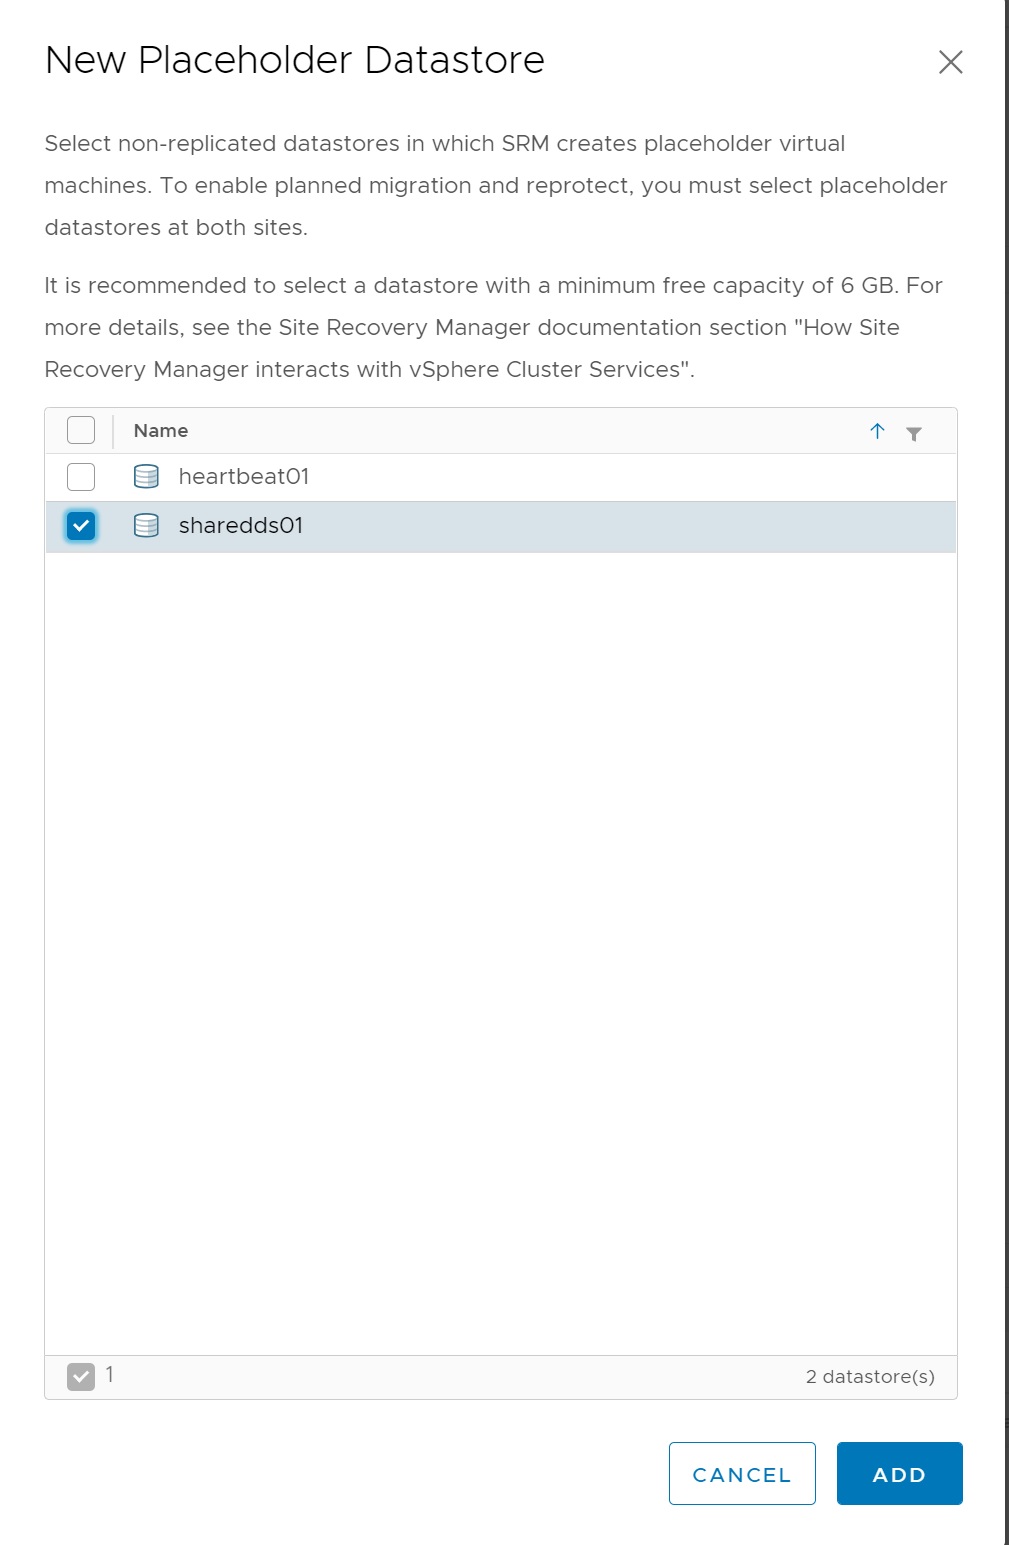
Lastly we move onto the PlaceHolder Datastores, click new
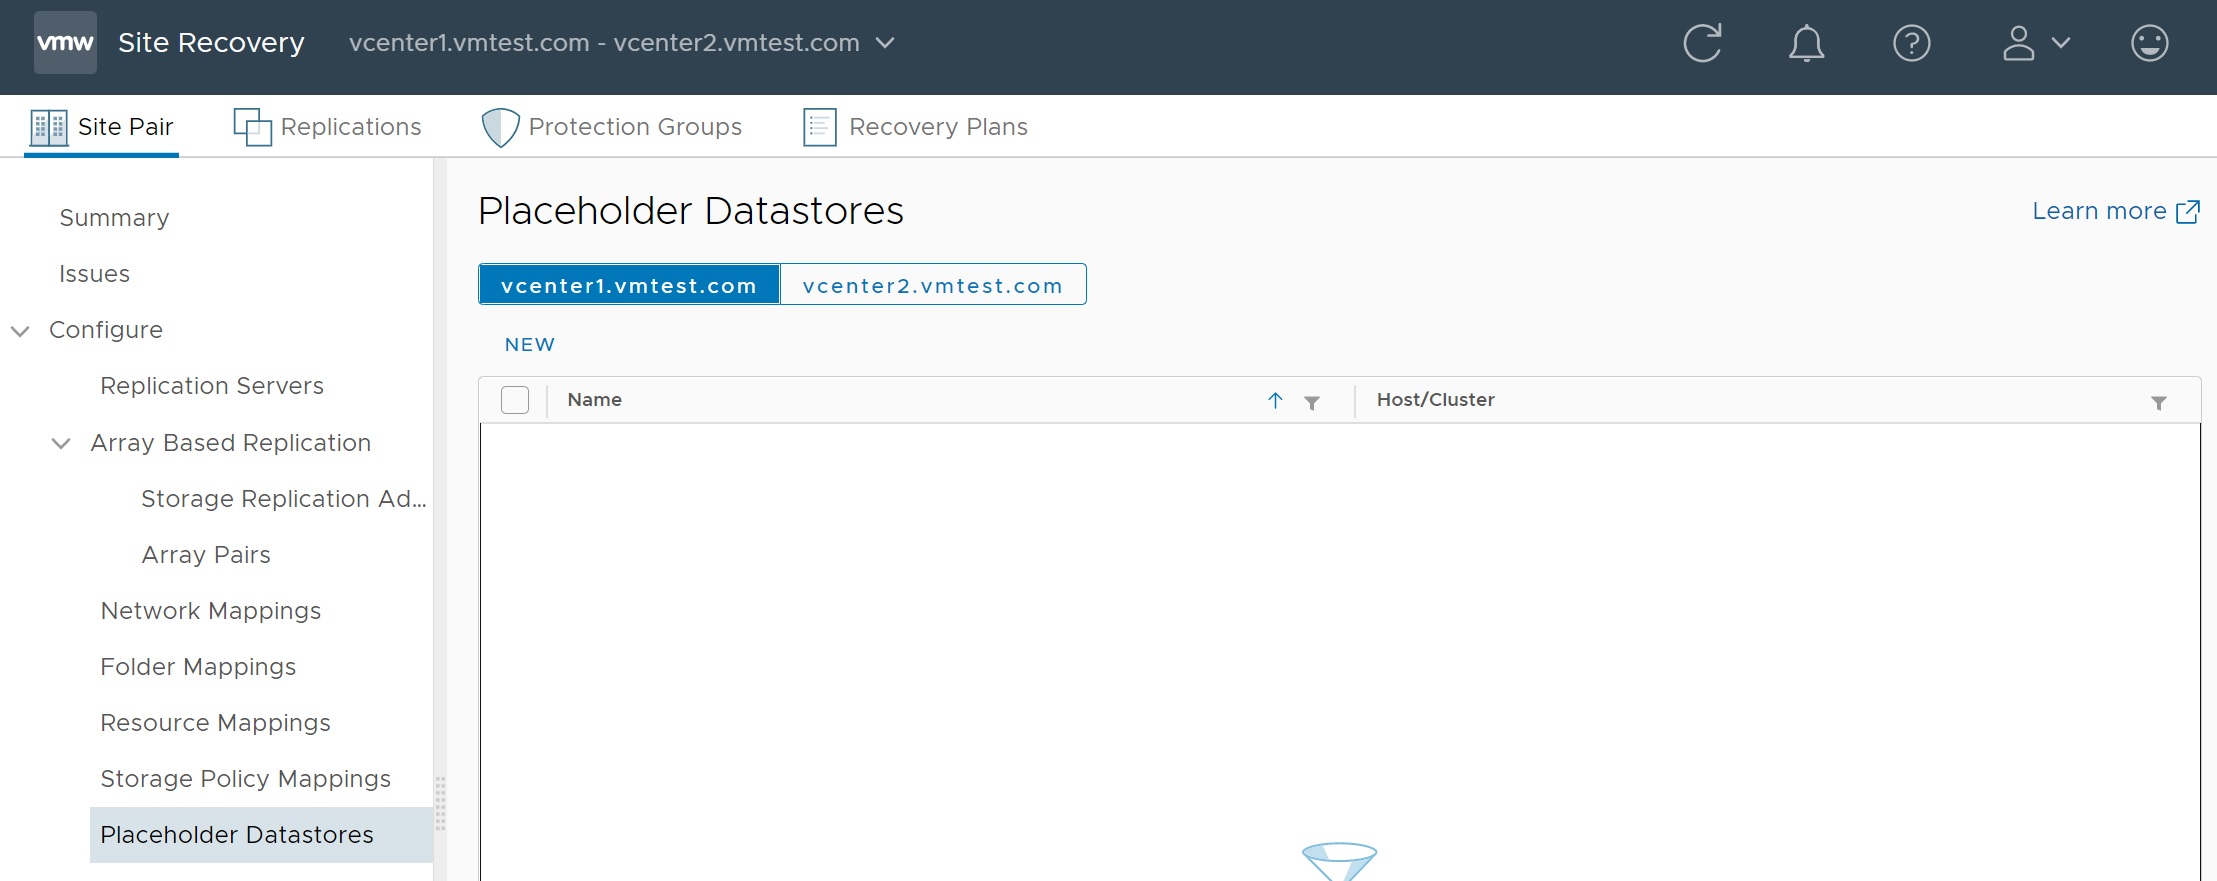
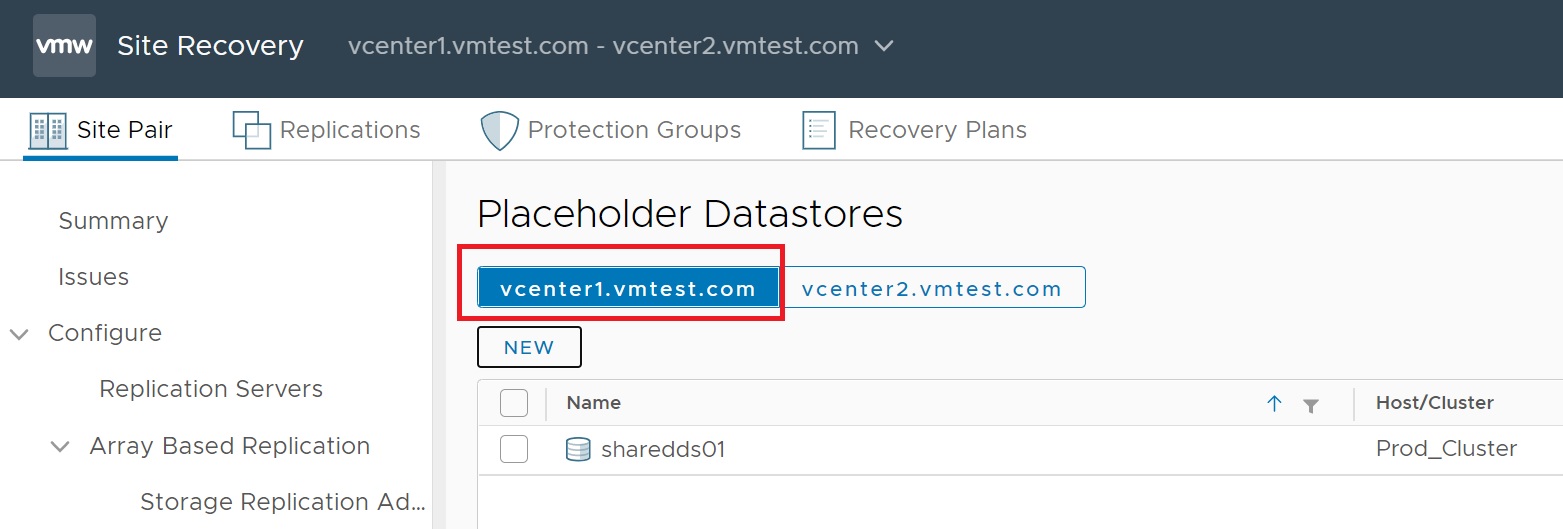
Select the datastore to which the VM will be replicated too, make sure you have enough free space, here I have selected my NFS datastore sharedds01
Notice that the datastore has now been added for vcenter1, however in the previous step there was no reverse mapping, so now we have to do this step for the other vCenter server vcenter2
I have selected vcenter2 server, click new and then add the datastore for that side of the cluster, in this case sharedds02 as you can see below

Just to recap if we go to Replications -> Outgoing we can see that redhat01 VM is being replicated across the two sites

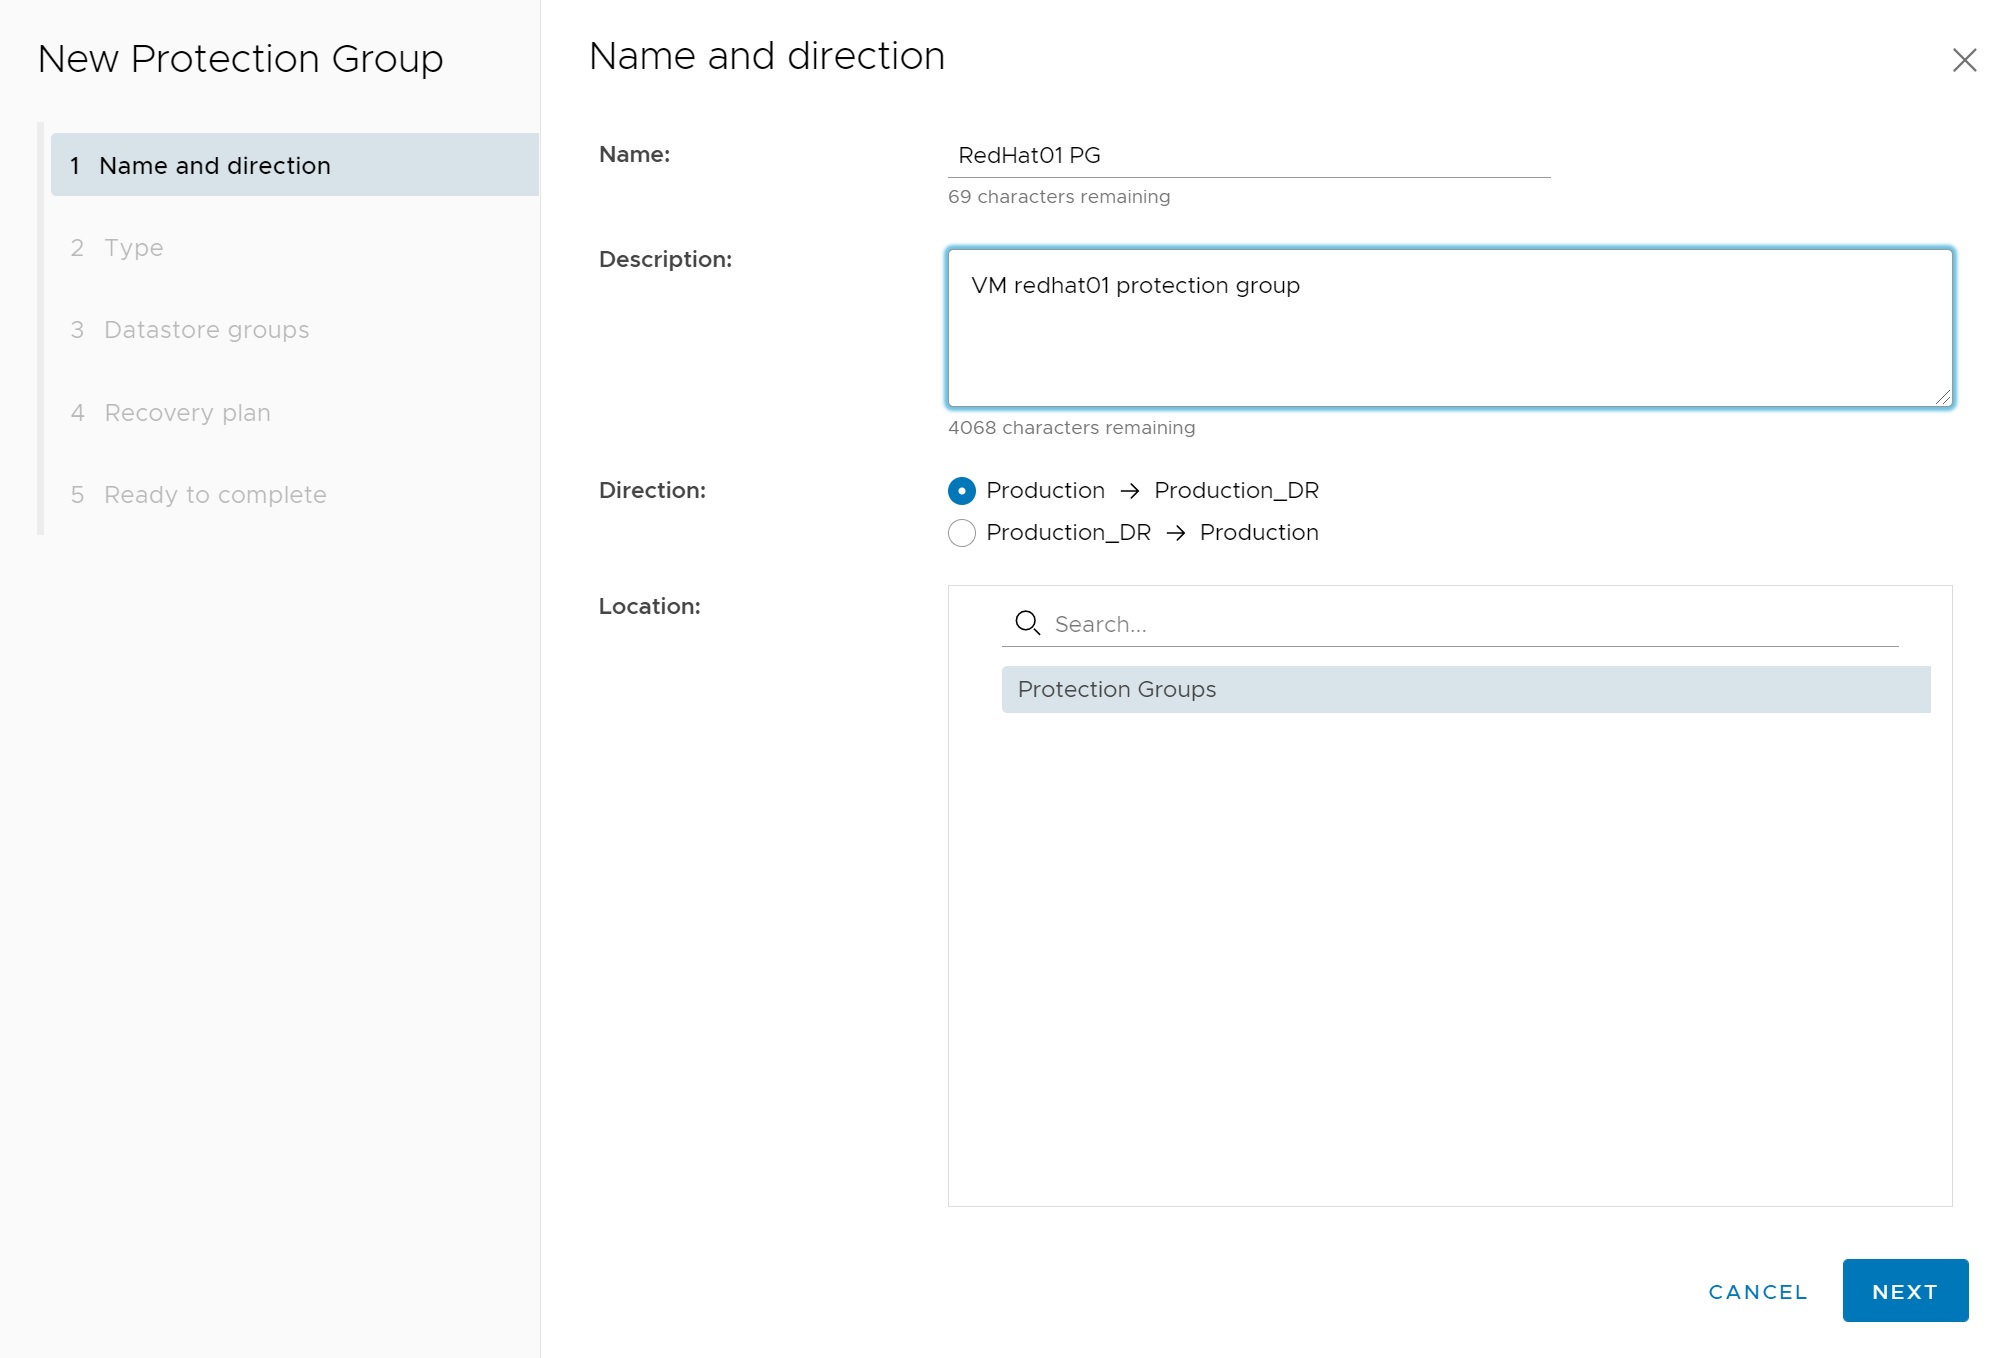
Let create a protection group for this VM, click Protection Group at the top and click NEW, we again will be taken to a set of setup screens

The first setup screen requires some details of the protection group itself, name, description, the direction of the protection, in my example redhat01 VM normally resides in the Production side with the replicated one on the Production_DR side, should Production go down then we can restart it on the Production_DR side.
In this screen you many options, will be selecting Individual VM's
- Datastore groups - protect specific datastores
- Individual VM's - we have an option to specify only the VM's we want protected
- Vitual Volumes - you have an option to protect virtual volumes which i have not covered
- Storage Policies - you can even protect very specific storage polices

In my example I have only one VM setup, but select as many VM's as you like making sure, you have enough data storage to handle the replicated VM's

You have an opportunity to either use an existing plan or create a new or defer the plan to later, as I do not have a plan yet I will create one, I enter a plan name which is specific to this one VM

We then get to the review screen, click Finish to create the protection group.

Return to the protection group main screen we can see that the protection group has been created, we can also see that there is an issue, click the protection group to get more details

On the protection groups main page we can see clearly there is an issue, again we need to keep drilling down to find what the issue is, but before we move on this screen is important as this is there you can execute the recovery plan, see that VM's or datastores are in the plan and get history on the plan to see when it has tested or invoked.

I have now fixed the error and we can now see that the protection group is in a OK status

Looking at the protection group in more details we can see we can edit, move or even delete the plan, as mentioned above we can even test the plan which I will be doing later in this section.

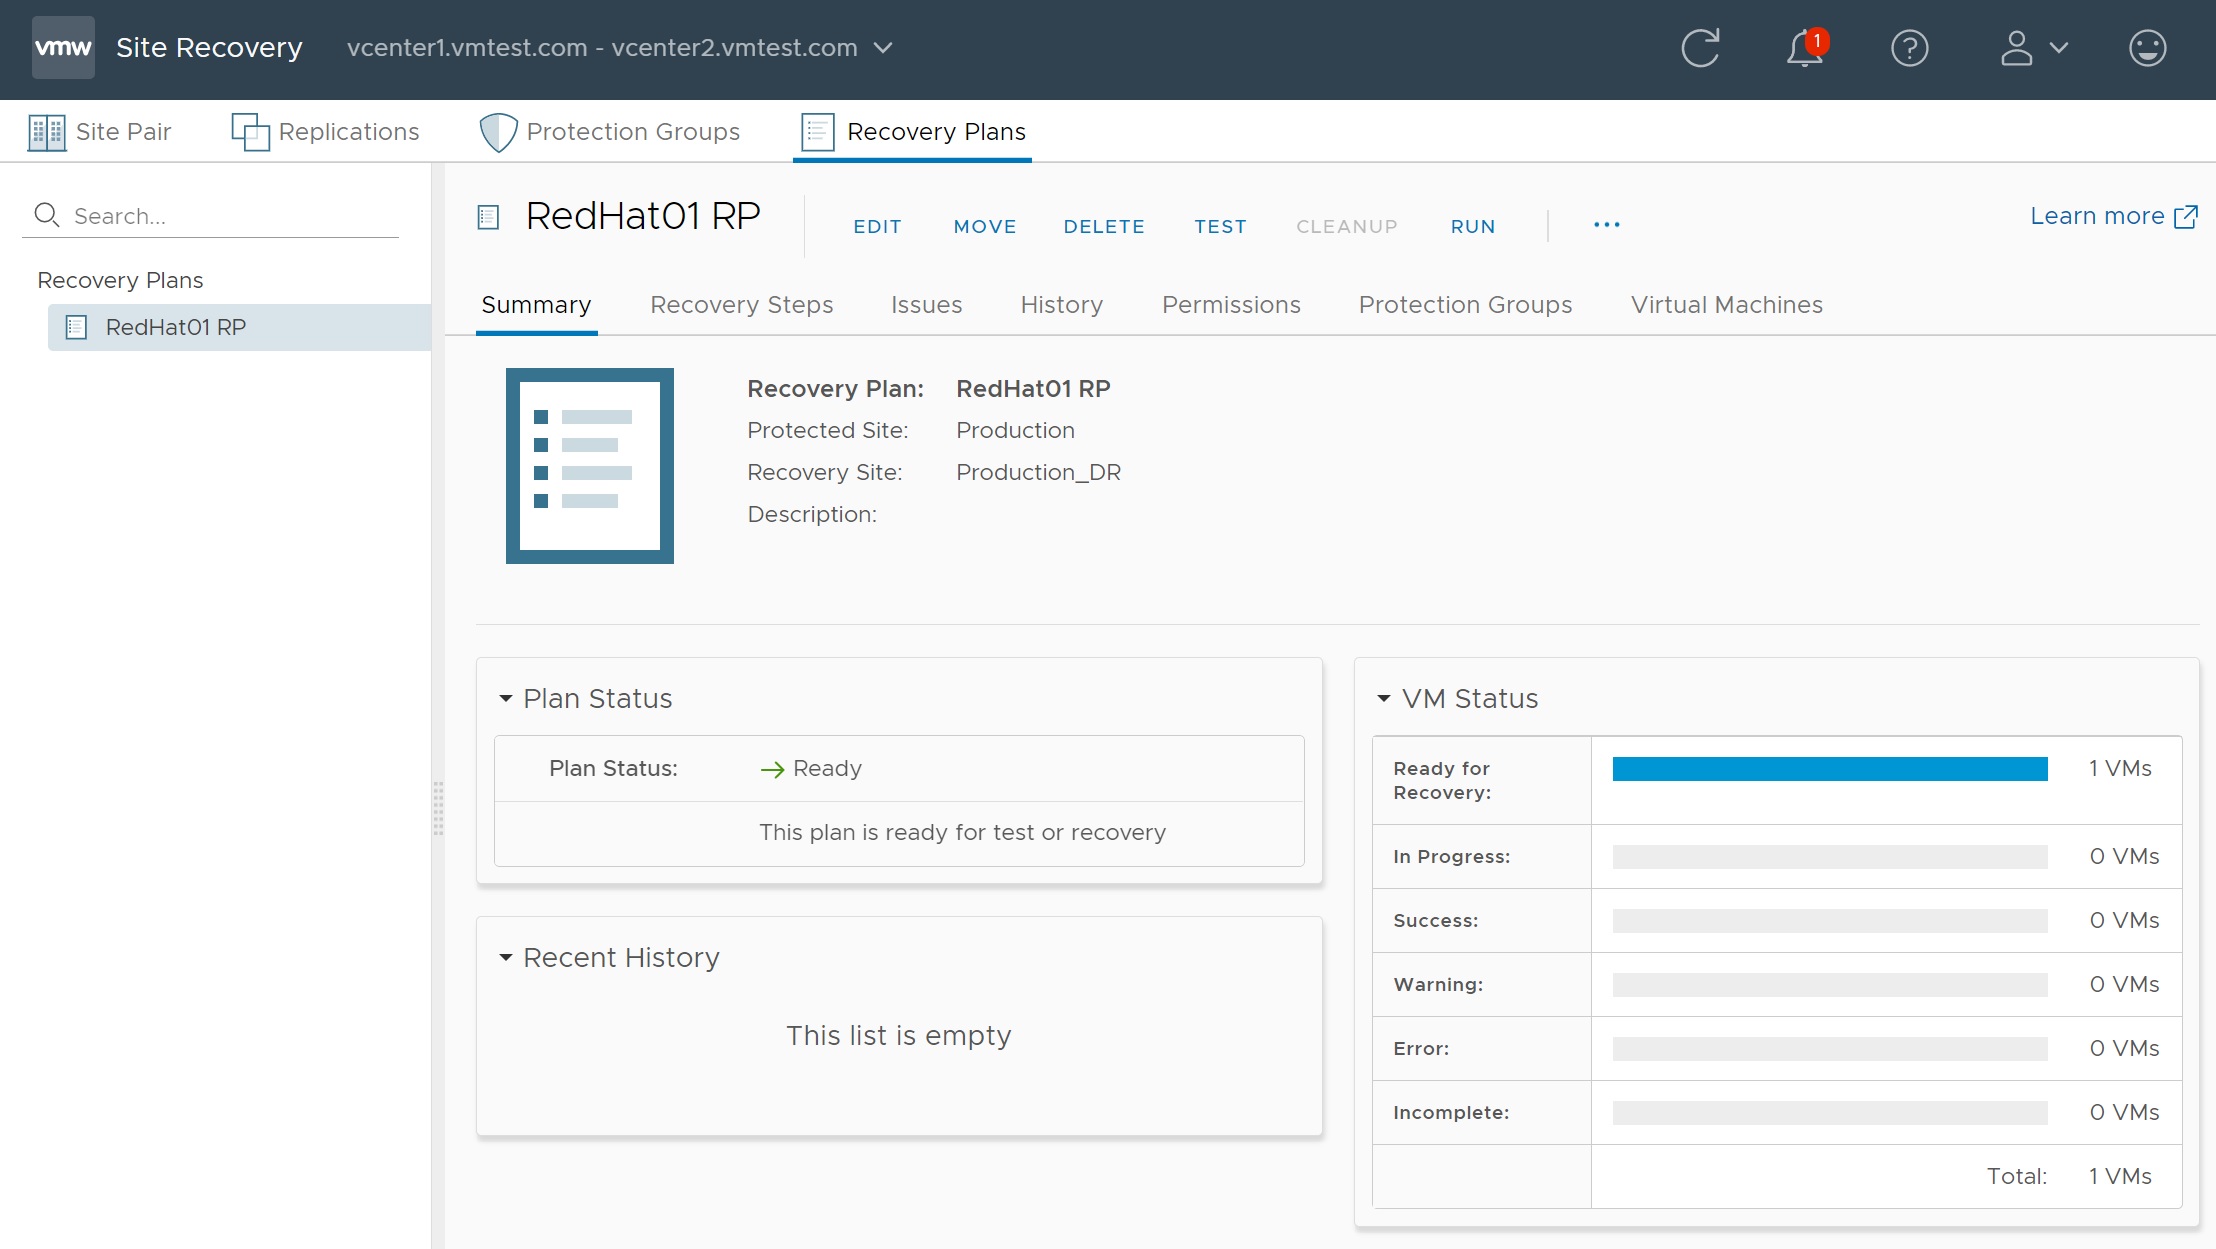
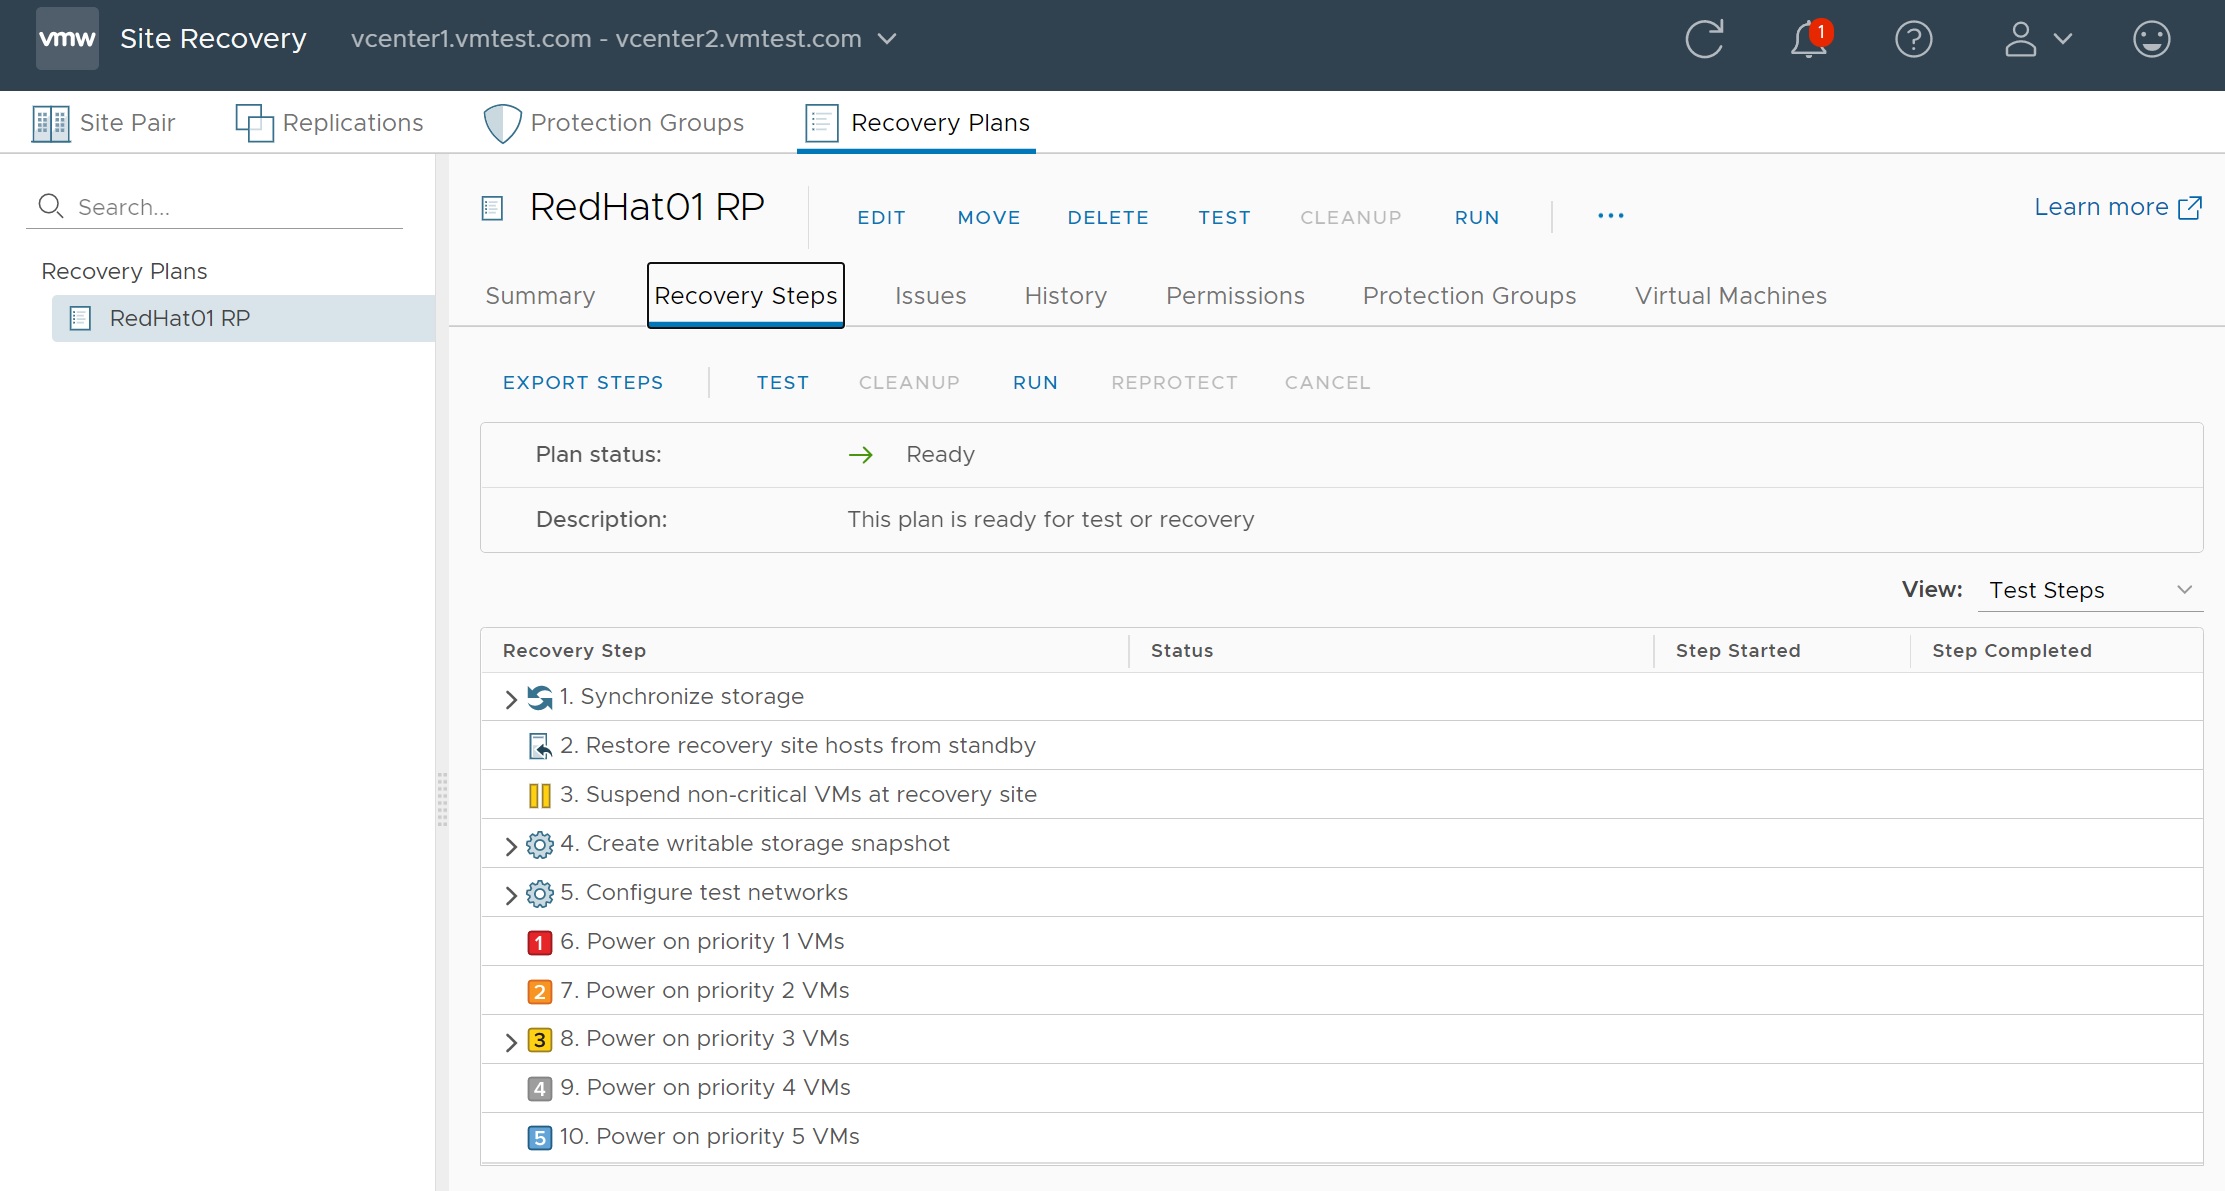
You can also view the recovery plans by selecting the Recovery Plans tab at the top, here you can see the recovery plan I created earlier, so you can create specific plans here and then attach them to a protection group later

By clicking on the recovery plan we are taken to the plan itself which gives the details of the plan, here we can also test or invoke the plan (or even edit/delete), if you do invoke or test notice the VM status display at the bottomright-hand corner, you can use this to get the progress, its very useful for very large VM's which might take a bit of time to cutover.
The Recovery Step screen is useful for identifing issues and the progress of the cutover (or test) in greater detail
So lets test the recovery of redhat01 VM to the other site (or DC), select the Recovery Plans tab, then select the RedHat01 RP plan (or the one you created), then select the Recovery Steps and the Test link

We are taken to a confirmation screen, notice that it states we are invoking a test only and details on what is going to happen, one VM to be tested
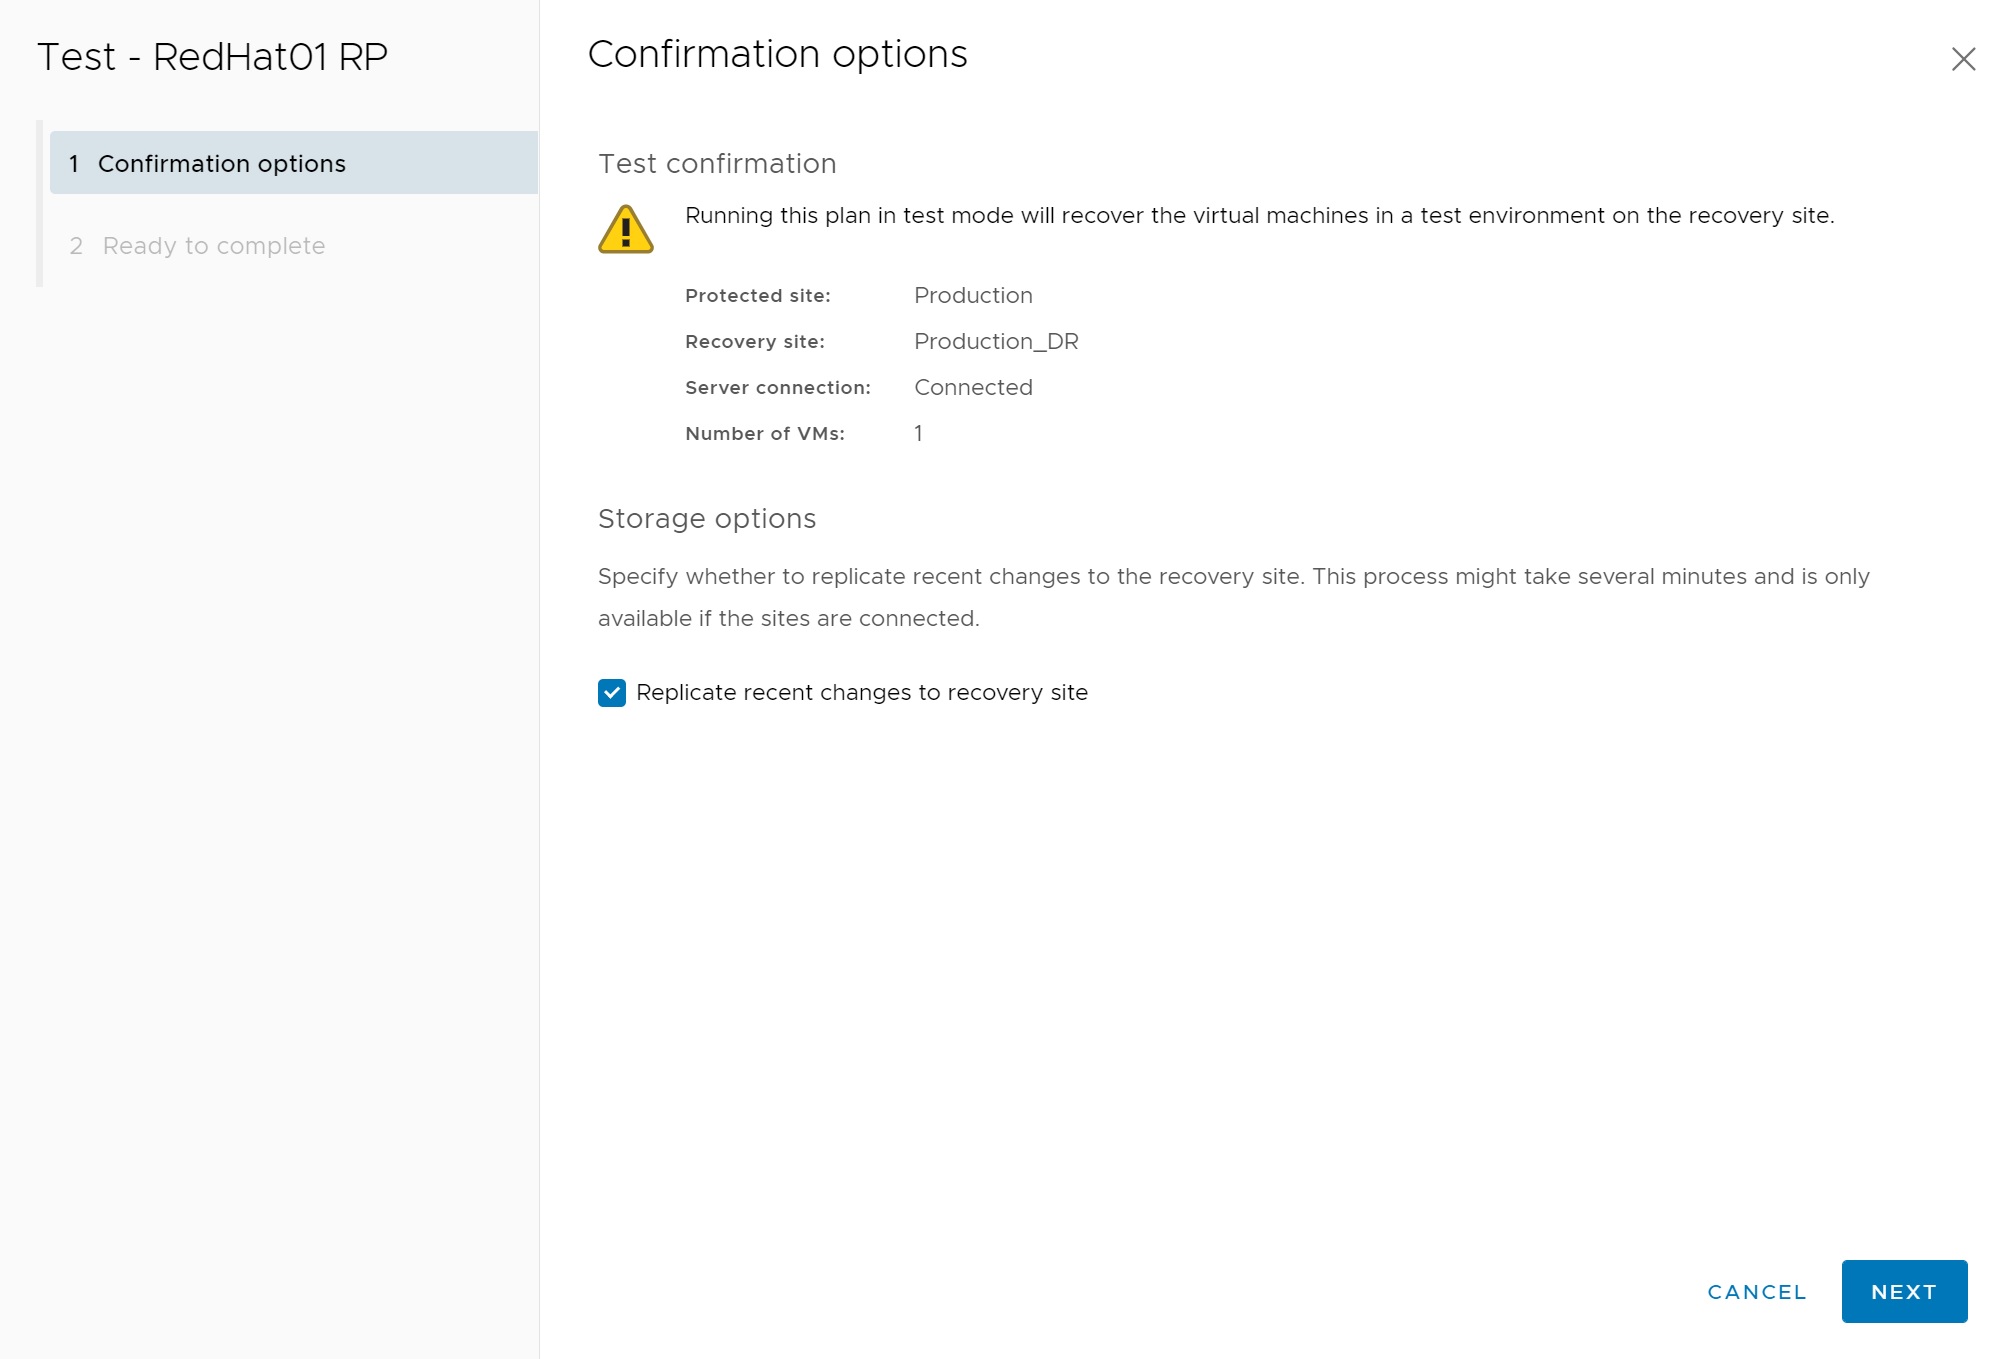
Next we get a review screen, click Finish to start the test

Returning back to the Recovery Plan -> Recovery Steps screen we can start to see the progress of the recovery to the other site.
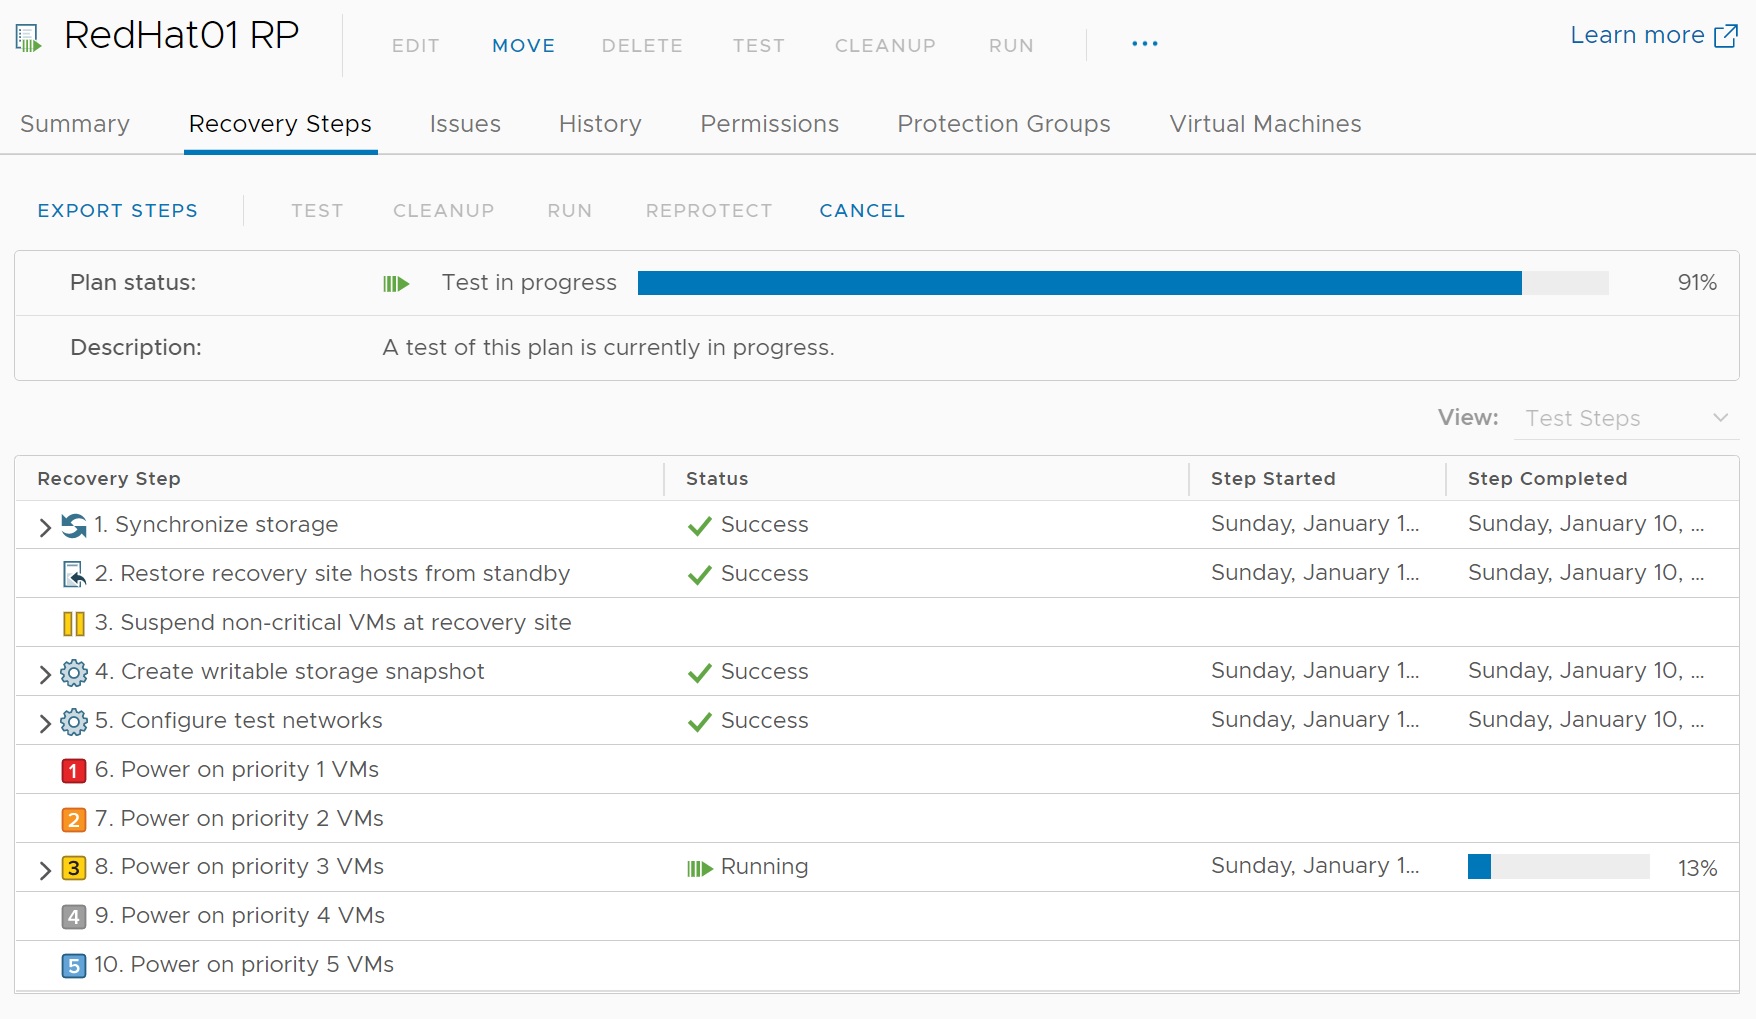
You can even expand the recovery steps tabs (arrow) to get further details on what is happening

Eventually the test will complete as per the Plan status seen below, all the steps where completed successfully

Going to the vCenter2 we now see that a replicated redhat01 VM has been copied and is up and running, remember that we asked to create a separate network when testing VM's which is why you see 2 IP address, so this won't impact the LIVE redhat01 that is currently running on the other production cluster, now you can login to this server and check the RPO times and that files are being kept up to date by the replication process, etc.

If you look at vcenter2 -> Networks you should be able to see the temporary test network that has been setup for this test VM.

Once you have finished, it's time to cleanup and remove the test VM, return to the Recovery Plan -> Recovery Steps and click on the CLEANUP link as per below
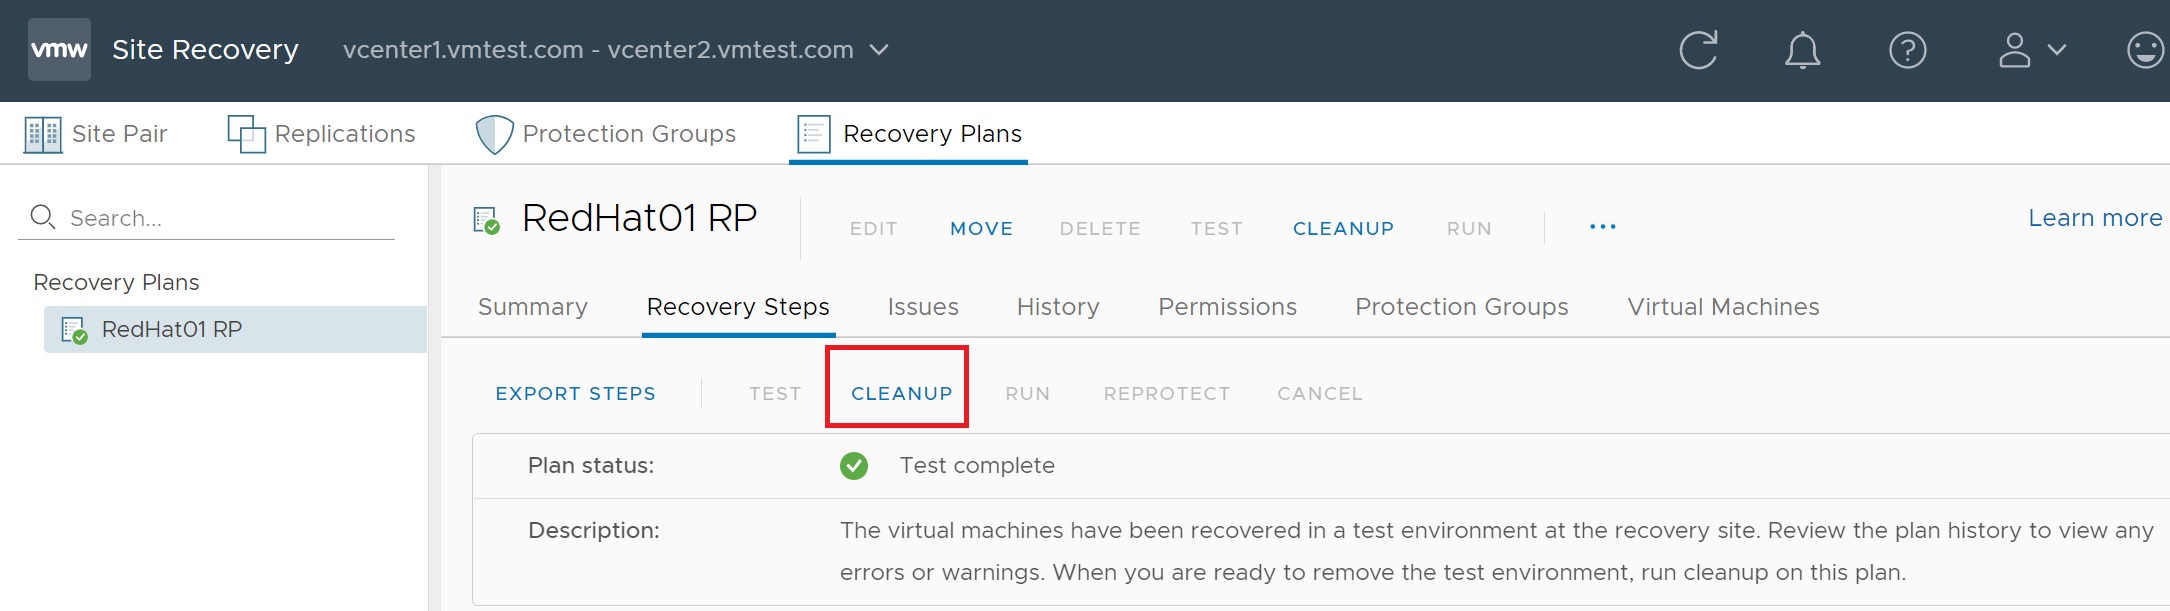
Again we get a confirmation screen, click Next to continue
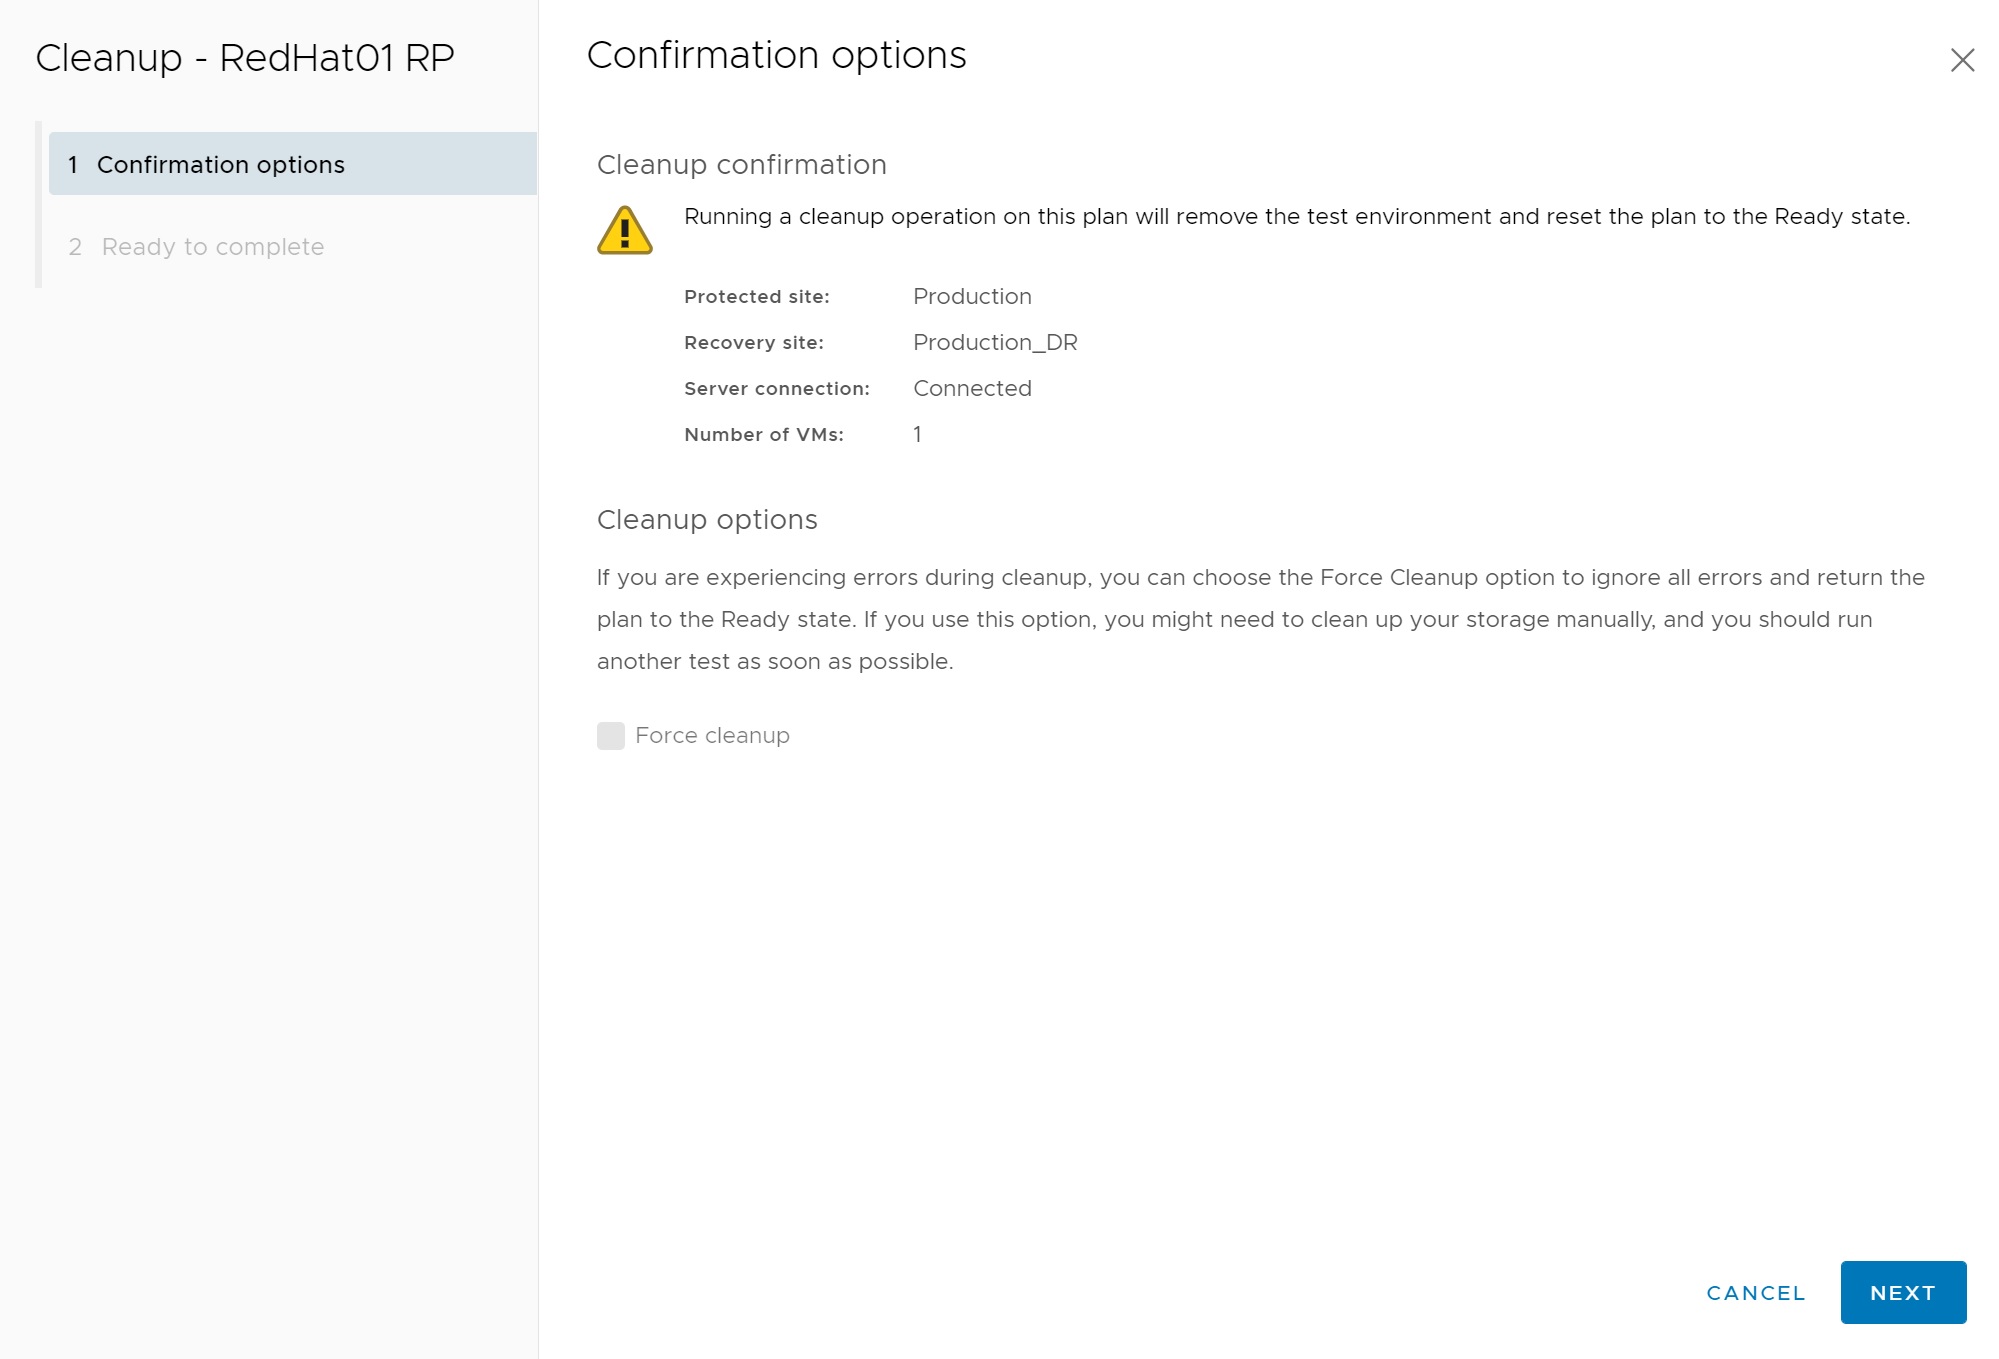
The review screen appears click Finish to remove the test redhat01 VM

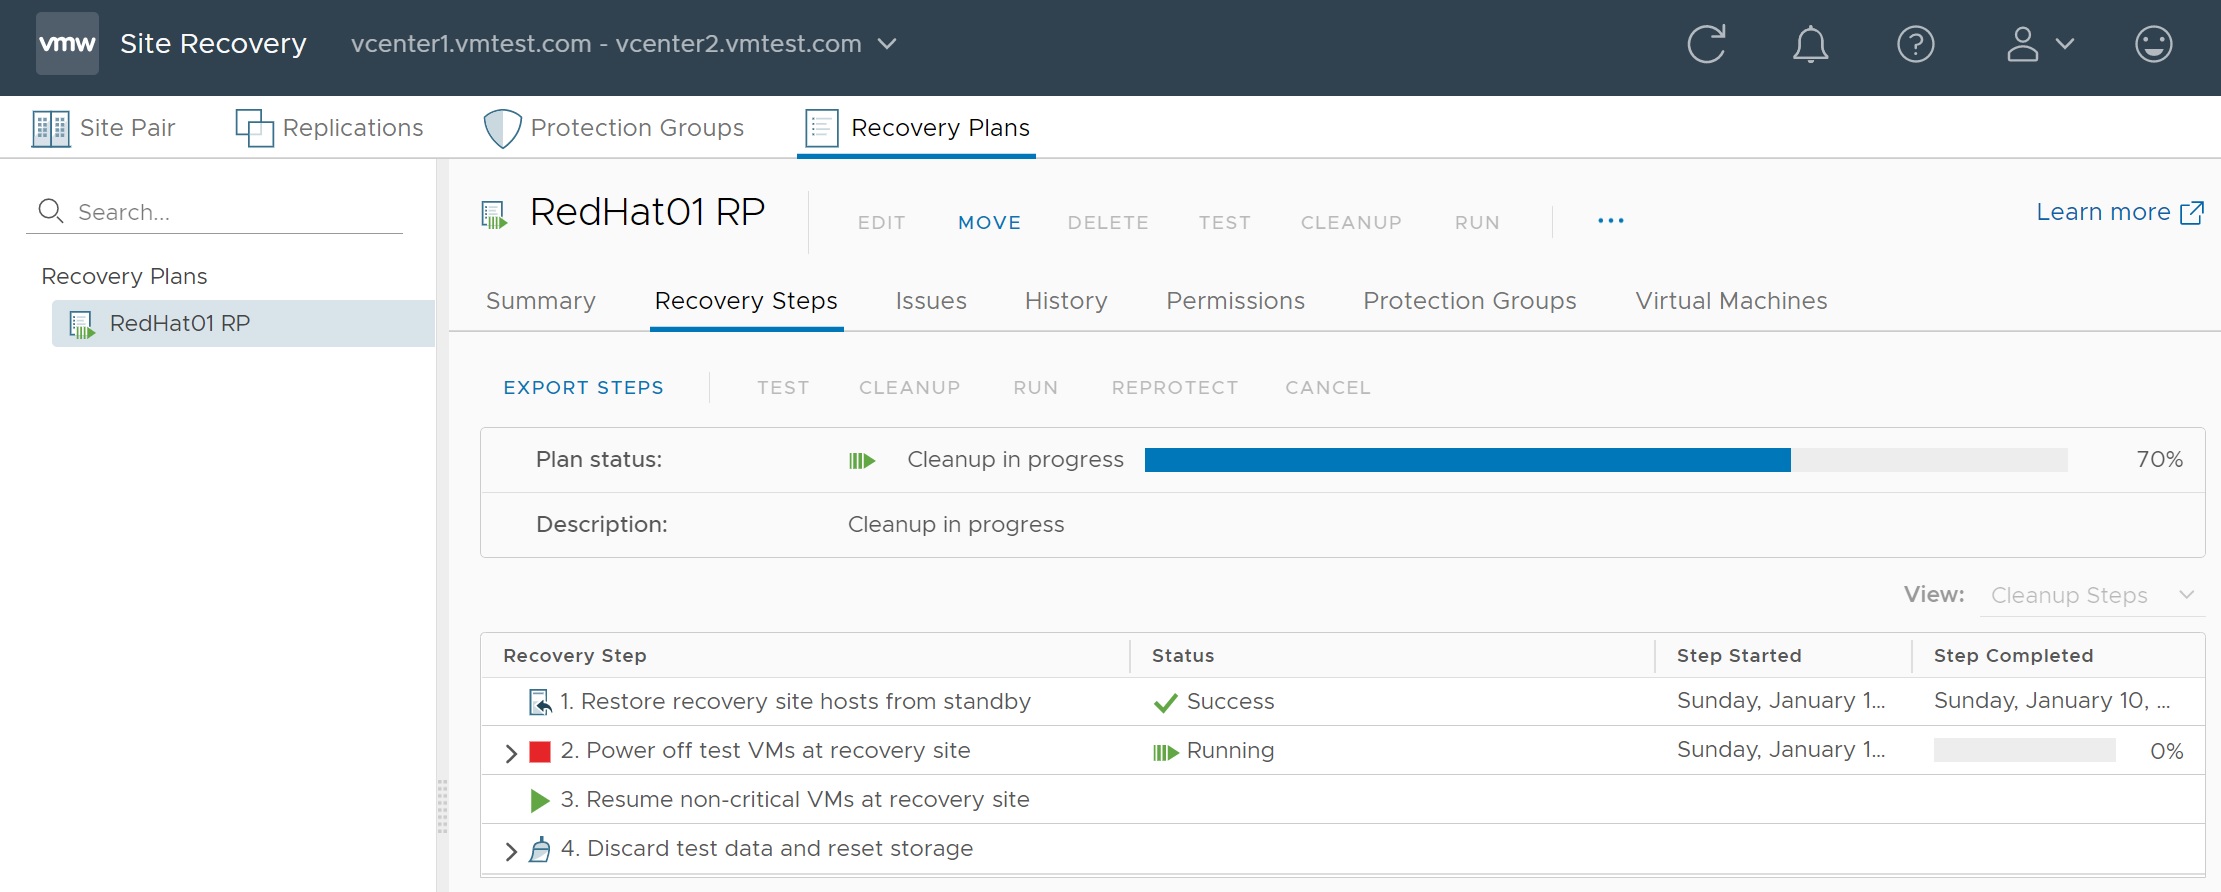
Returning to the recovery screen we see the progress of the cleanup of the test redhat01 VM
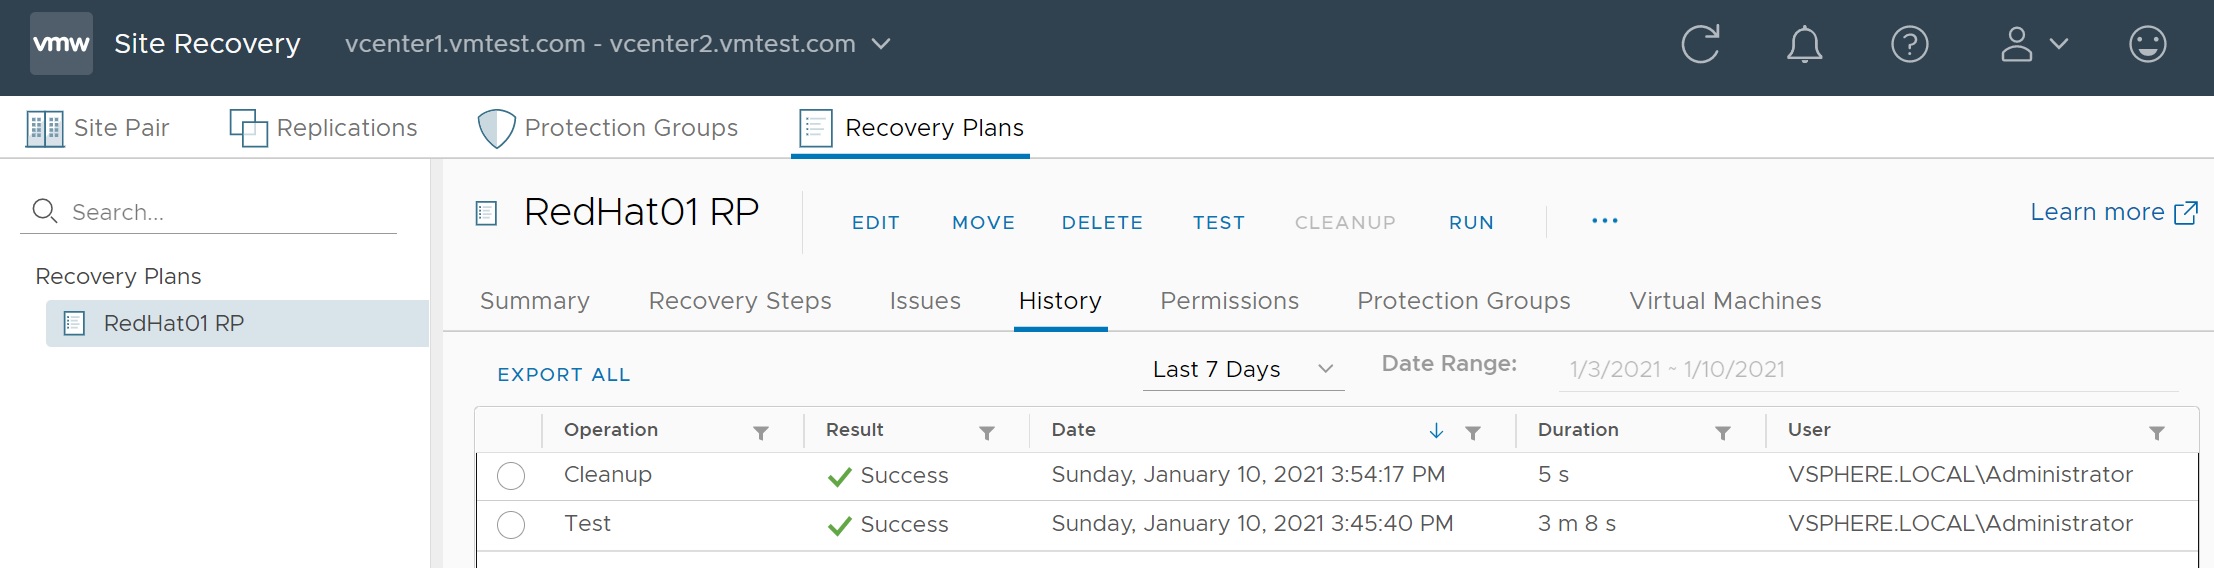
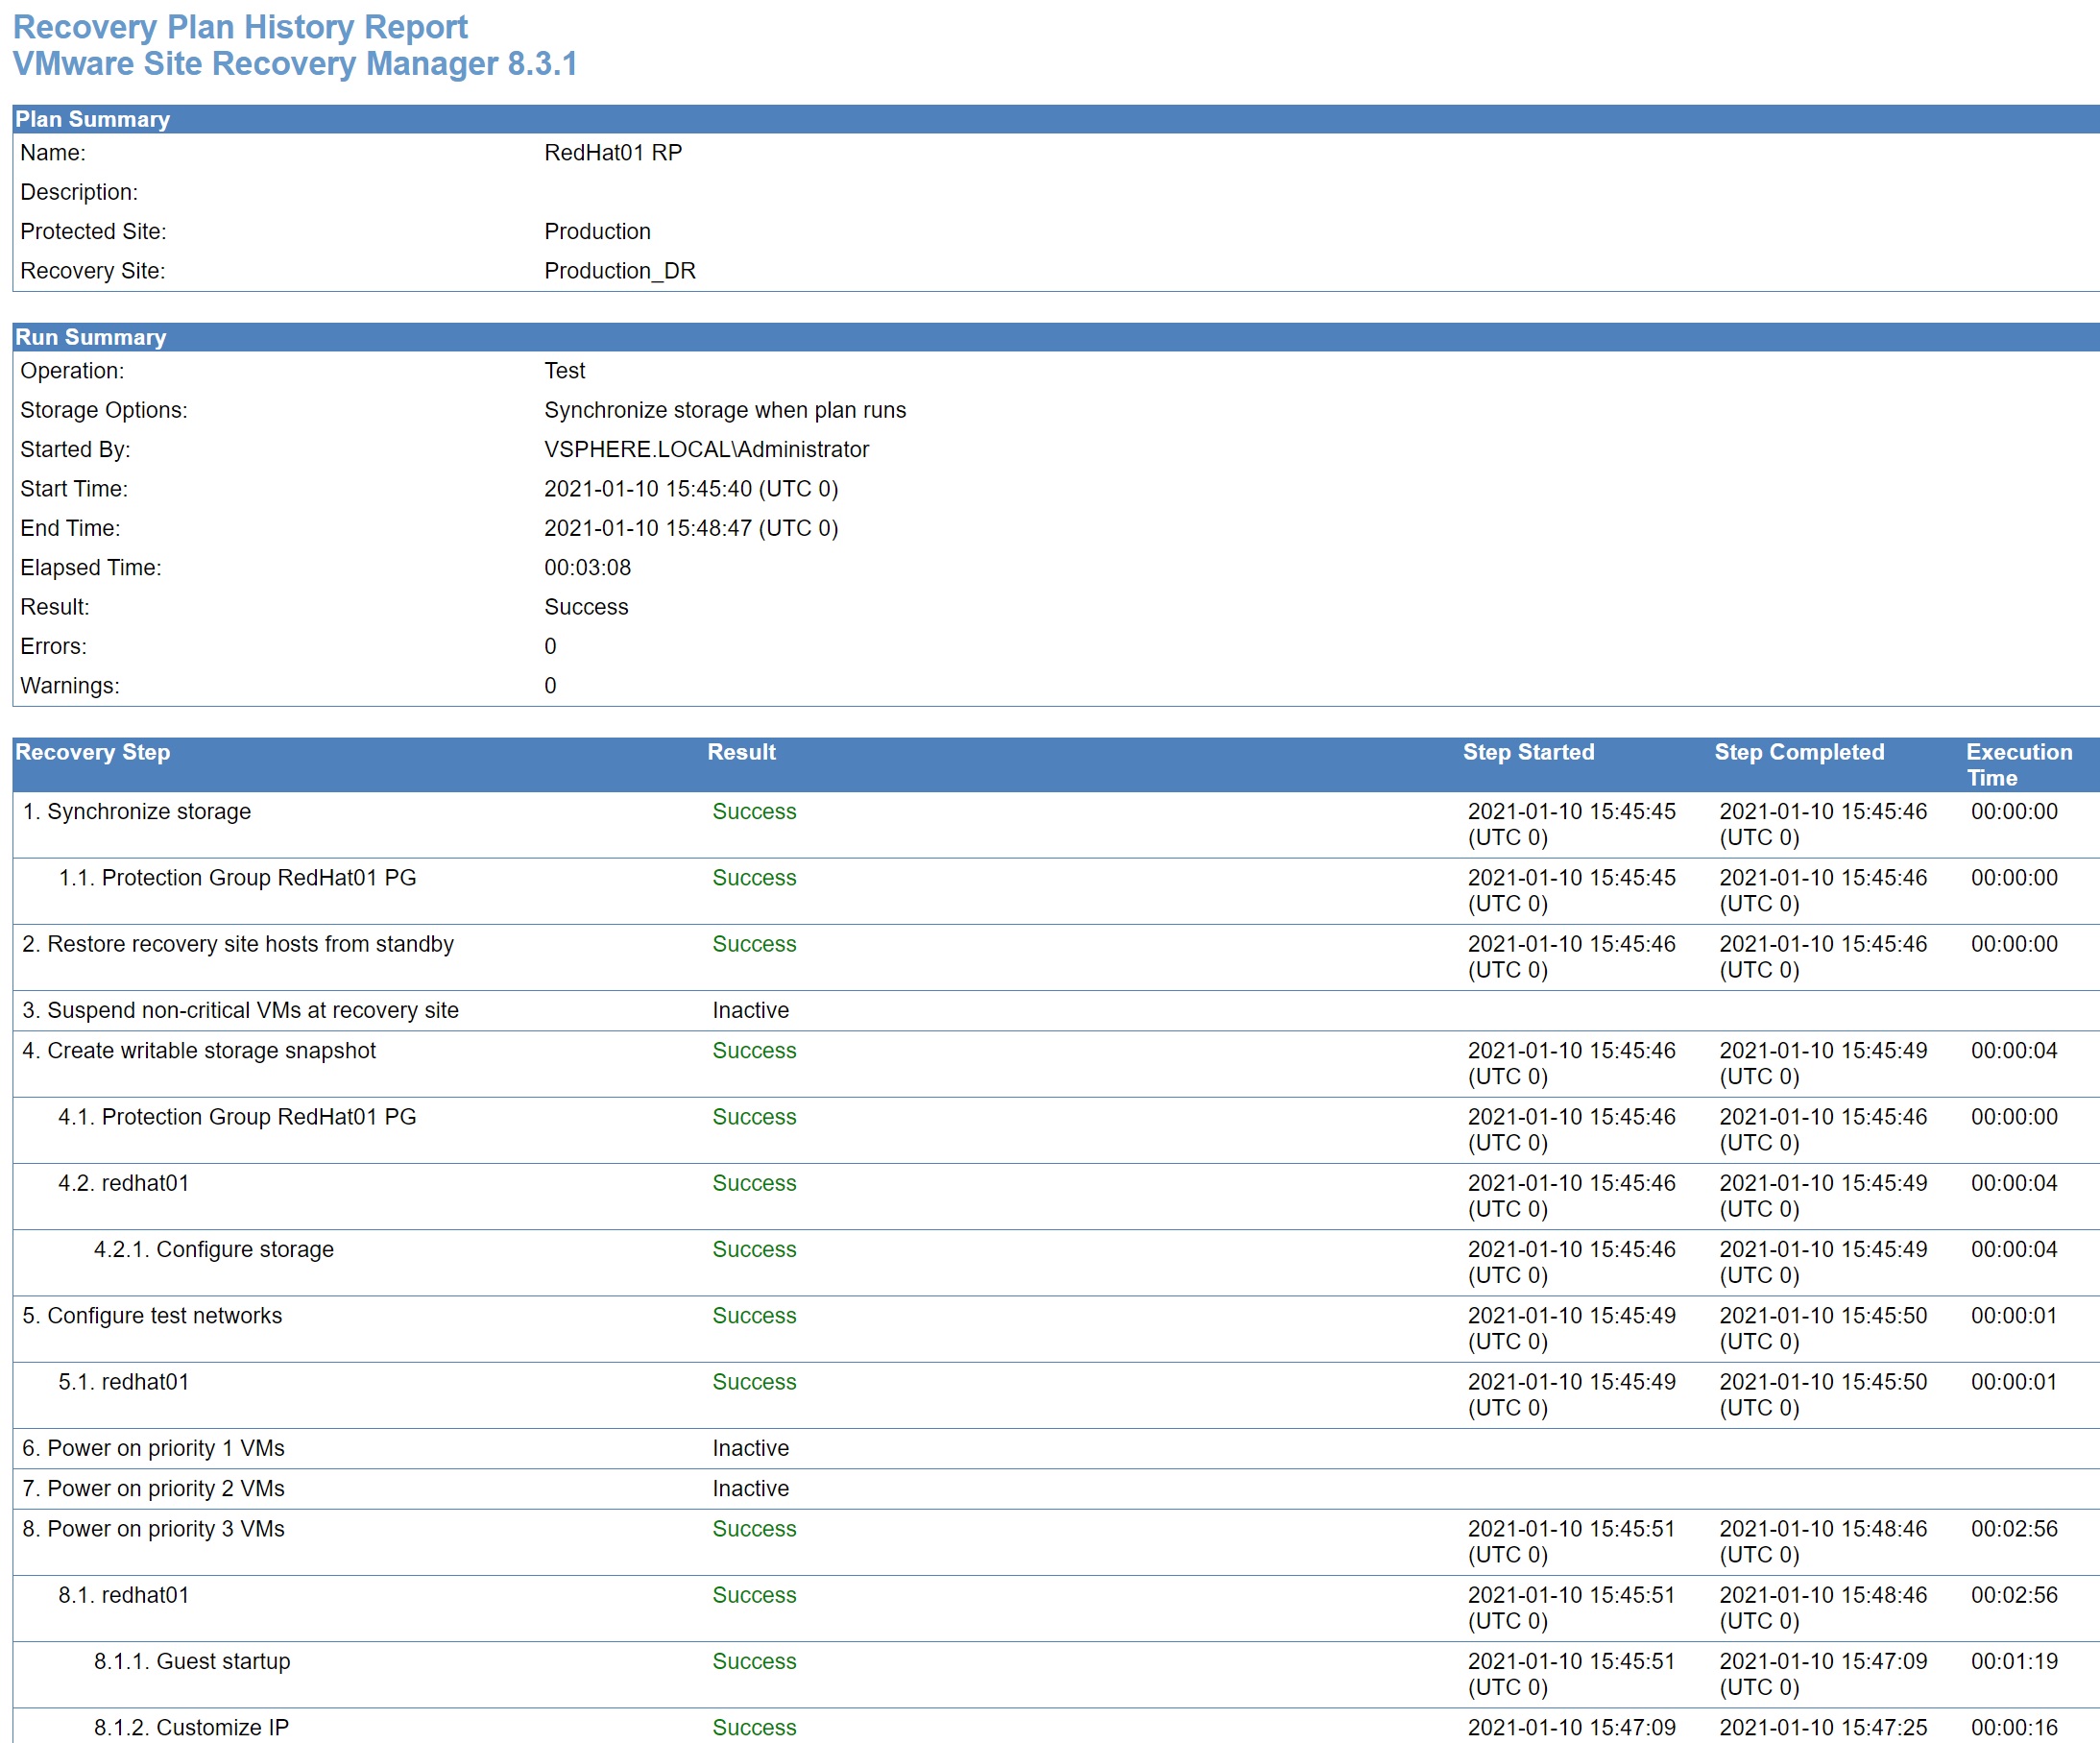
One handy screen is the history screen here you can see when the recovery plan was tested, cleaned up, etc.
You can even export the report for documentation purposes
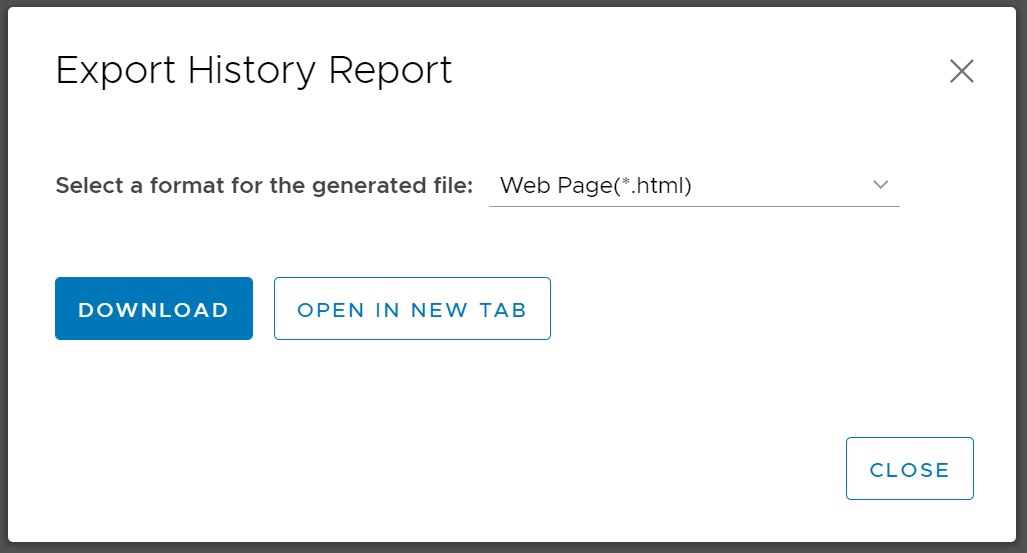
The report can be exported to various different formats, below is the HTML version.
As you can see there is a lot of work in involved in setting up a Site Recovery Manager server, but making sure that you use FQDN's helps the installation process, also make sure that the vCenter and Replication are setup and working before you start installing SRM. Once you have finished restart everything and confirm that it comes back, by default you get about 60 days licensing which gives you plenty of time to have a play around with some other features of SRM which I have not covered here.