vCenter Management
In this section I am going to cover the basic administration tasks of the vCenter, I will cover topices like
- User,Groups and Roles
- Licenses
- Client Plugins
- VMware support tools
- System configuration and Customer experience program
- Lifecycle manager (very brief)
- Scheduling tasks
- Events
- Managament console
There are many more topics that I have not covered but the above are ones that you might use frequently.
I have already covered users regarding ESXi servers, etc in my ESXi server section VMWare security section, however here I look at users, group and roles in the vCenter itself. You can create users which have roles that allow the user to perform specific tasks within the vCenter itself, for example create VM's, create distributed switches, create data centers, etc. One thing to note with vCenter is that the permissions use a parent/child relationship, for example a cluster is a child object of a data center, a ESXi host is a child of a cluster, this is important to understand as you have the option to inherit the permissions into the child object, we will see this later.
First we need to go to the menu -> administration screen
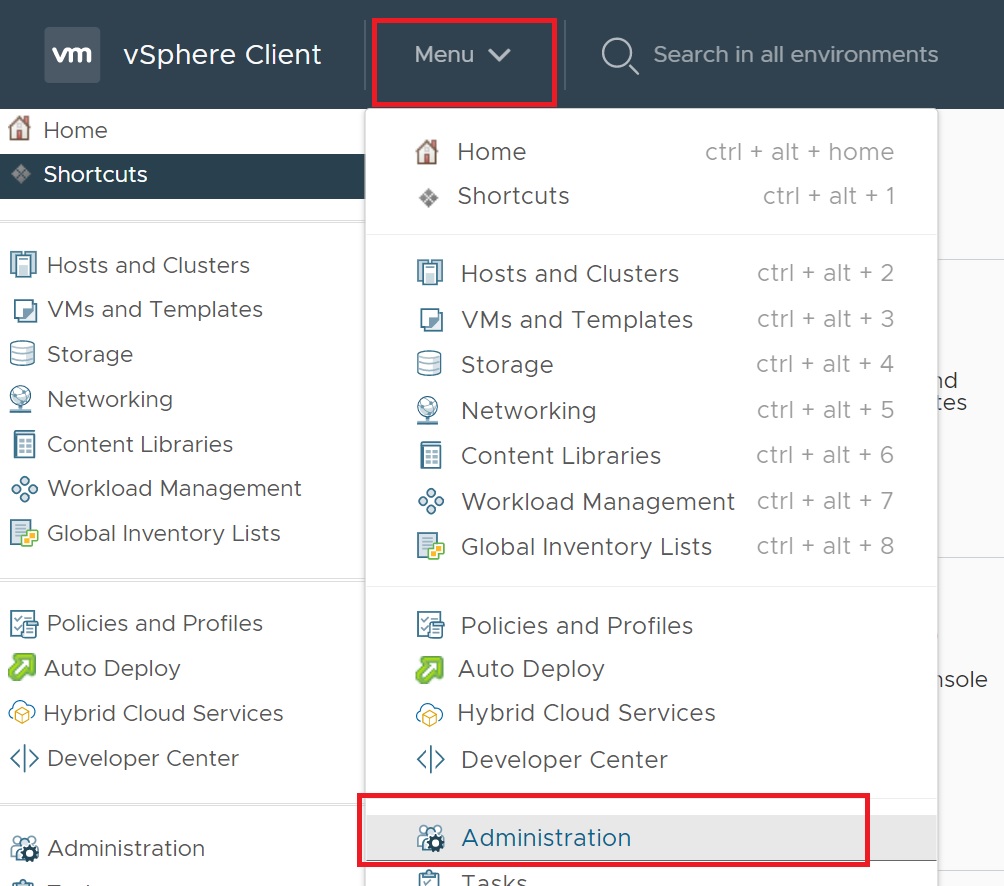
There are two sections we will cover, access control and single-sign on (usergroups and roles), let first create a test user, in the single-sign on section select User and Groups, this screen is split into two tabs Usaers and groups. When we first installed the vCenter we specified a domain, in my case vsphere.local, slecting this from the domain drop down you can see all the users that were created during the installation, to create a new user click on the ADD link

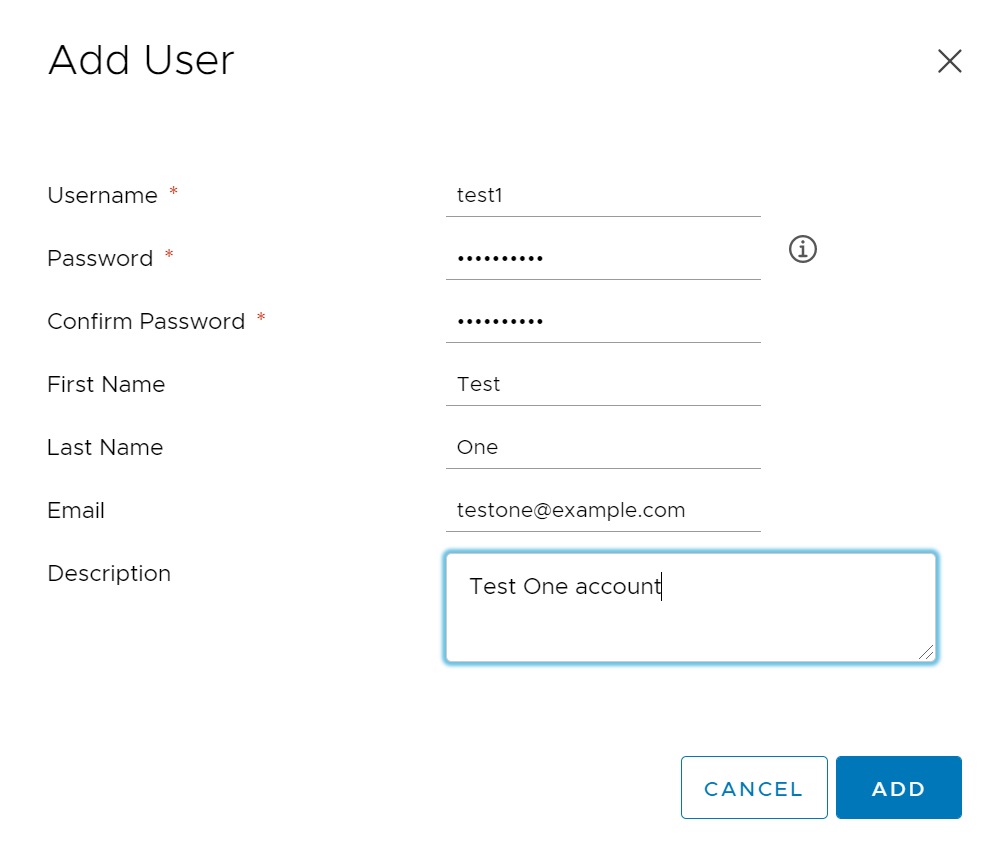
We are taken to a user setup screen, we enter the user details and password, then click add to create the user
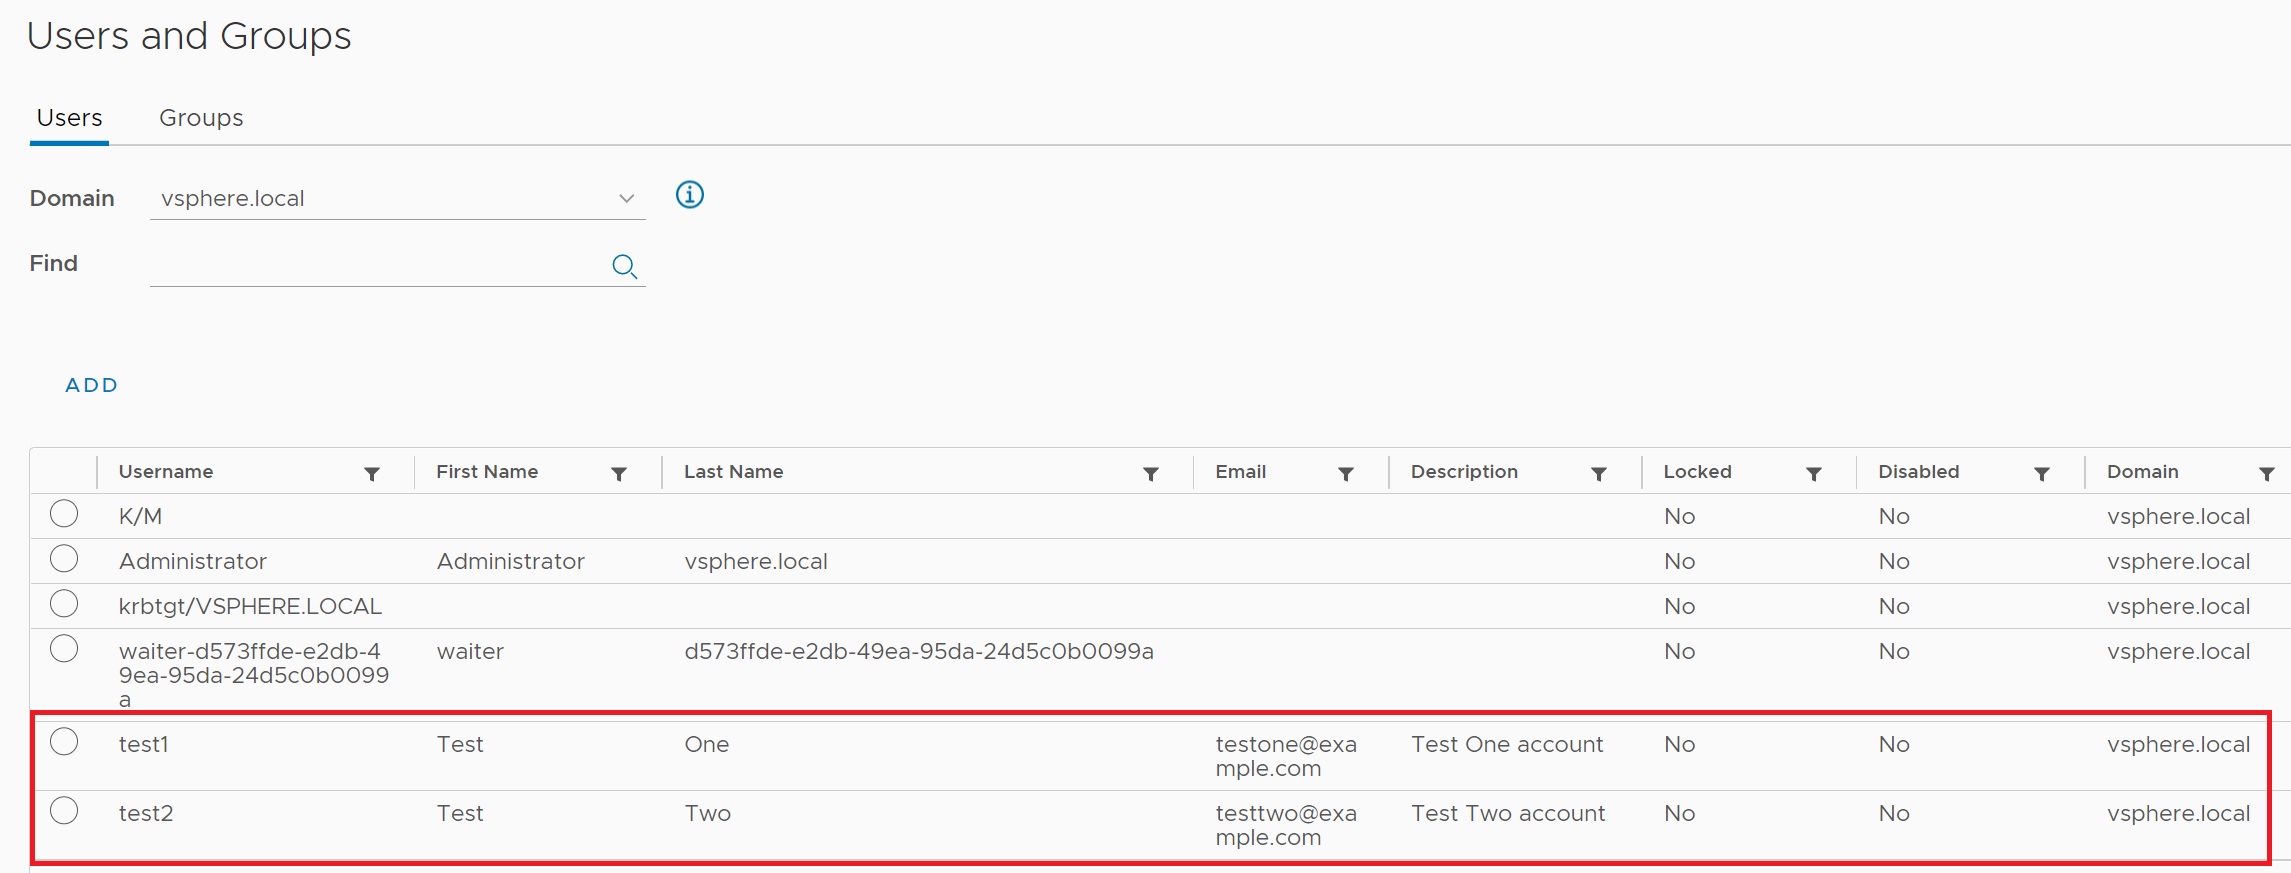
Returning to the main user screen you can see that I have created two test user accounts test1 and test2
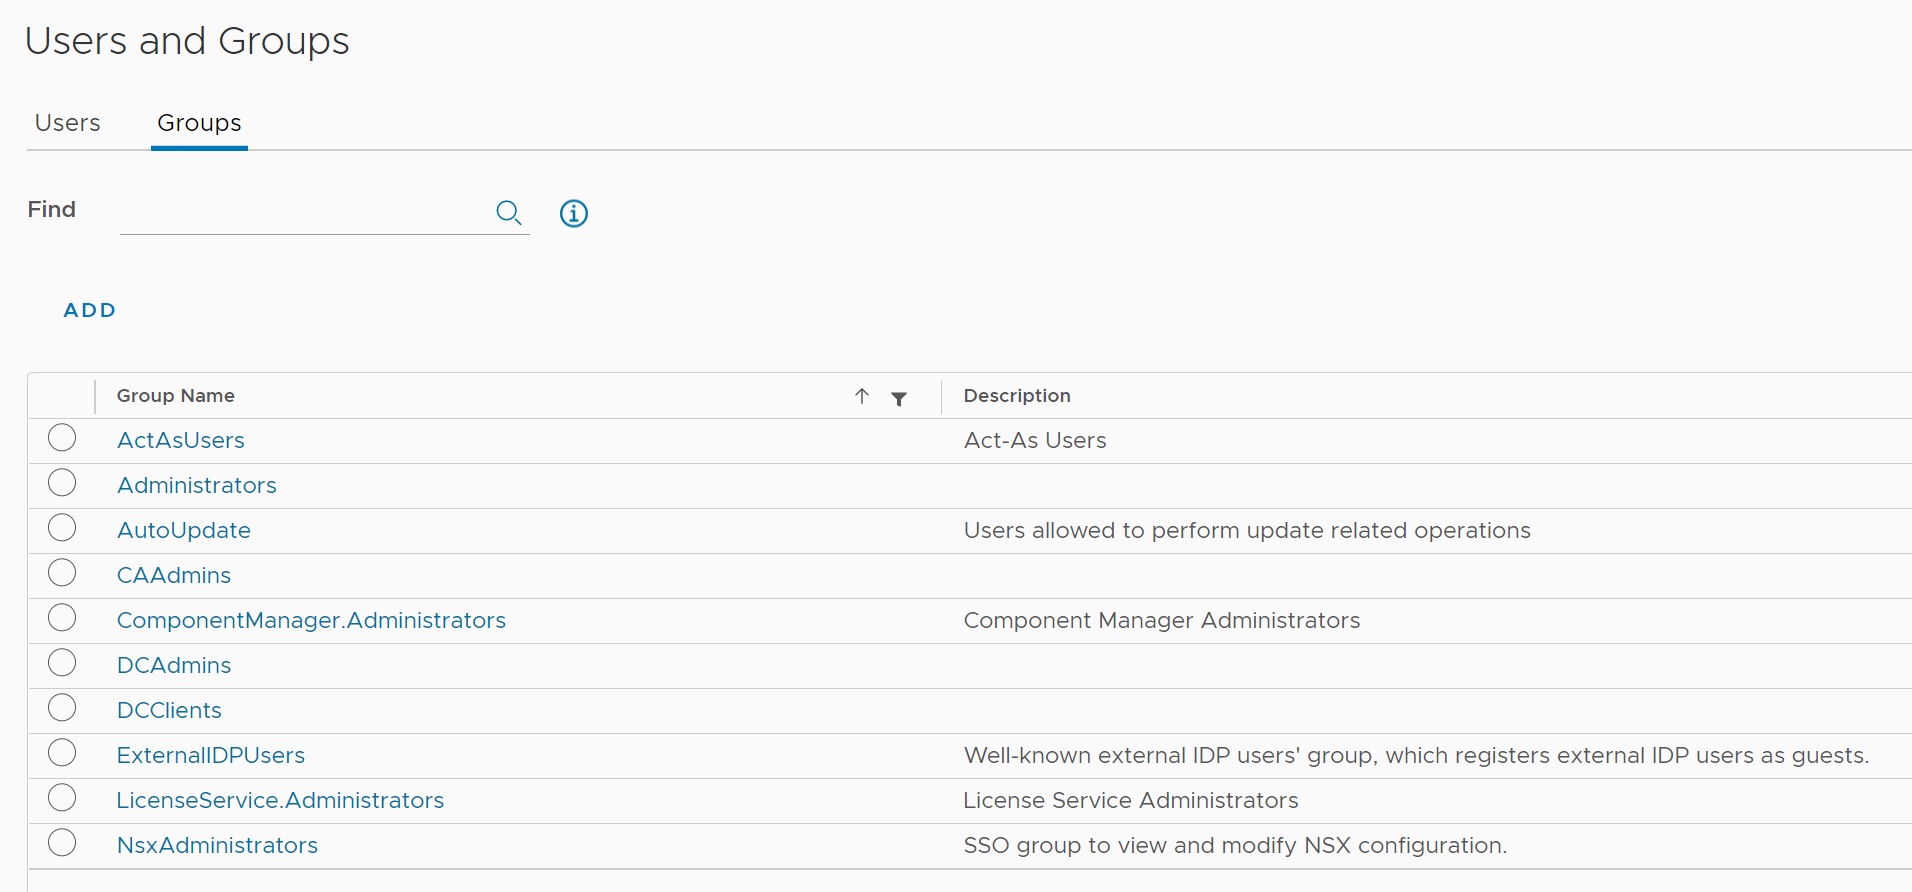
Clicking on the group tab we can see the default groups that were created, feel free to explore these, to create a new group click on the ADD link
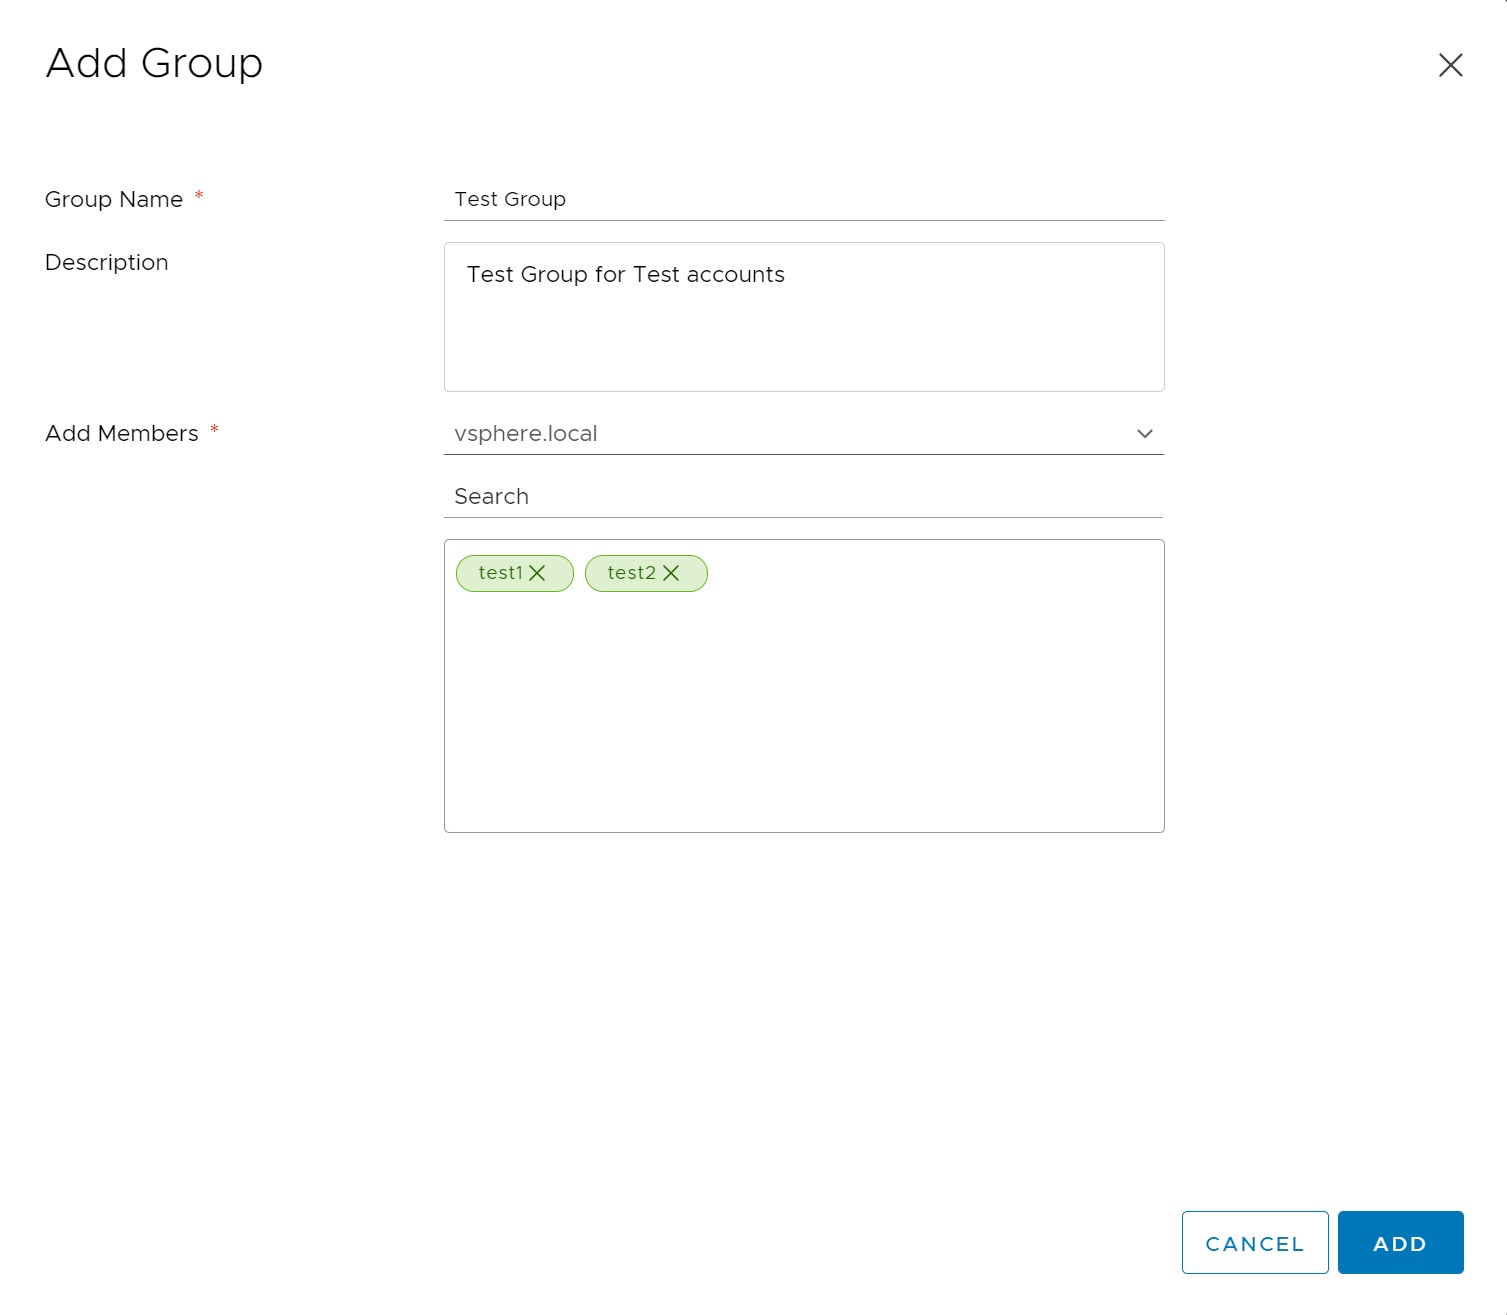
A simple group setup screen appears, add a group name and then you can add the members to the group
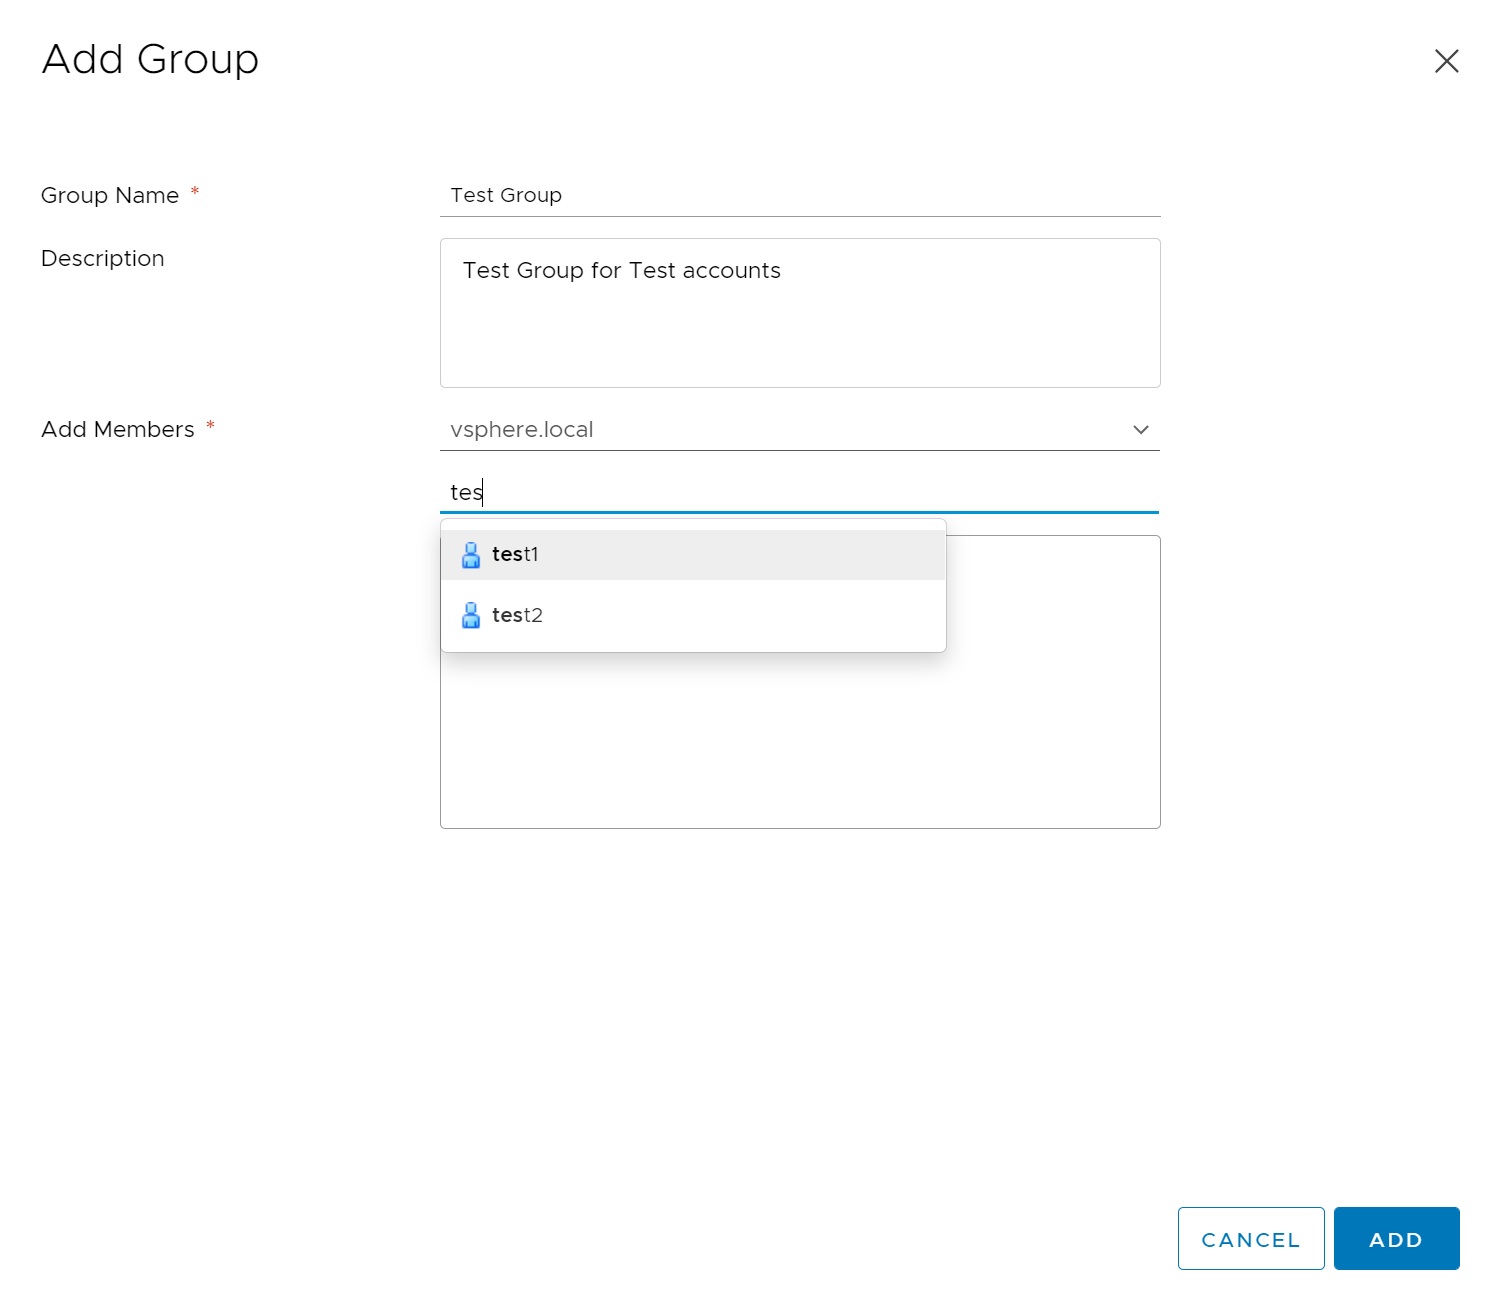
As you can see I have added two members test1 and test2, groups are idea for adding permissions to in one go instead of adding to every user.
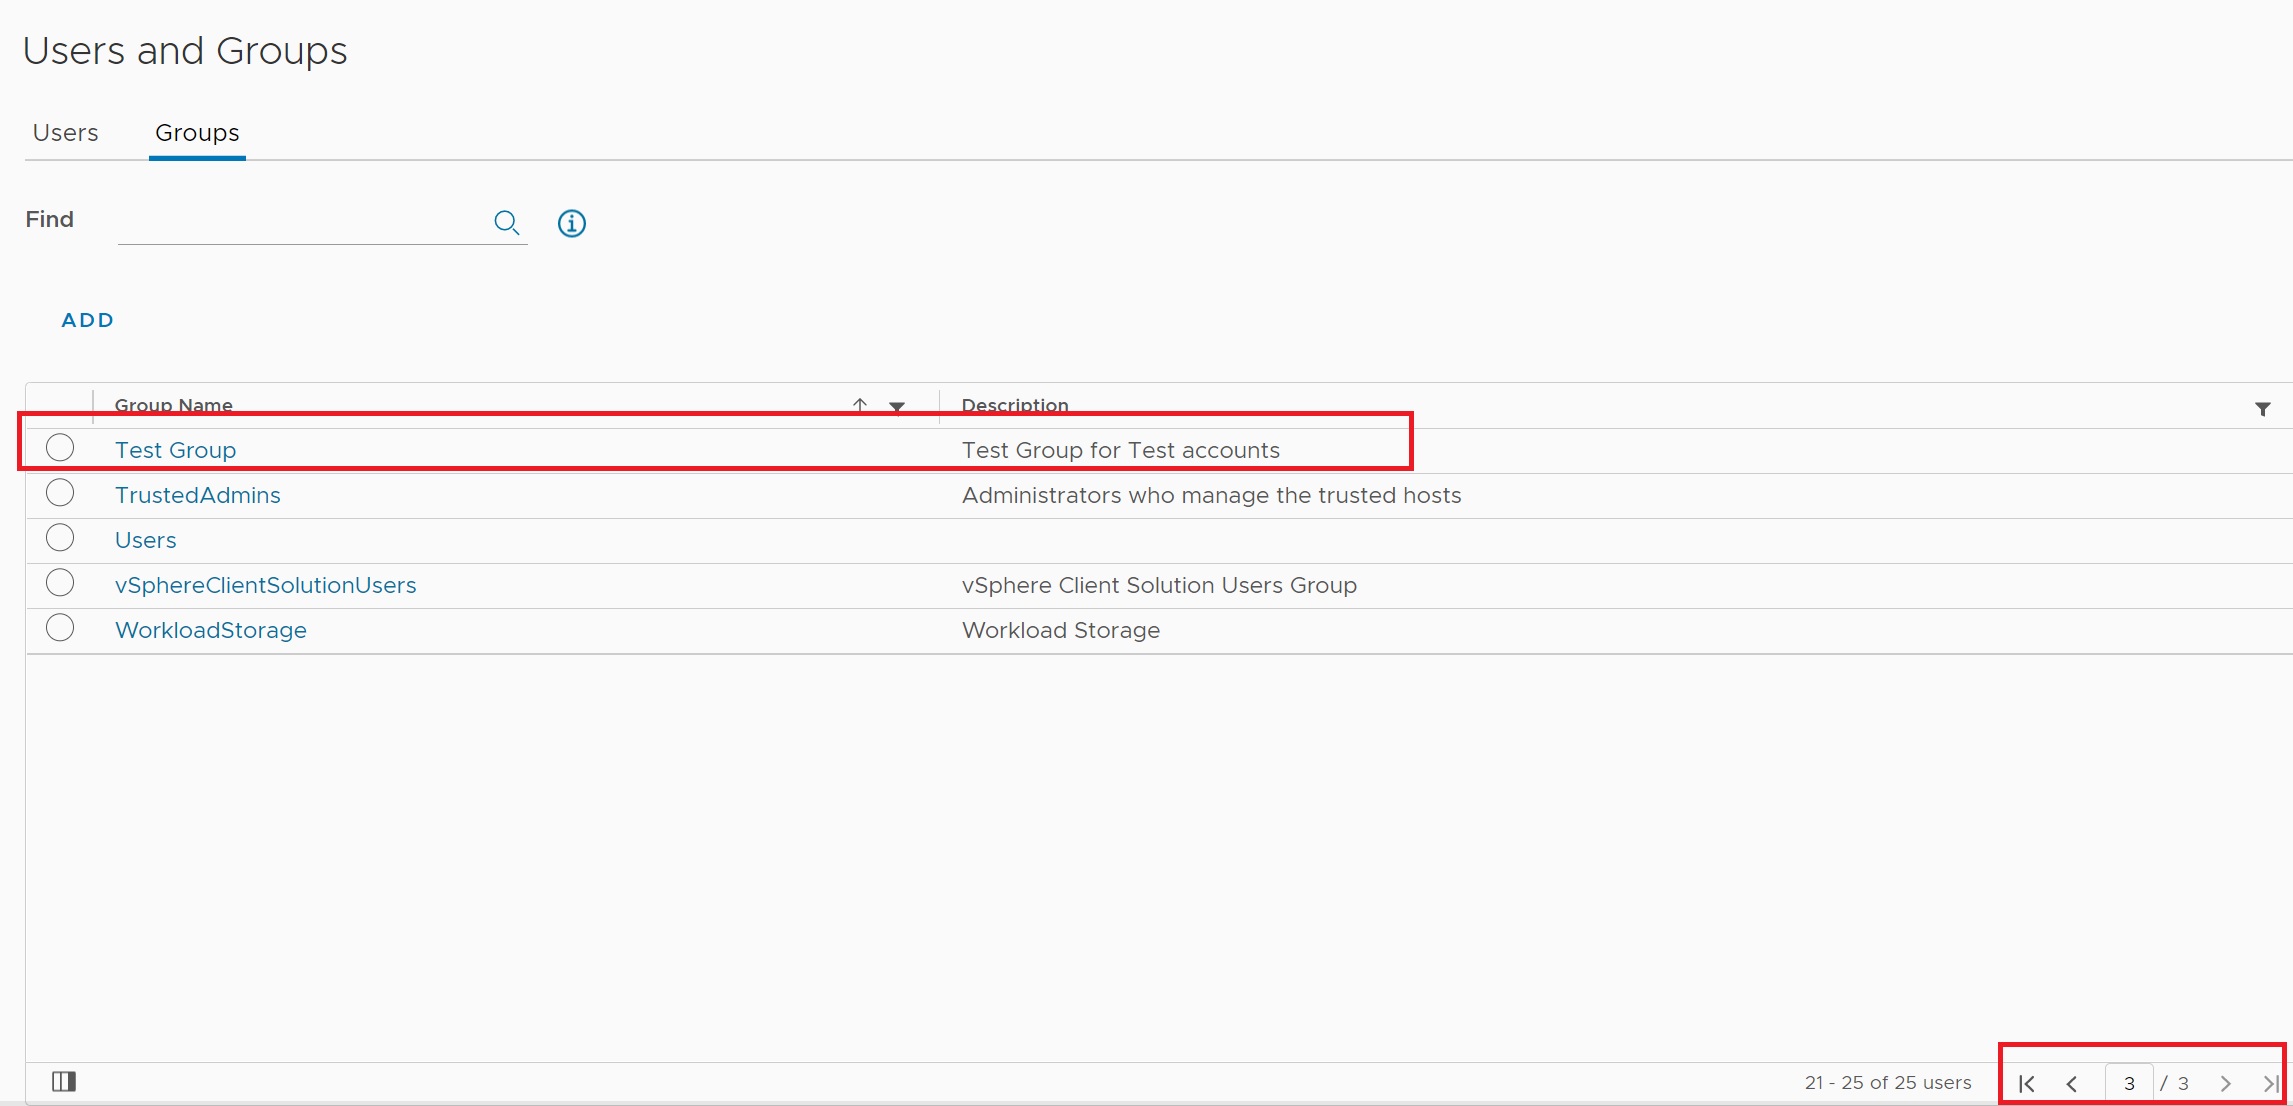
Returning to the group main screen you can see that I have create a Test Group
Now if we try and login to a new user you will be greeted with the screen below, this is because the new user (test1 in my case) does not yet have any permissions to do anything yet.

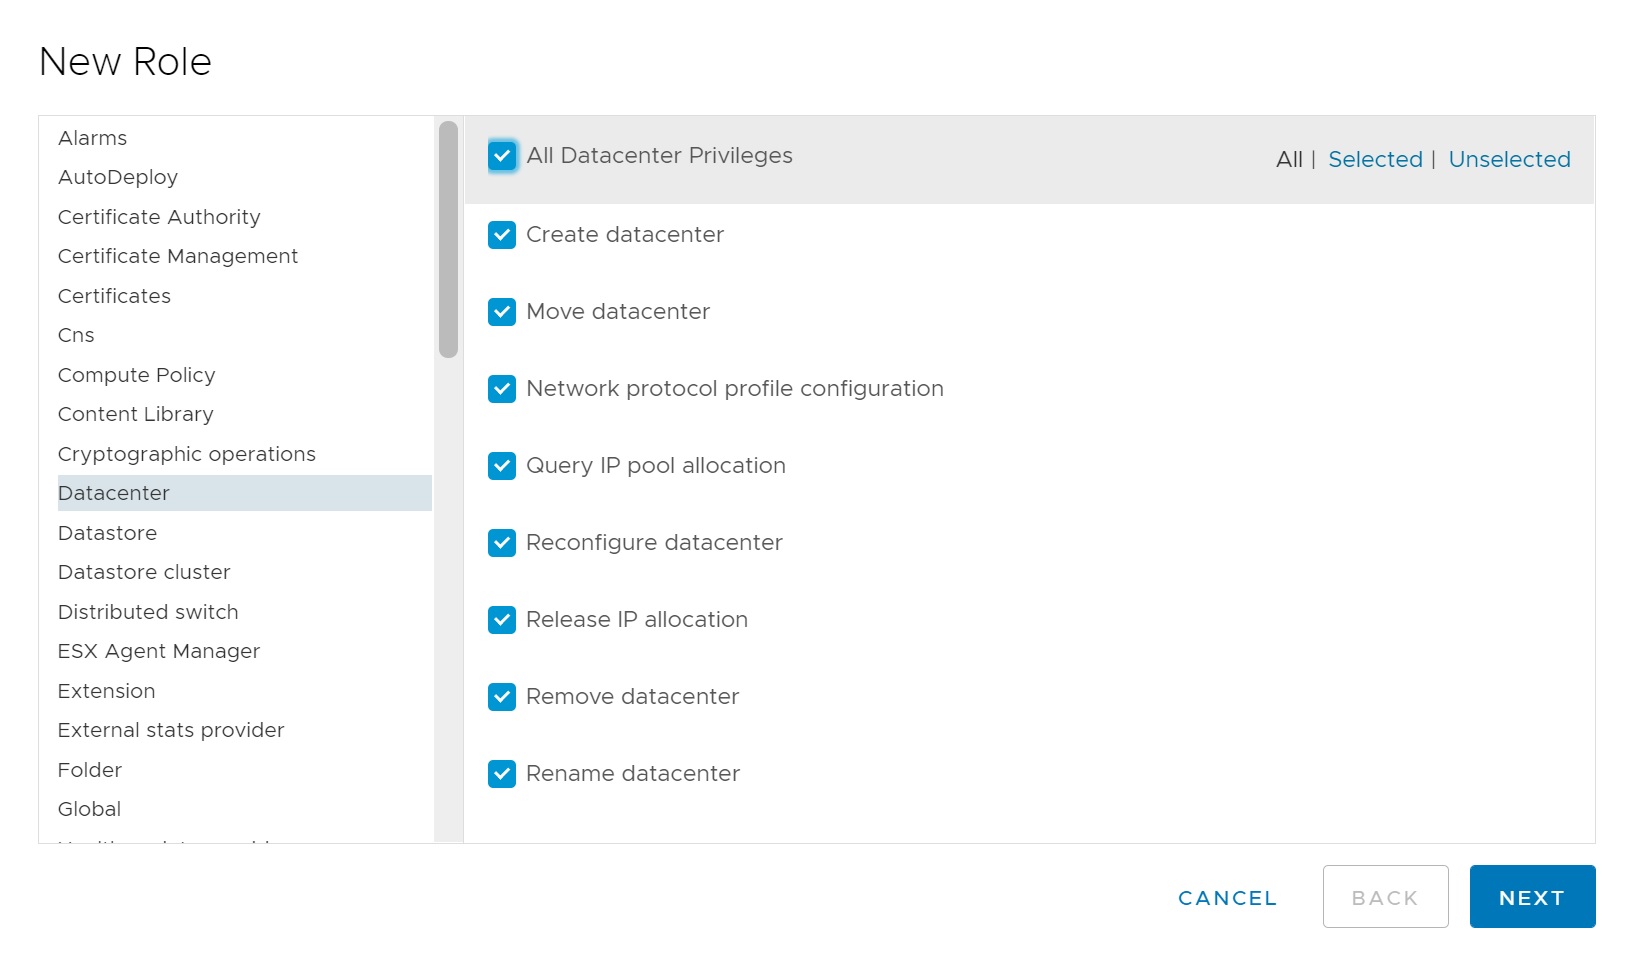
Firstly we will create a new role and assign it to the test1 account, in the access control section select Roles, here you can see the main roles screen, a number of default roles have already been created, if possible try and use these but you do have an option to create your own. If you look at the right-hand side you have 3 button to details on the role, a description, usage and the privileges granted to the role.
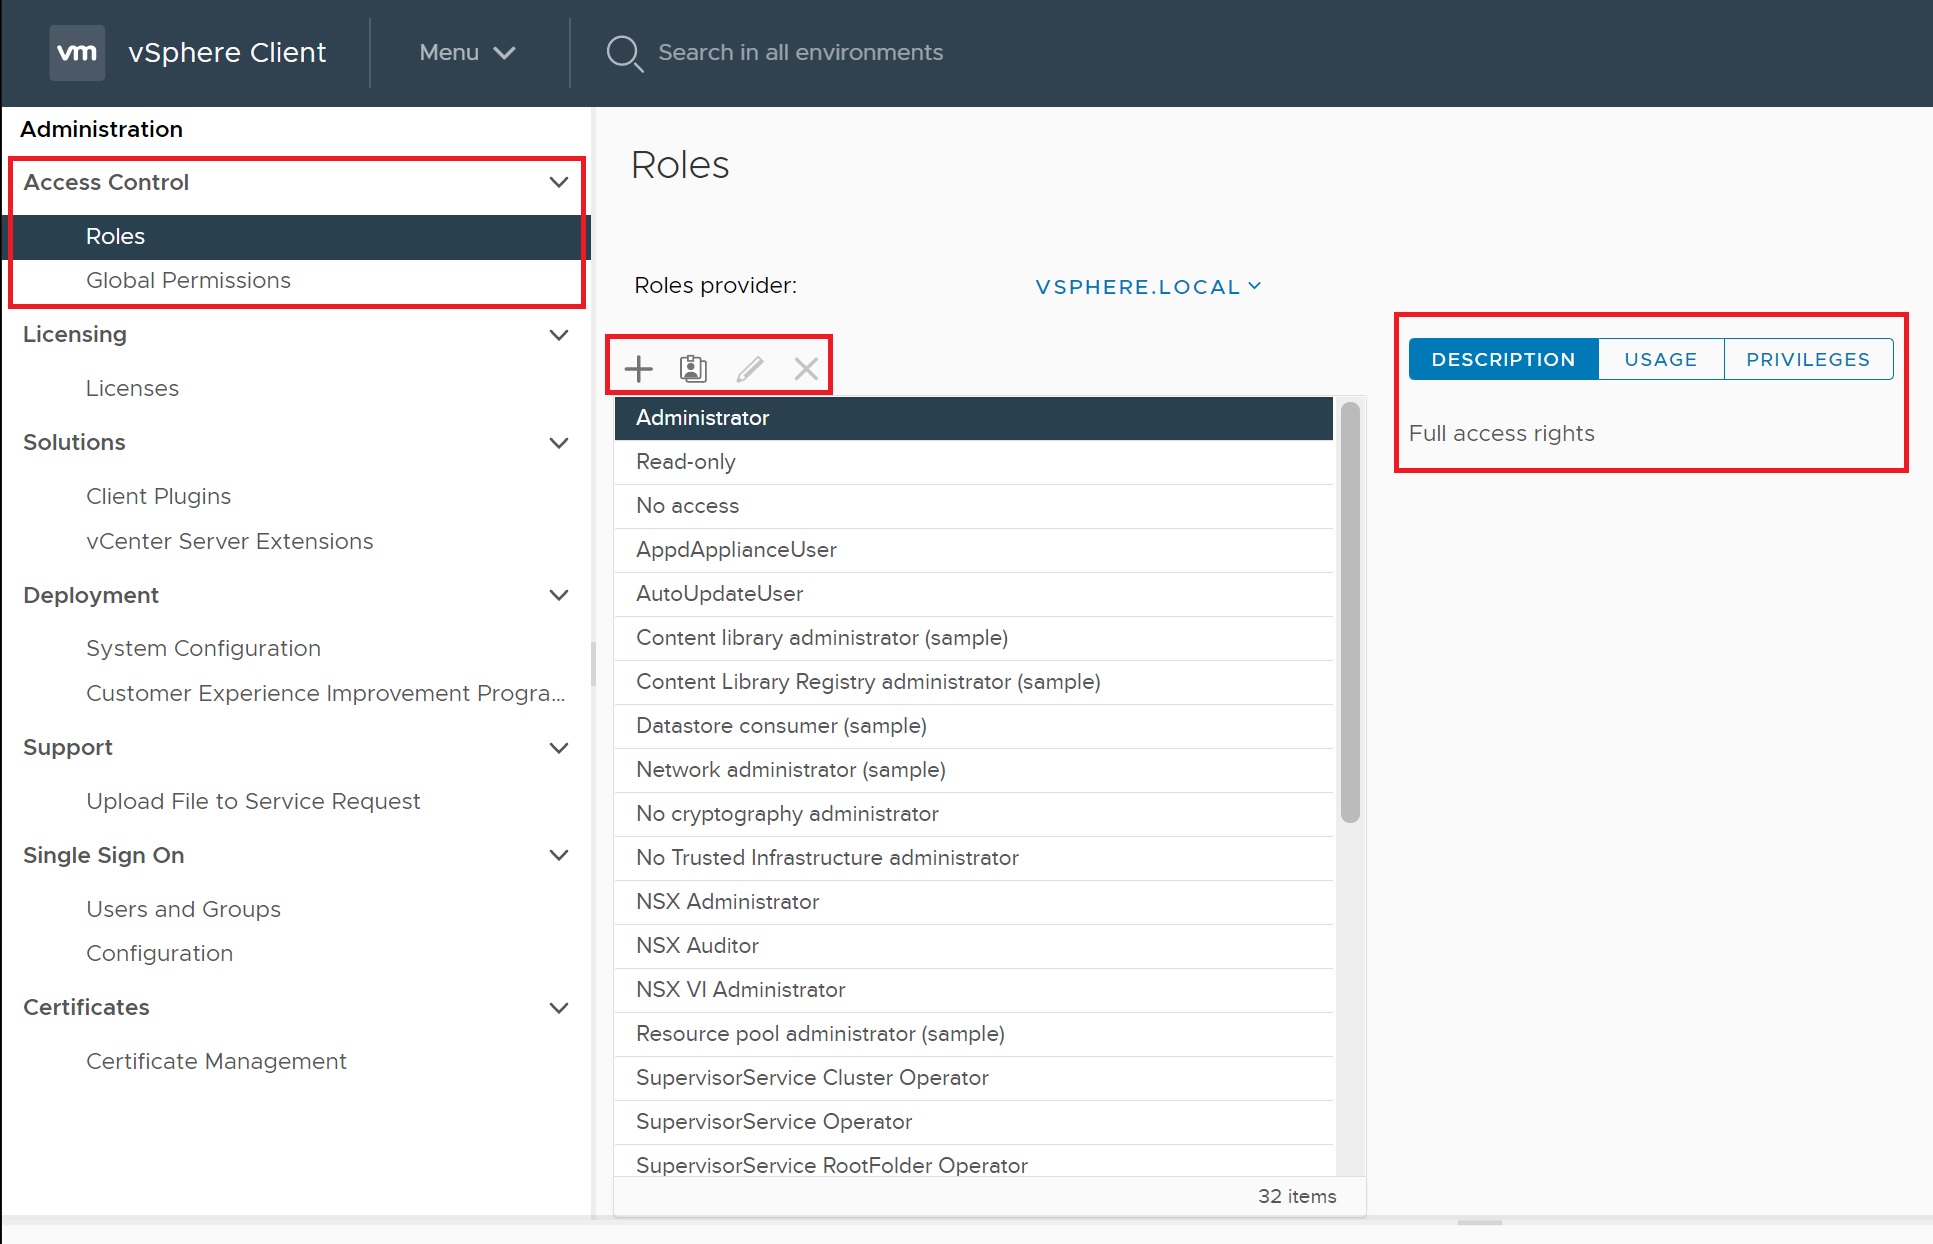
Here you can see the privileges for the administrator role.

Clicking on the plus (+) symbol we are taken to the new role setup screen, first we select the privileges that the role will be granted.
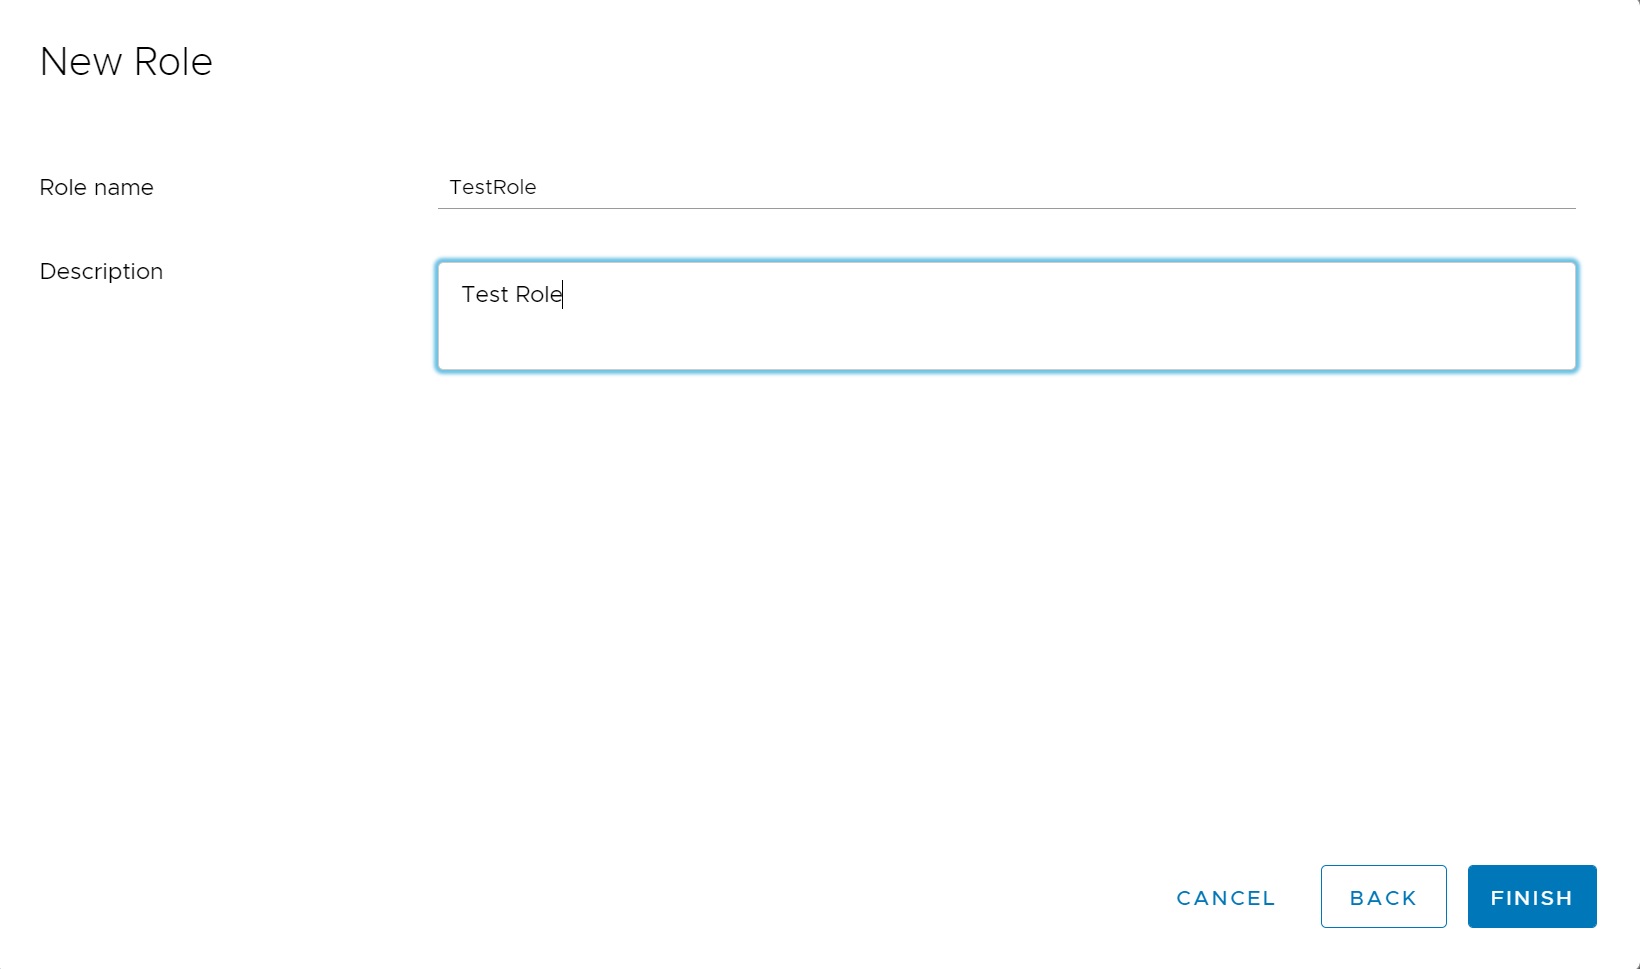
Next we enter the role name a description.
Using the role main screen we can see our new role and its privileges.

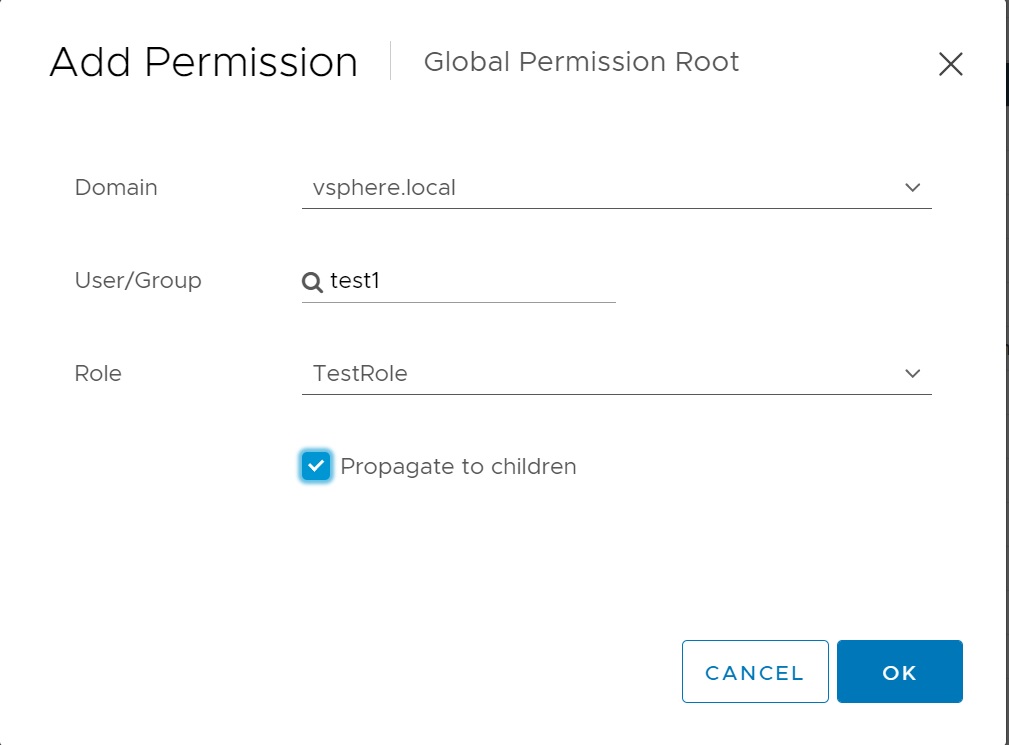
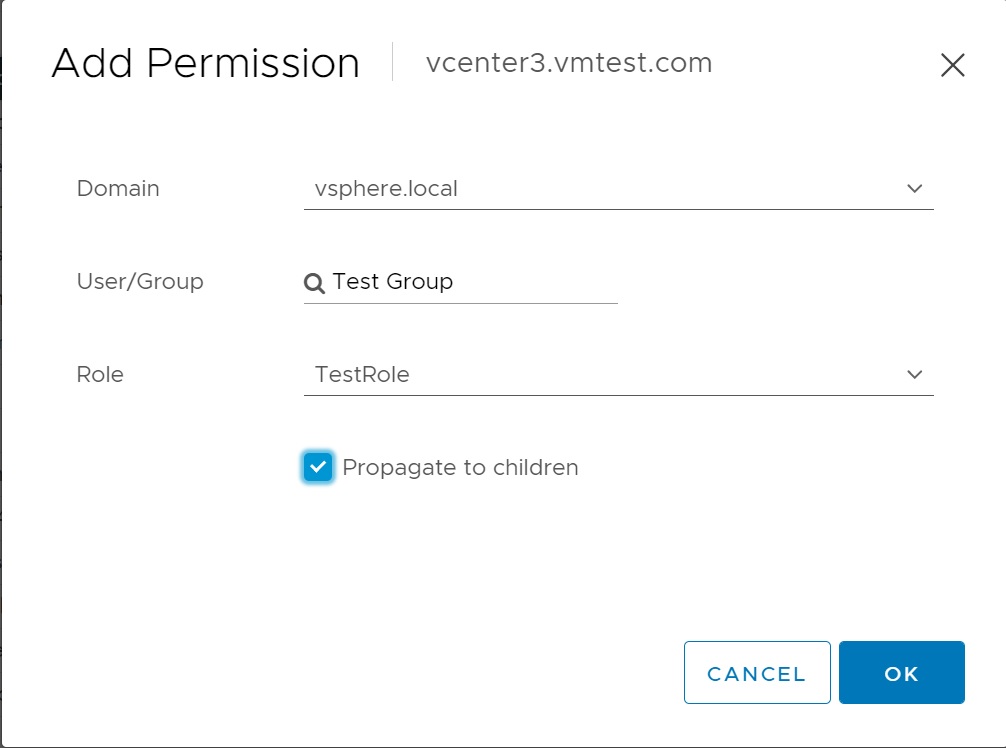
Now we are ready to assign the role to our new user test1, we select Global Permissions and the plus(+) symbol

You have the option to either assign the role to a specific user or to a group of users, now notice the propagate to children checkbox. As mention at the start of this section VMware vCenter objects are hierarchical. This means that permissions (with the Propagate to children option) will be inherited (all child objects inherit from their parent objects).
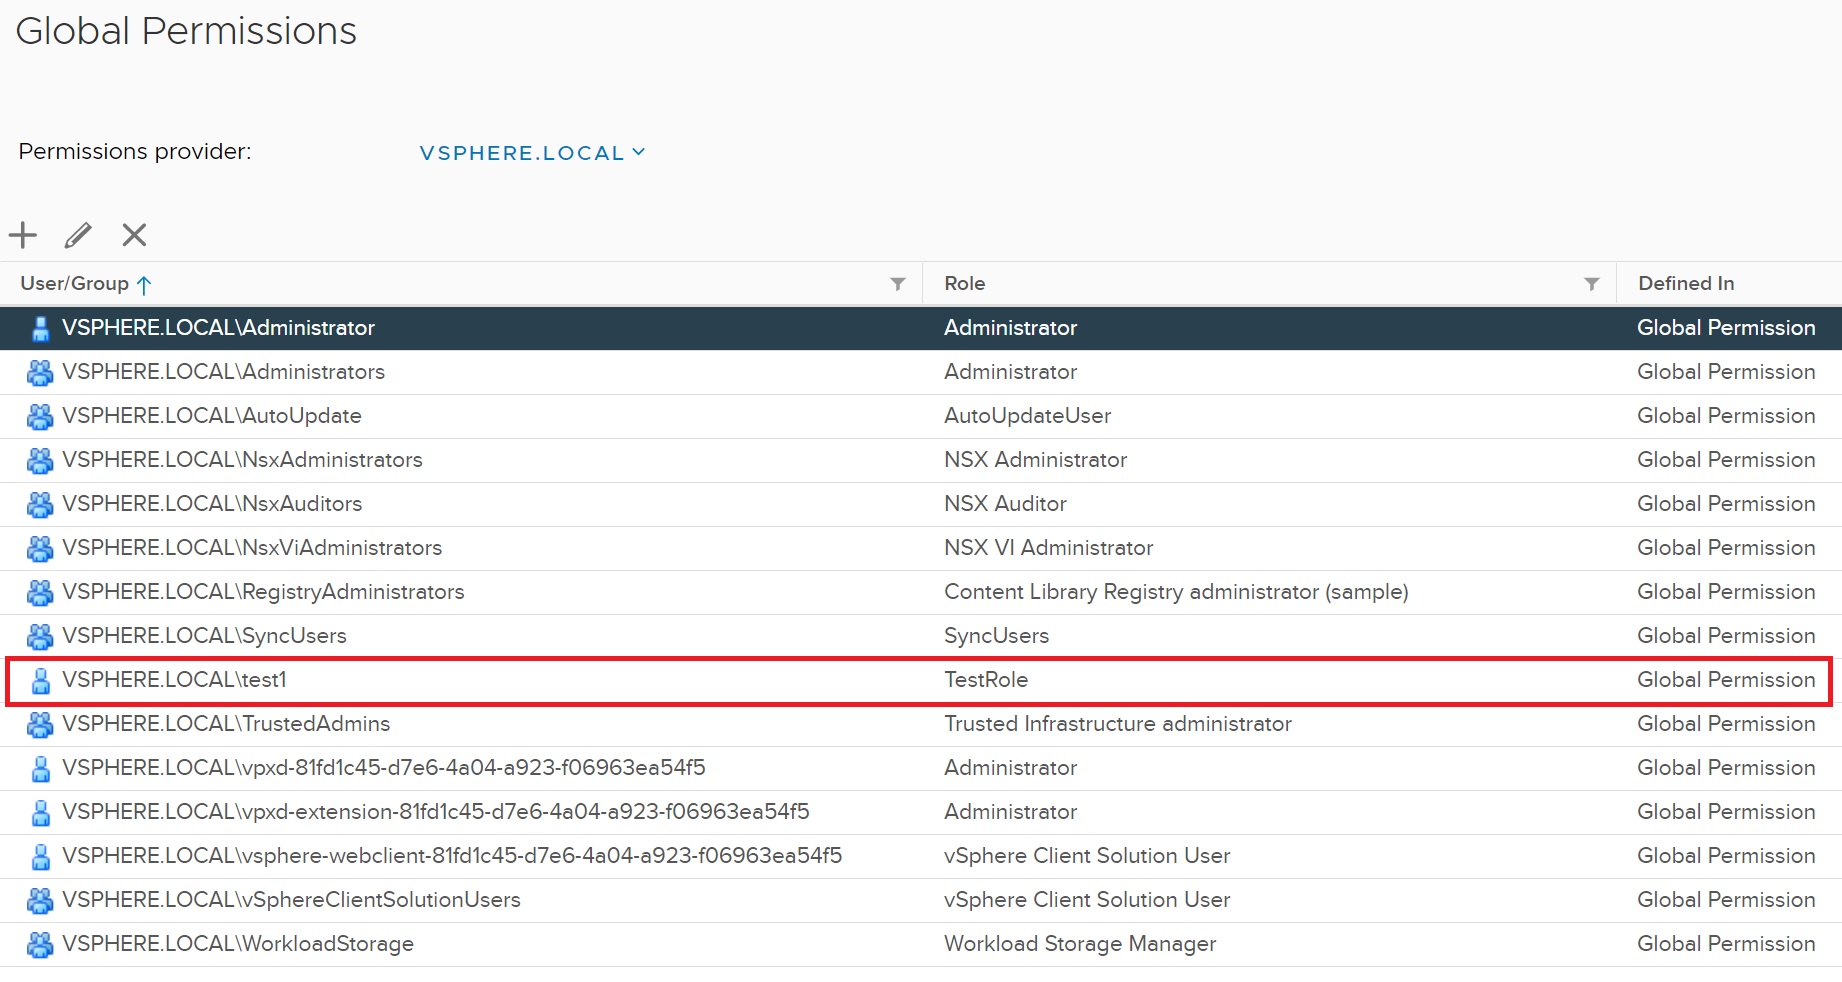
Once we have created the permission we should see it in the Global Permission screen, you can always come back here to add, remove or edit the permission at a later date.
Now when we login as test1 we have access only to the privileges that were granted in the role that was assigned to the test1 account.
If we start drilling down into the options we can see that some of them are greyed out, this means that we don't have the privilege to access this task
As I mentioned above you can also grant roles to groups which is an easy way to grant many privileges to many users in one go
Instead of using the admistration screen, you can add permissions at the task level, here we select the ESXi host object, then we select Add Permission, we are then take to the screen we have already seen but using this way allows you to easy identify the parent/child relationships as you are granting permissions from this level downwards.

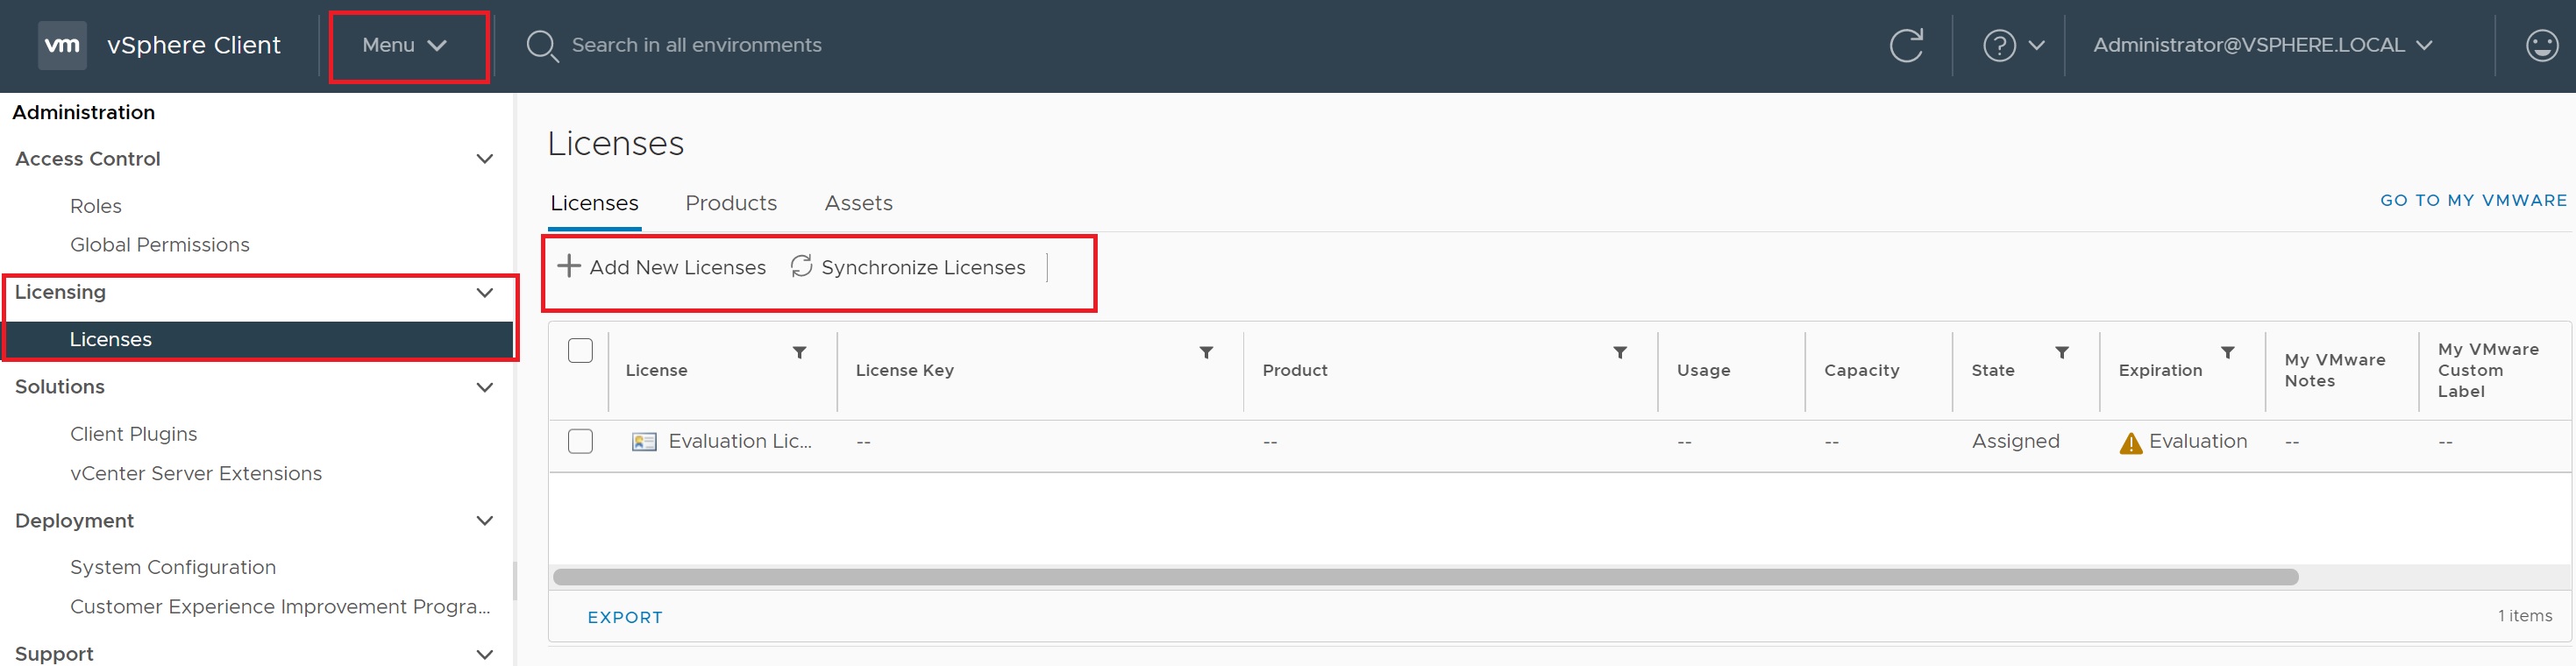
In this brief section on licenses which to be honest is simple, I show you how to add and assign VMWare licenses, the menu -> administration screen -> Licensing screen slect Licenses, in the main licenses screen you can see details of existing licenes and add new licenses. One thing to note is the Licenses, Products and Assets tabs which details where and what liceses you have in different categories.
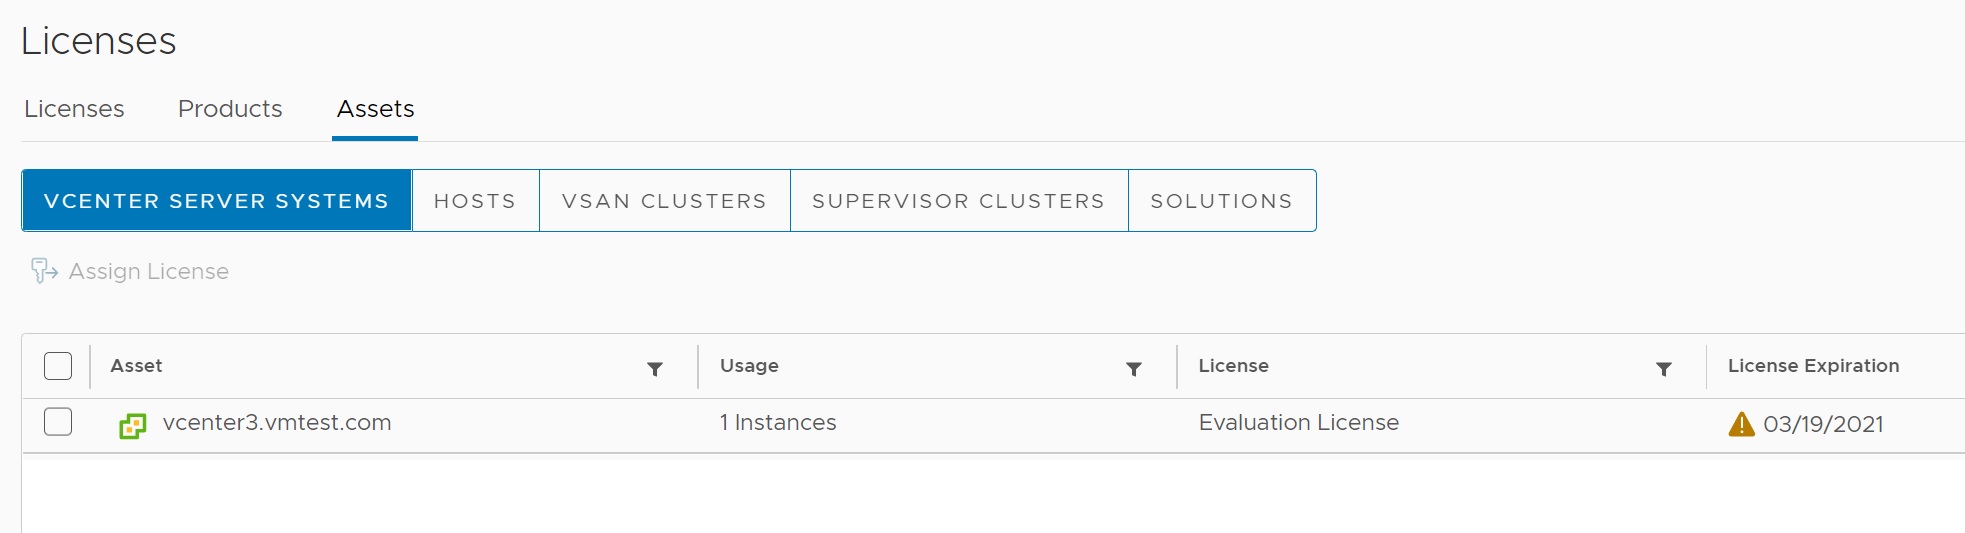
Looking at the Assets tab you can see what type of vcenter, hosts VSAN cluter, etc licenses that you have very easily .
From the main license screen and selecting add new license we can add a new license, in the first screen we enter the license code, as I dont have a license to show an example I will let you enter the details of the remaining setup screen but its all straight forward.
Going to the Assets screena nd selecting hosts you can see from here we can assign licenses to specific ESXi hosts

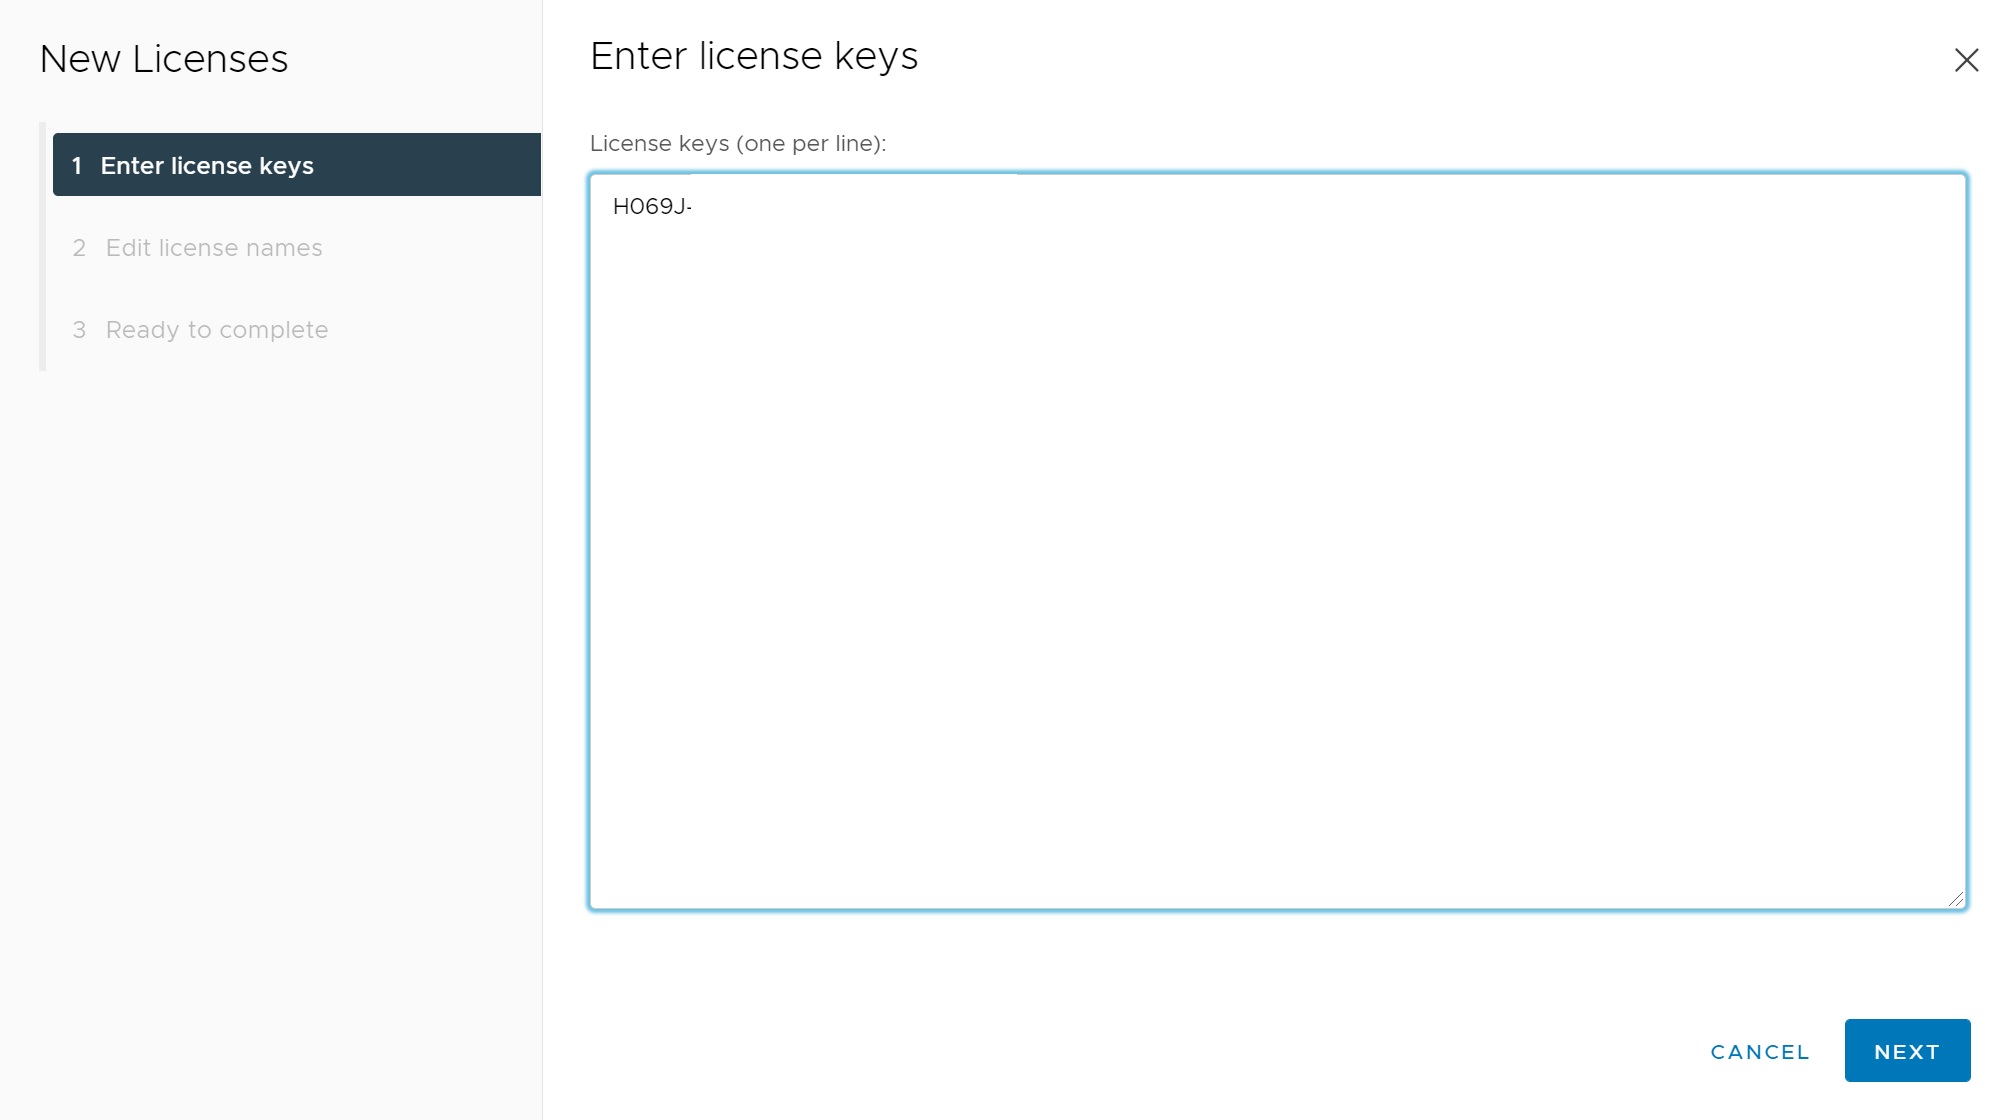
Selecting assign license we are taken to a assign license screen where we can either assign an existing license or add a new one

Simply enter the details of the new license and it will then be applied, thats all there is to licensing.

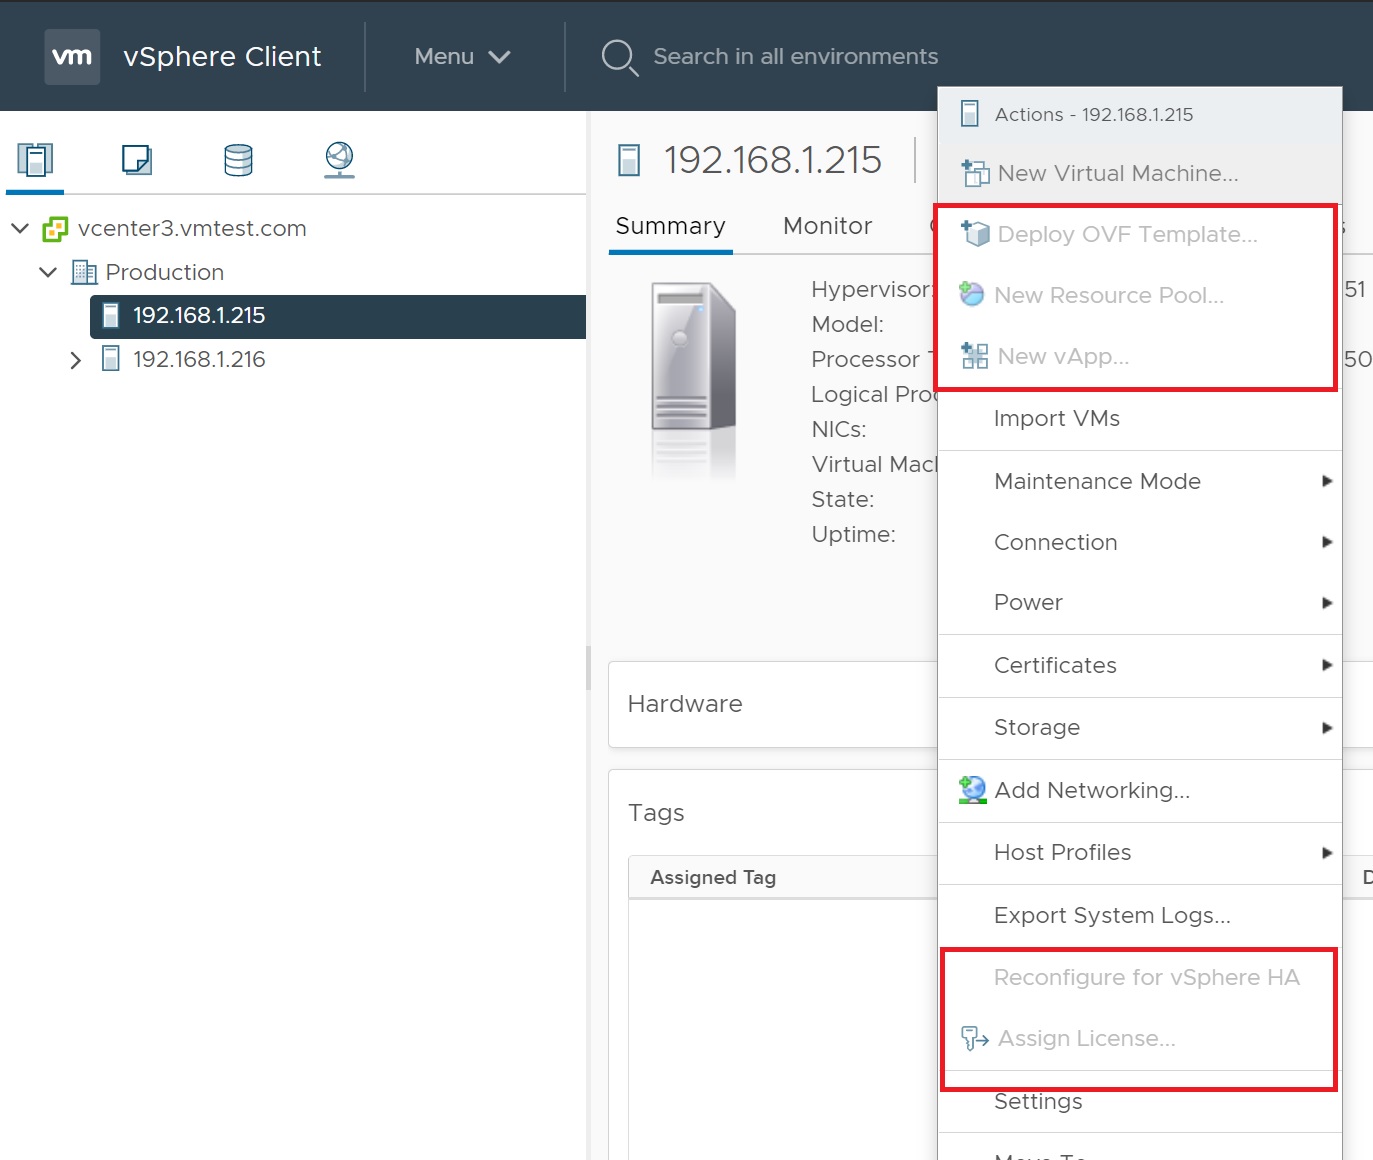
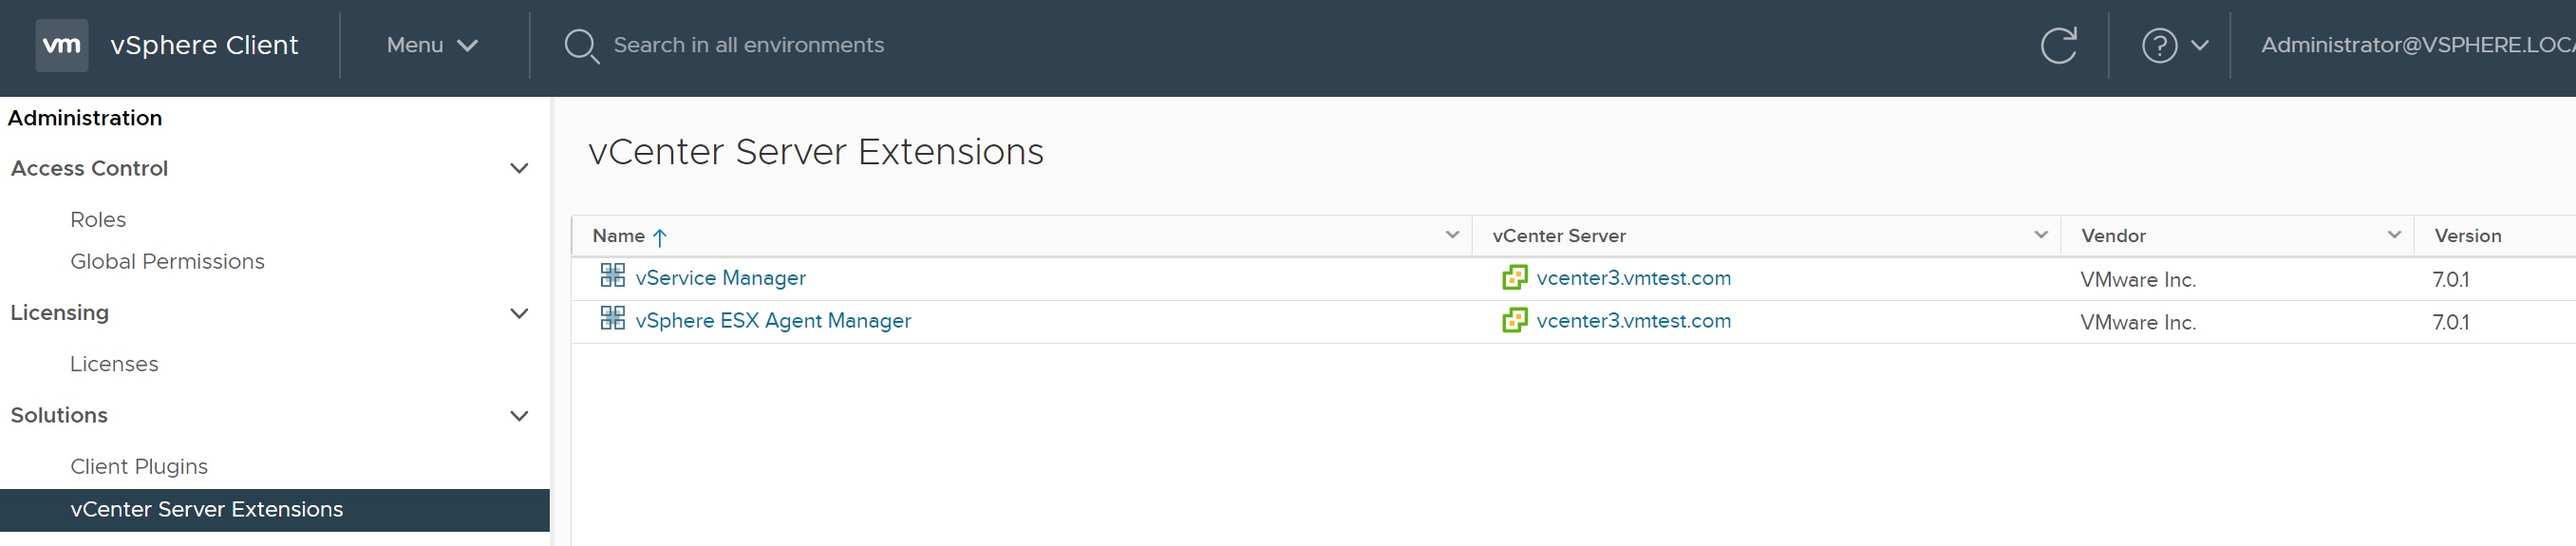
You can access the client plugins from Menu -> Adminstration -> Solutions, Client plugins are generally installed when you hook external applications like replication, site recovery manager, etc into vCenter, there might be a time when you then unhook the application and you then have an option to disable the client plugin, you also have to do this to there are problems with the vCenter and you are fault finding. Genrally though you never have to use this screen unless directed by VMWare support

The same can be said with the vCenter Server Extensions but
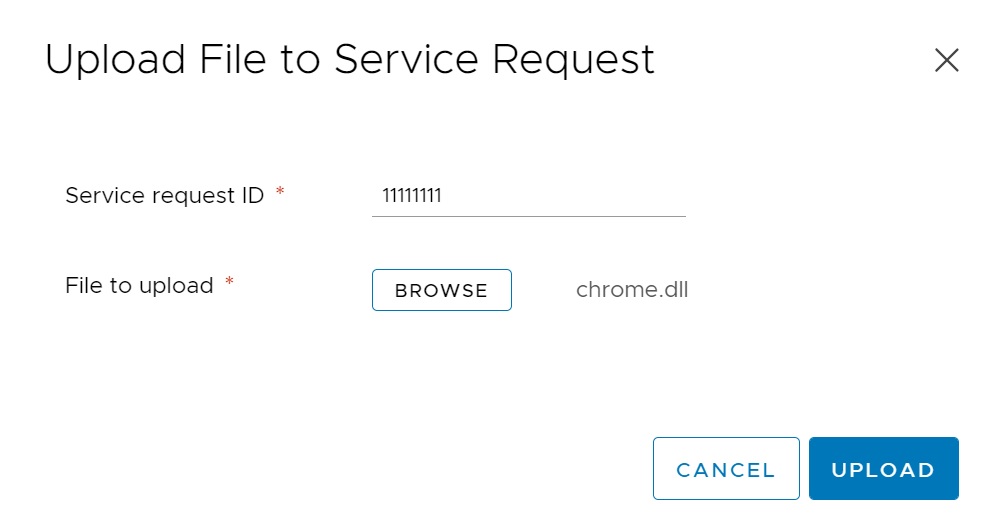
VMWare from time to time will ask you to upload specific files for them to diagnose issues and problem, from the Menu -> Administration -> Support screen, you select Upload file to Service Request.
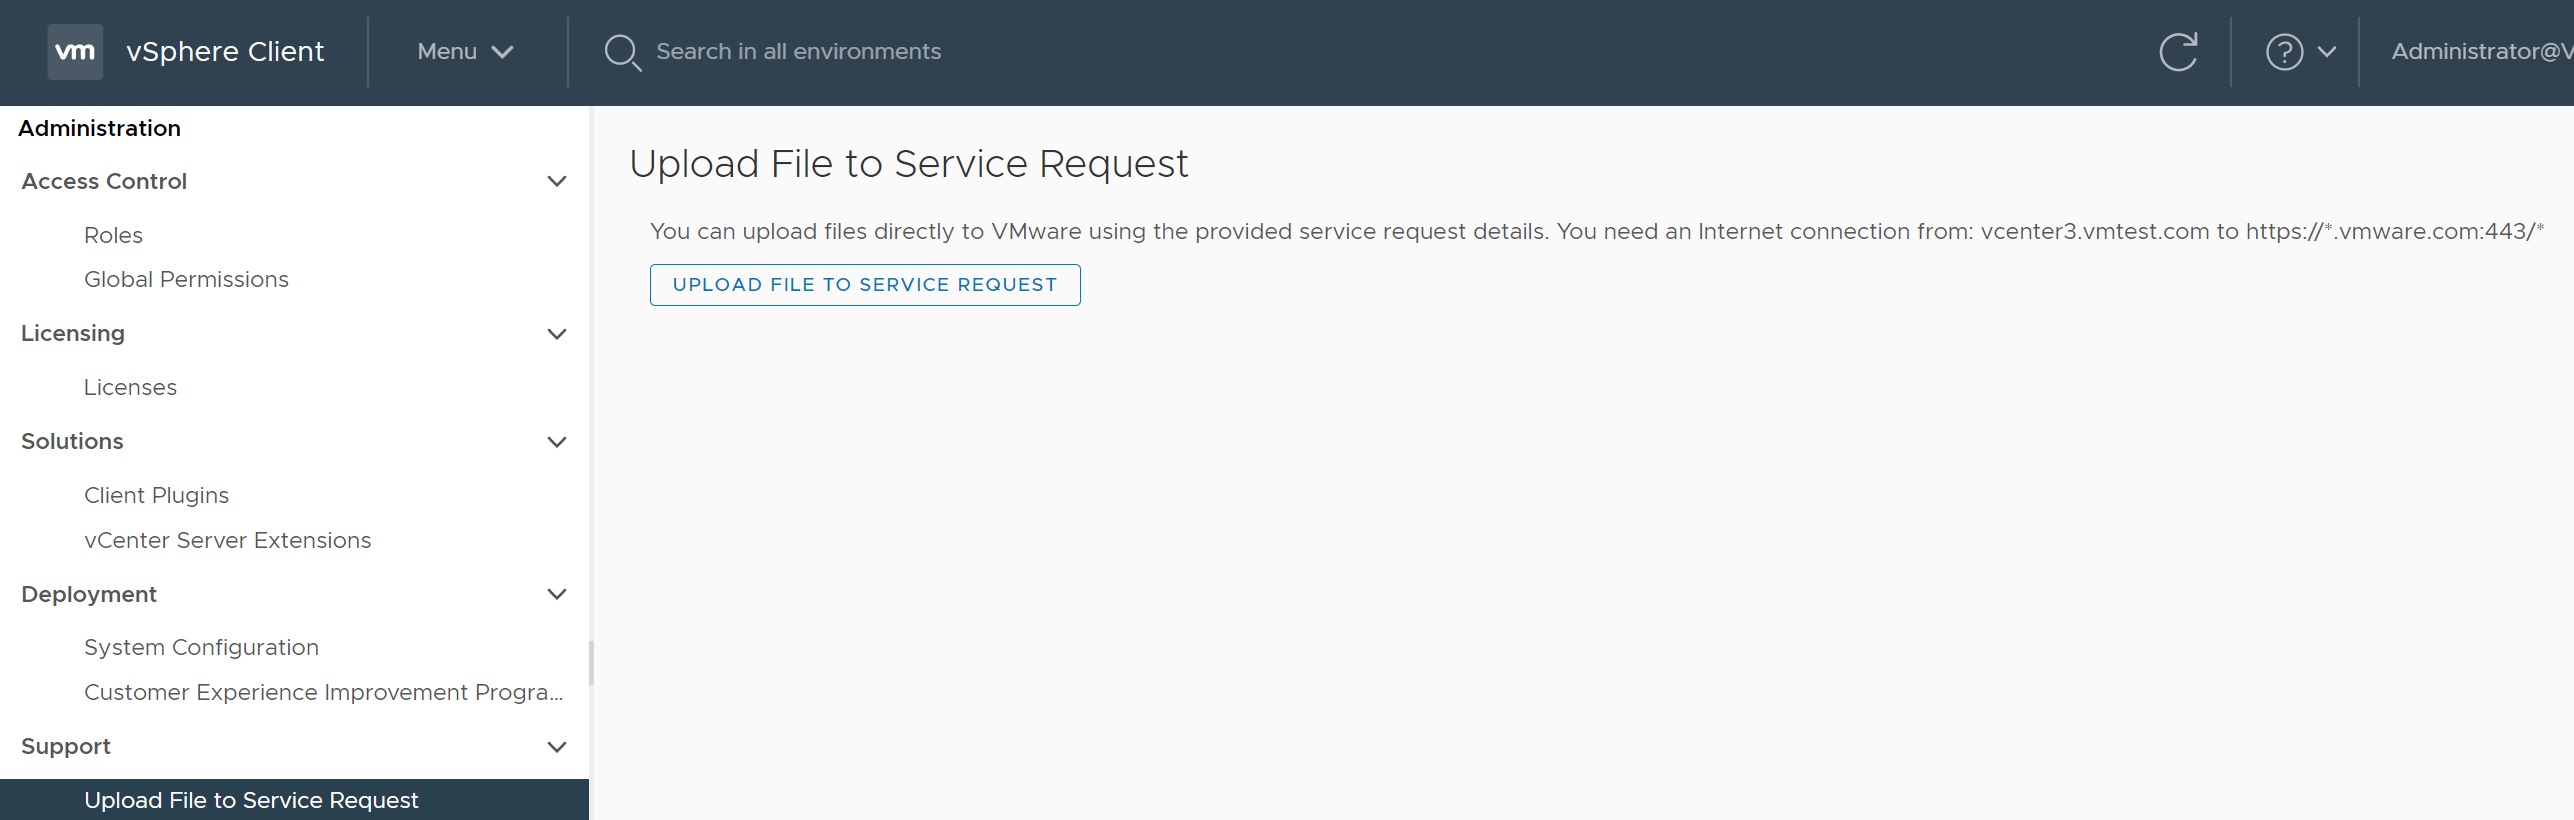
You are taken to a service request screen where you enter the service request ID and then browse to the file that needs to be uploaded

Here you can see I have selected chrome.dll file
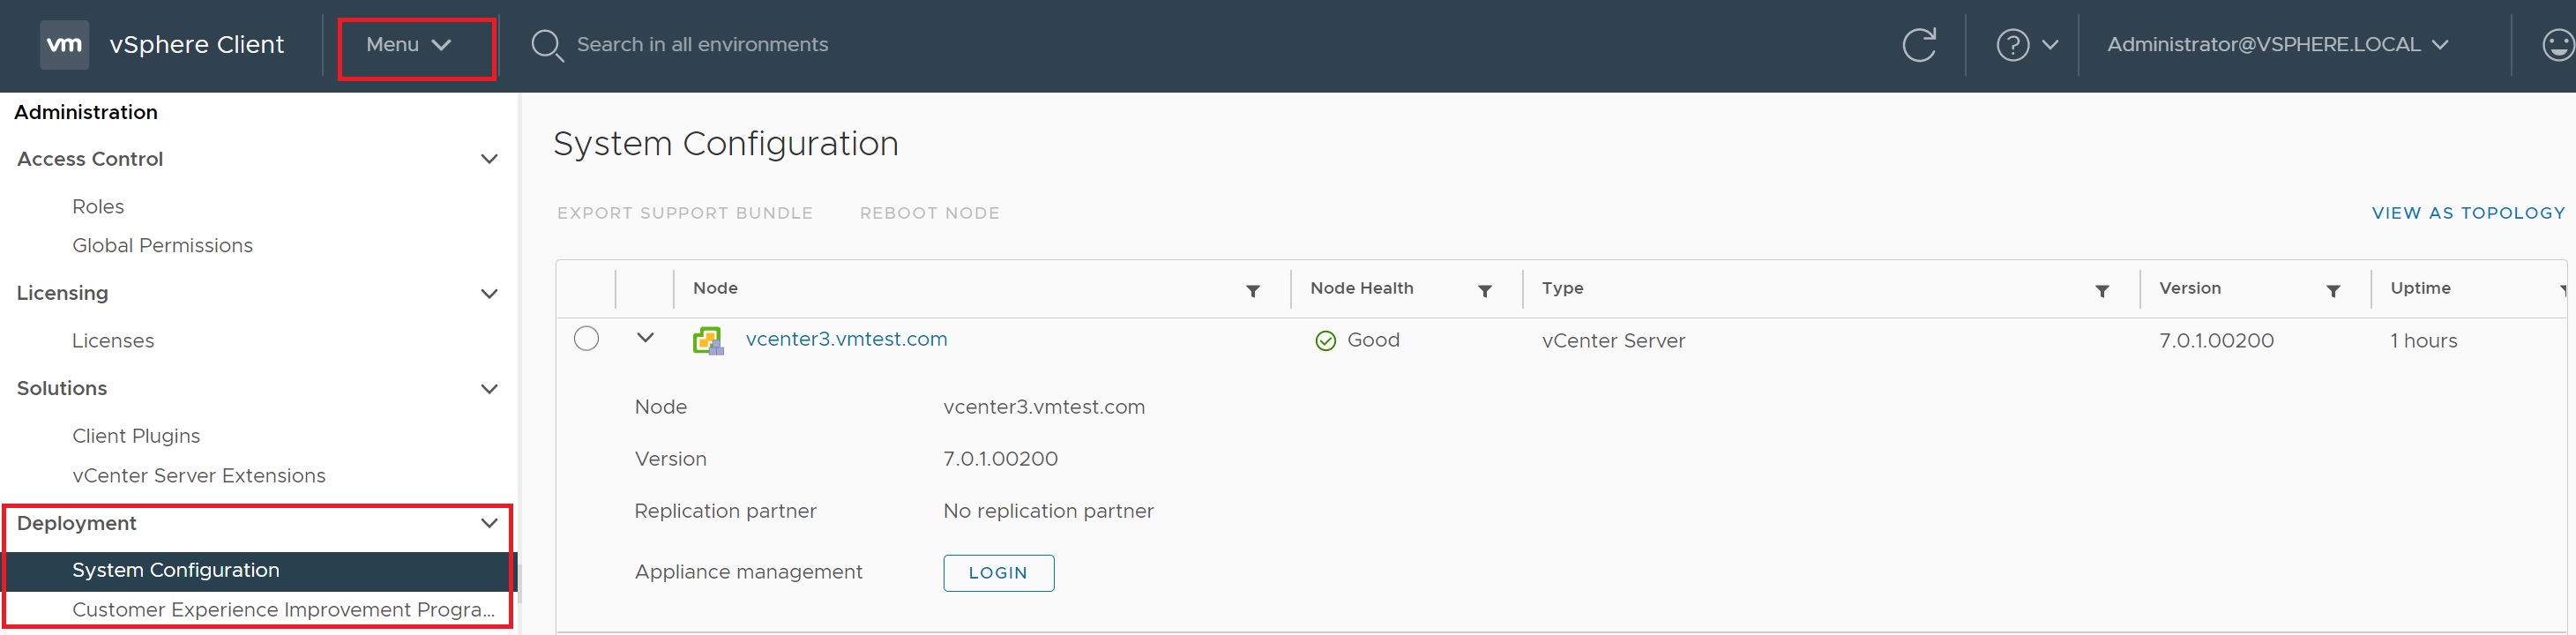
From the Menu -> Administration -> Deployment, you have access to the system configuration screen, this is different from the vCenter management screen we will see later, here you can see some details of all the vCenters that are connected, so if you are using Site Recoever Manager (SRM) you will see other vCenter servers here. You even have a reboot feature that allows you to reboot a vCenter server.
The Customer Experience Program allows you to send details about the healt of your ssytems and other performance details this allows VMWare to use this data to either fix bugs or performance issues in there code, plus obtains details on how the many various pieces of hardware work with the ESXi software.

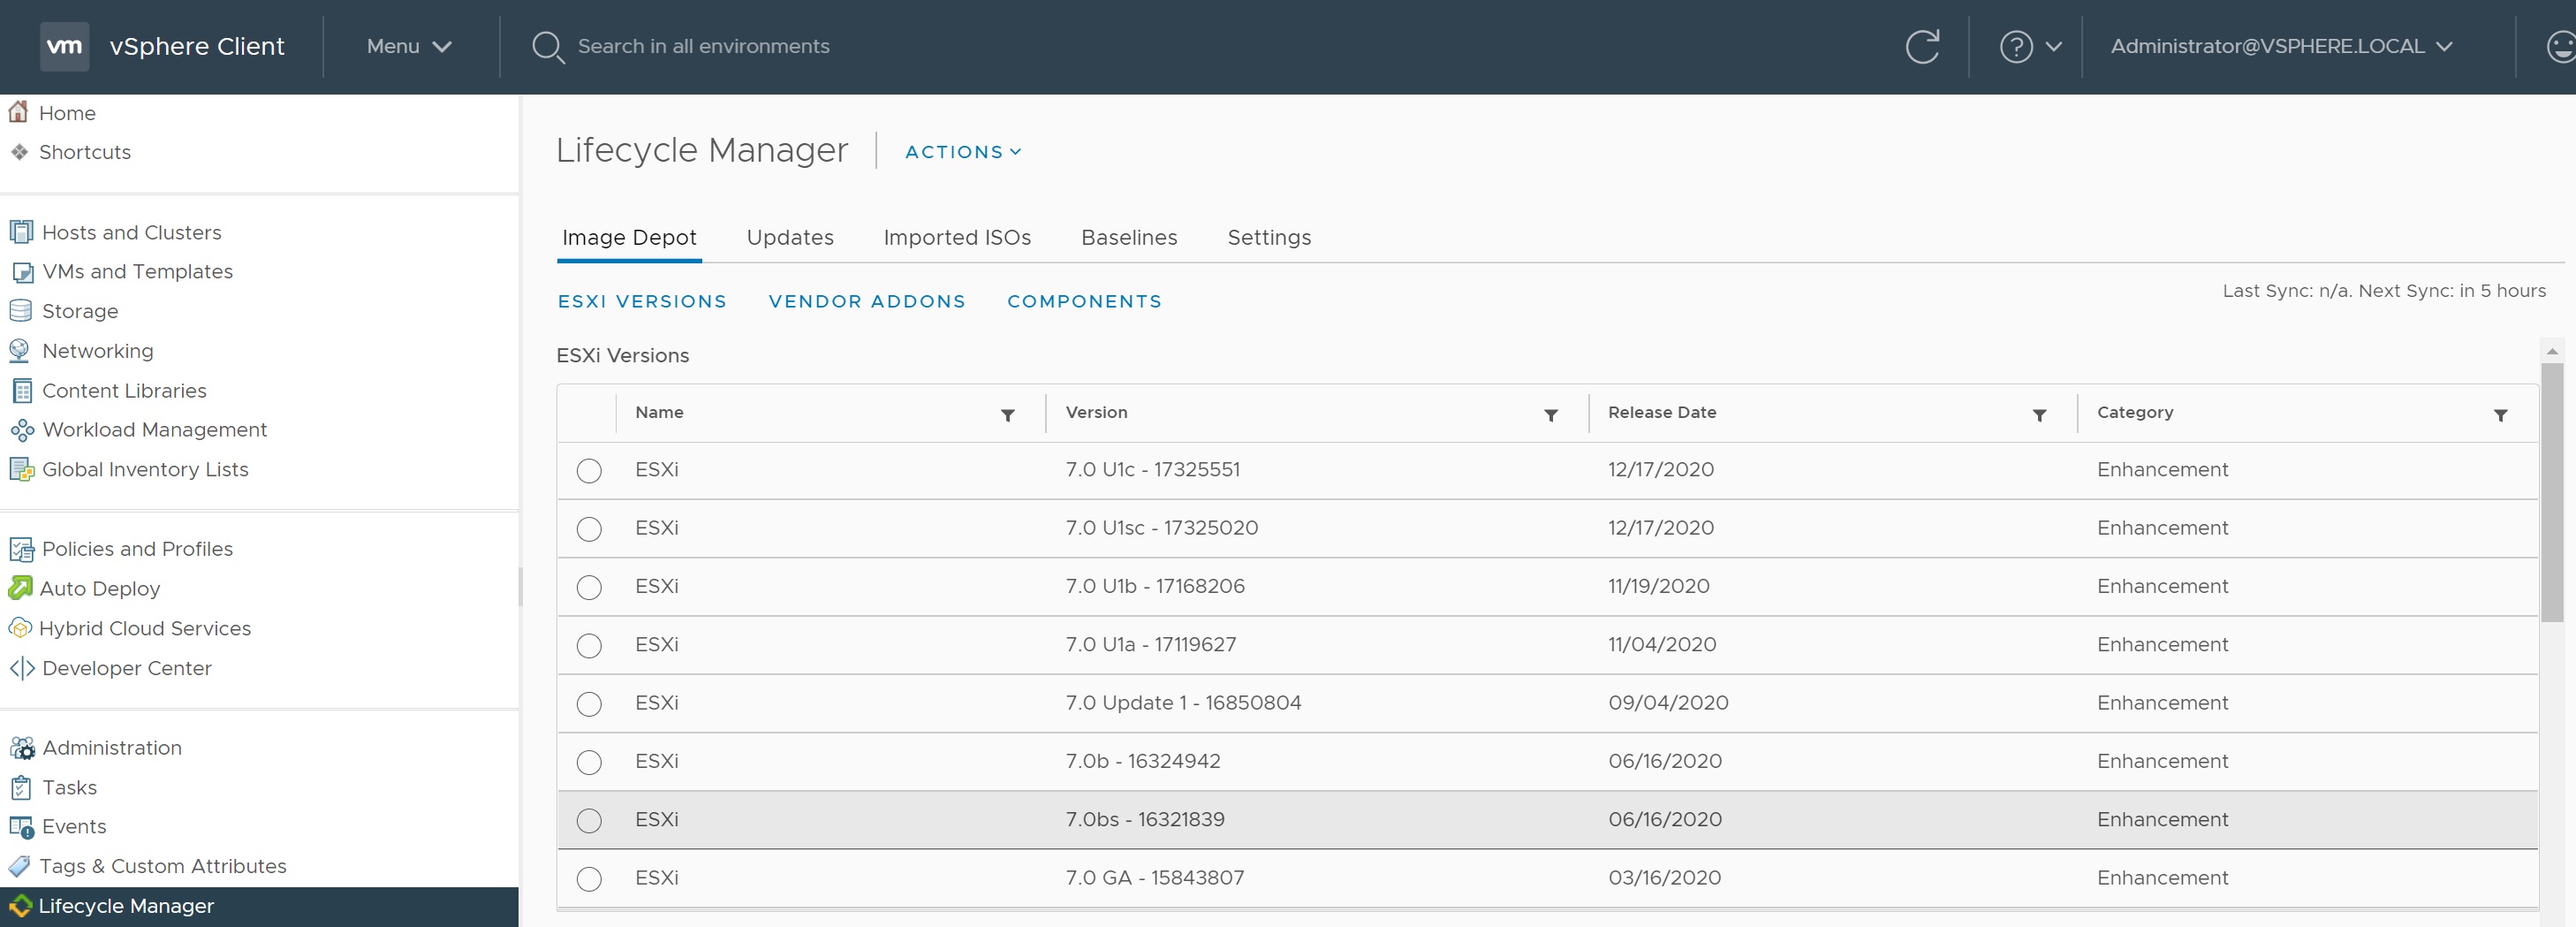
I have a whole section on the Lifecycle Manager as it a big topic, and simply point you to where you can find it within the vCenter go to Menu -> Lifecycle Manager
In this section I show you how to schedule a task, in this case a task for a Virtual Machine, but there are many places where a task can be schedule which is useful for example if you want to do something over the weekend, so companies are now starting to shutdown environments over the weekend to save costs (if using a public cloud environment such as Azure or AWS). To schedule a task for a VM select the virtual machine and the configure tab, then the schedule task link, this screen is the sceduled tasks main screen where you can view, remove, create or run tasks.

If you click on the NEW SCHEDULE TASK link there are alraedy a number of predefined tasks such as powering off, restarting take a snapshot, etc.

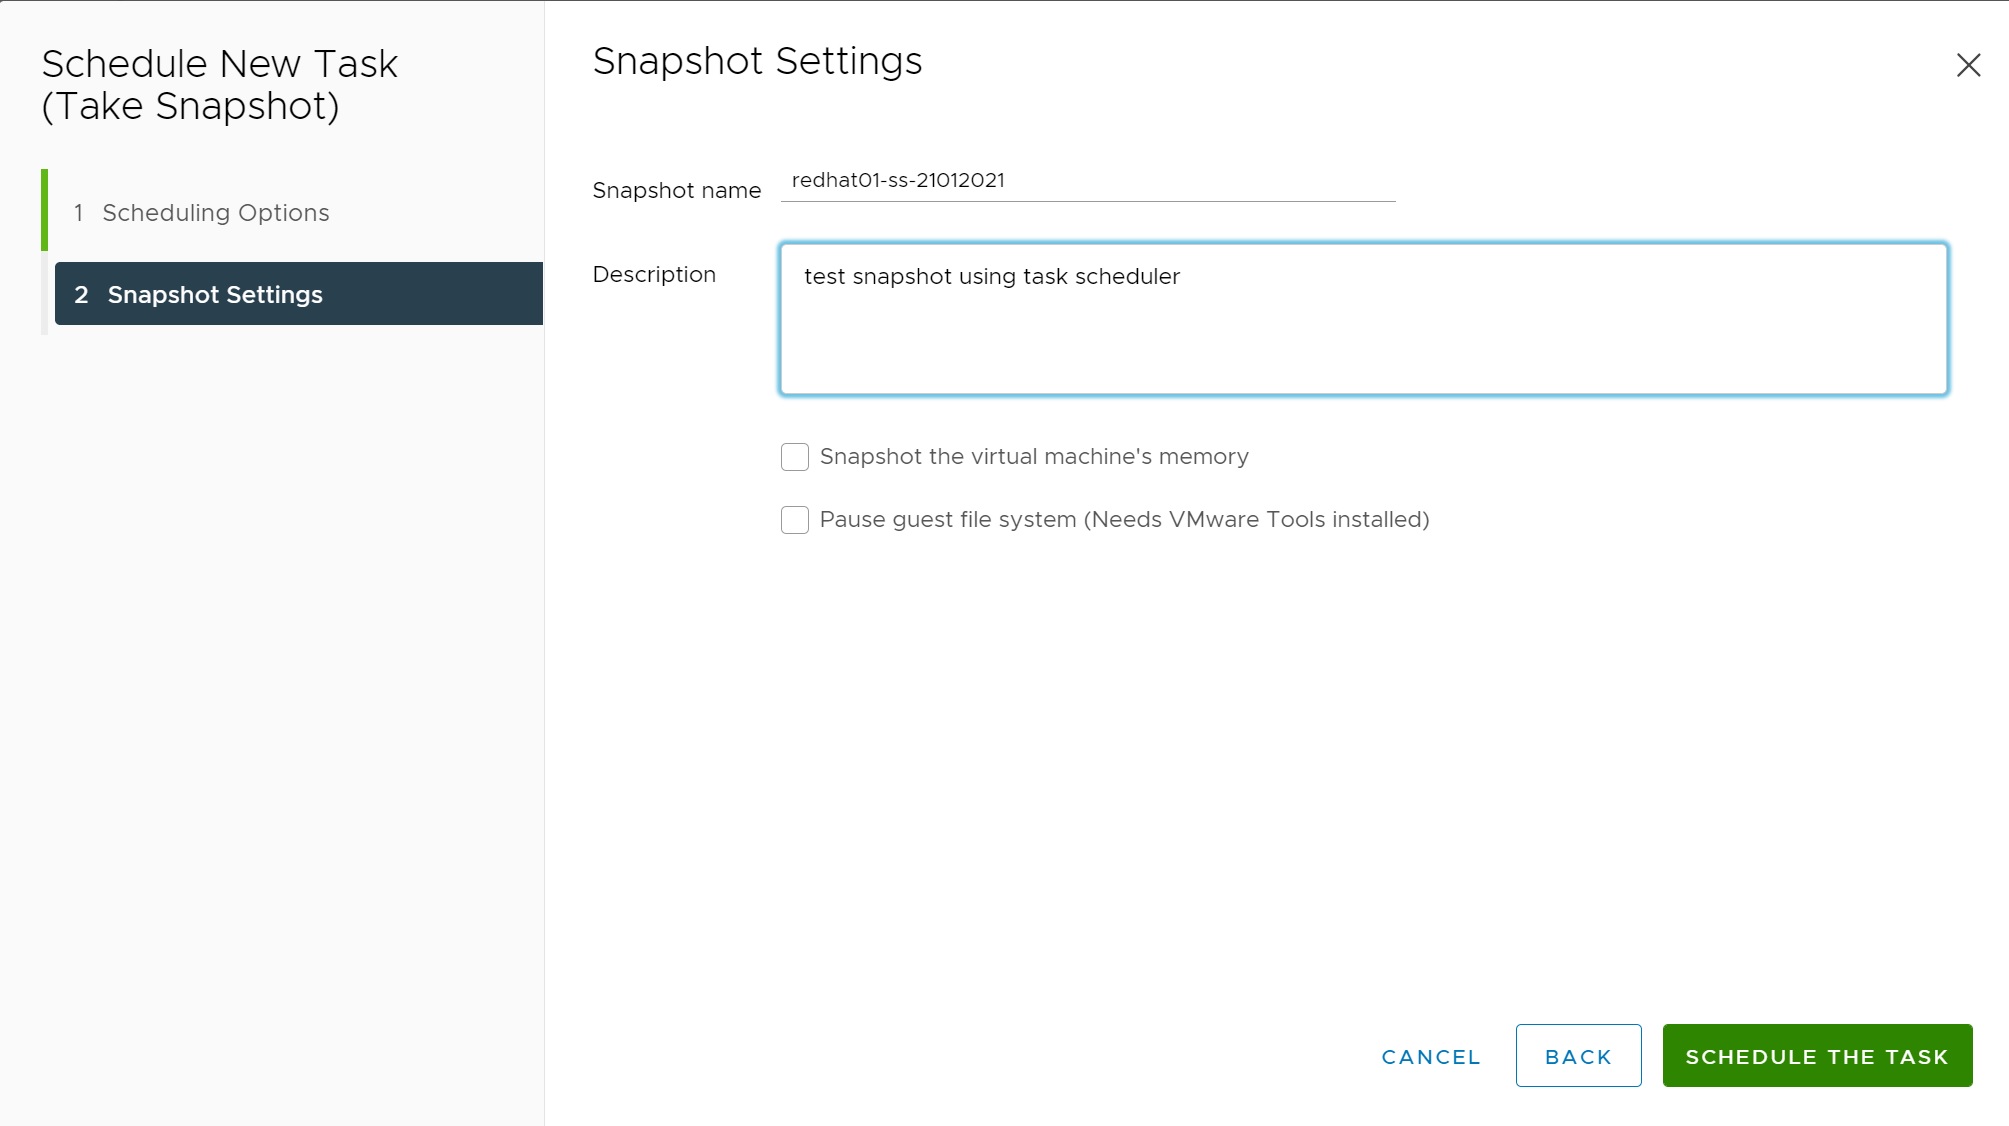
I am going to create a schedule task to take a snapshot of the VM, in the first screen we give the task a name and description, then select the schedule period once, weekly, etc and when the start should start from, you have the option to email staff of the outcome of the task.
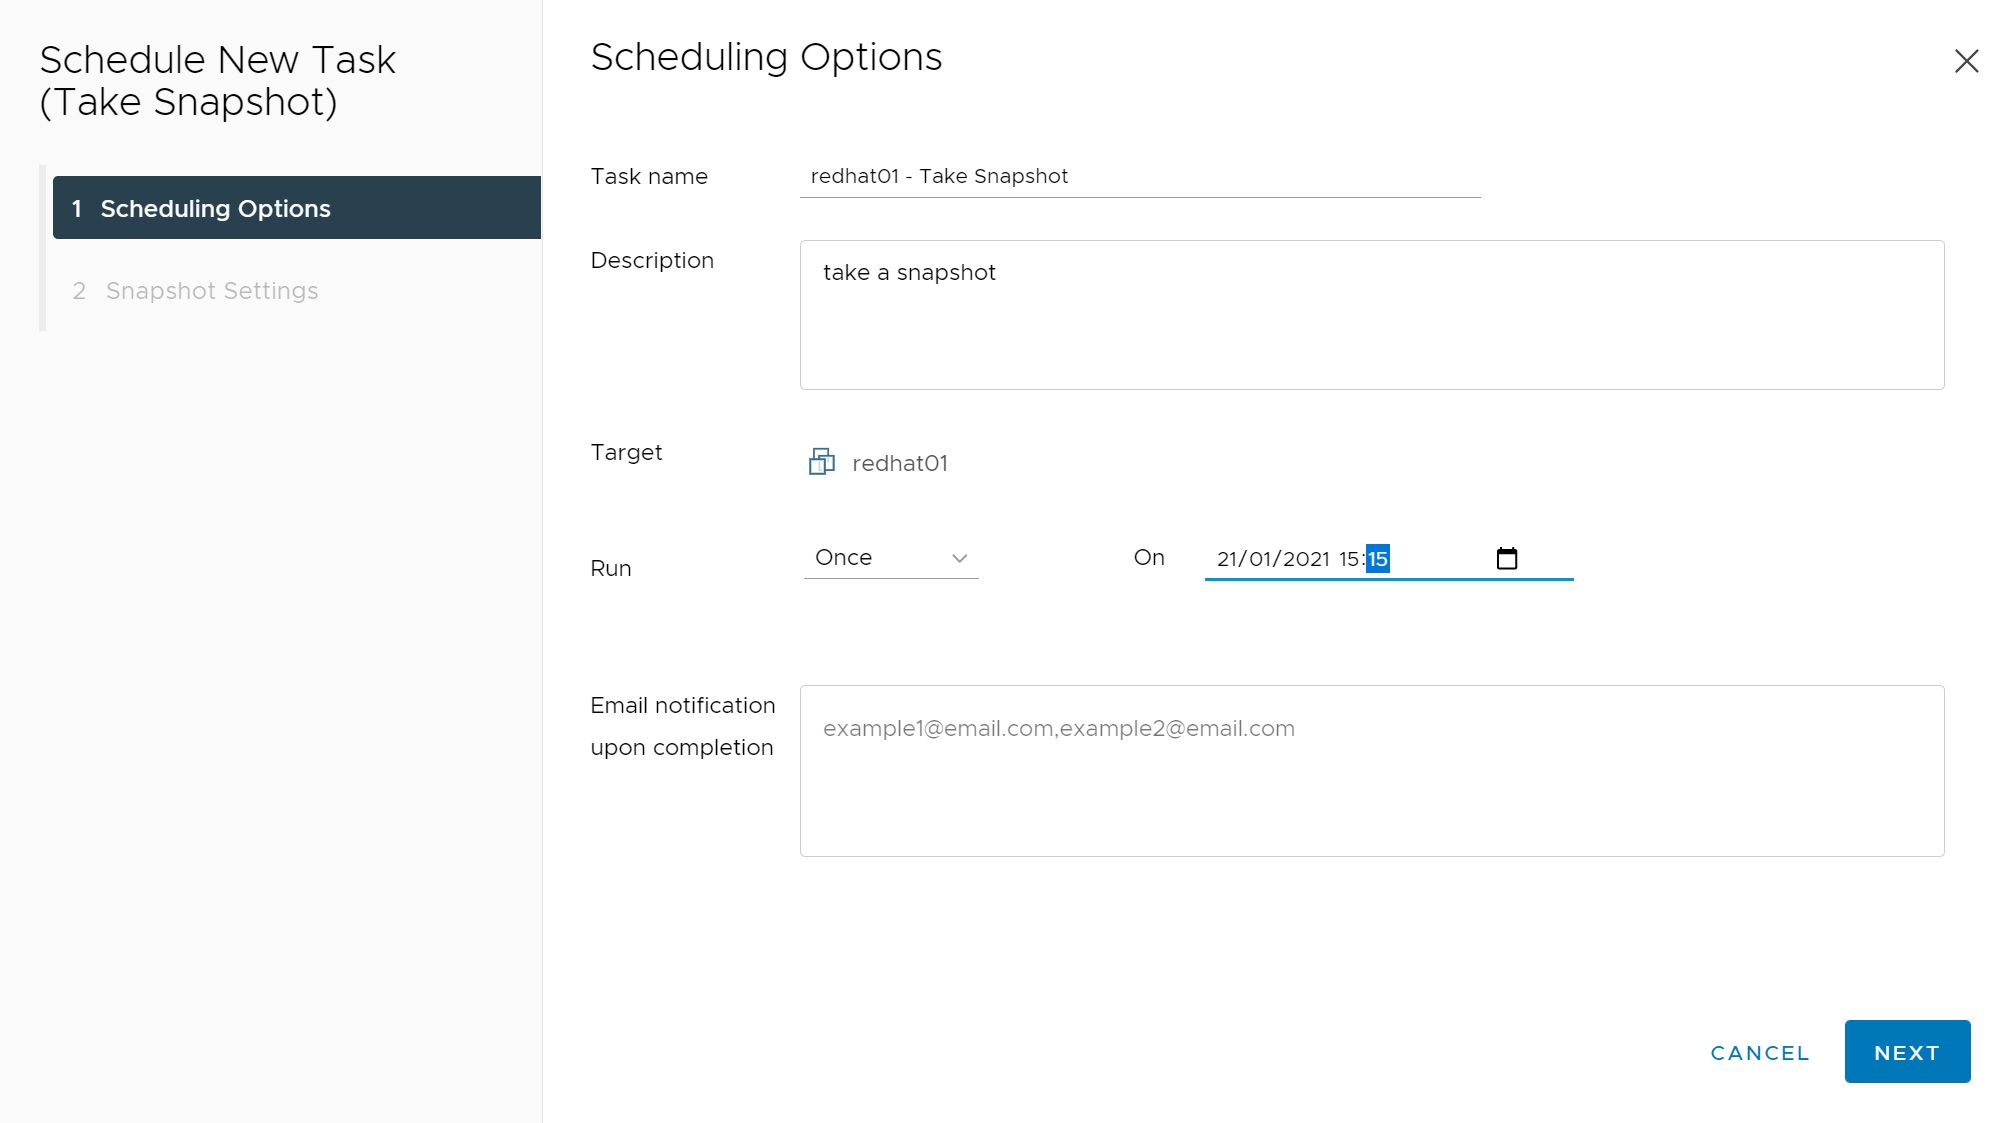
Because I choose a snapshot task the next screen relates to snapshotting
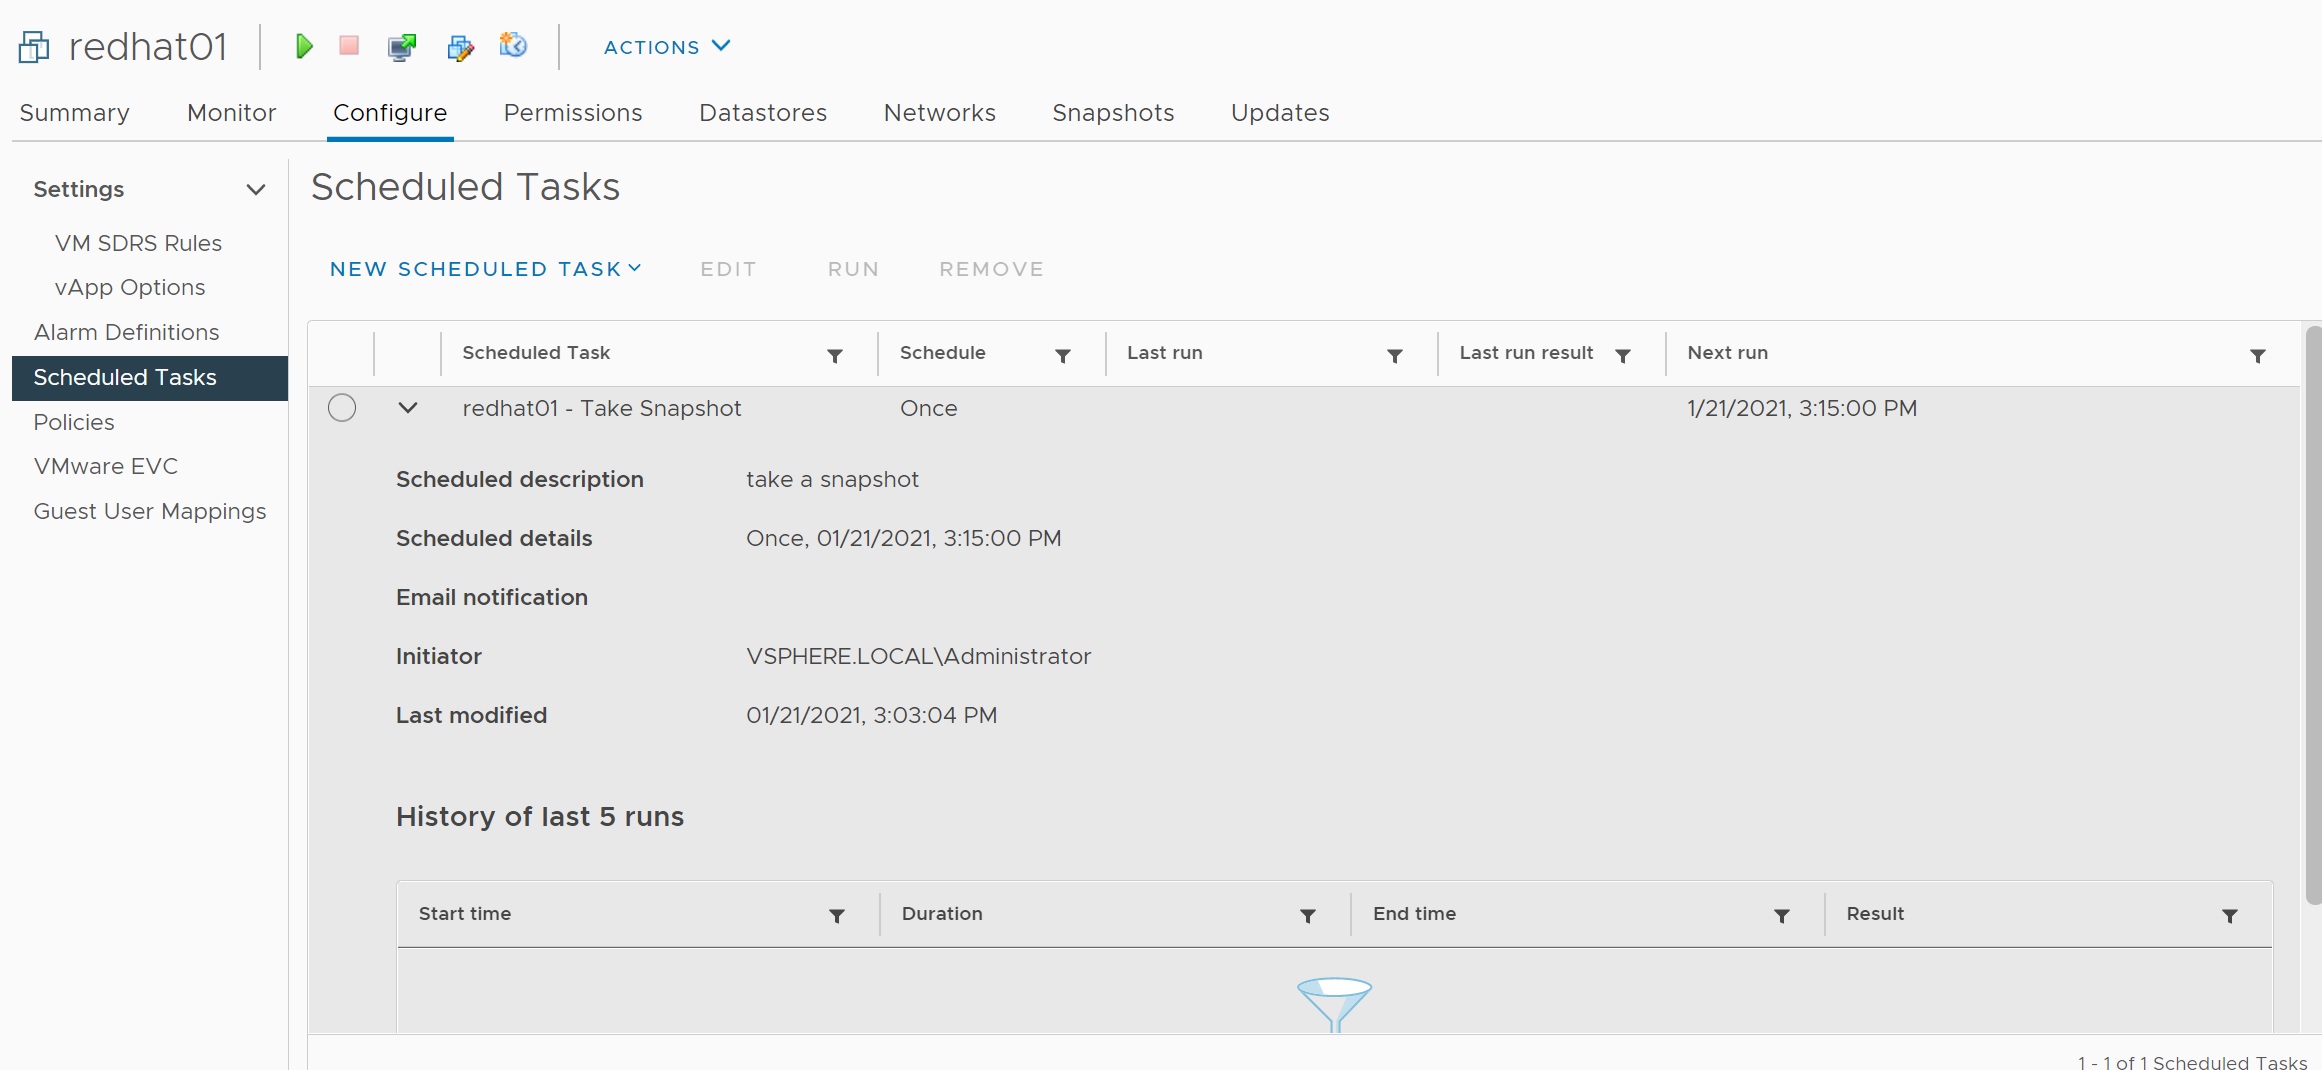
The you are returned to the main scheduled tasks screen, here you can see that the task has been scheduled but has yet to run
After a period the task will run and complete

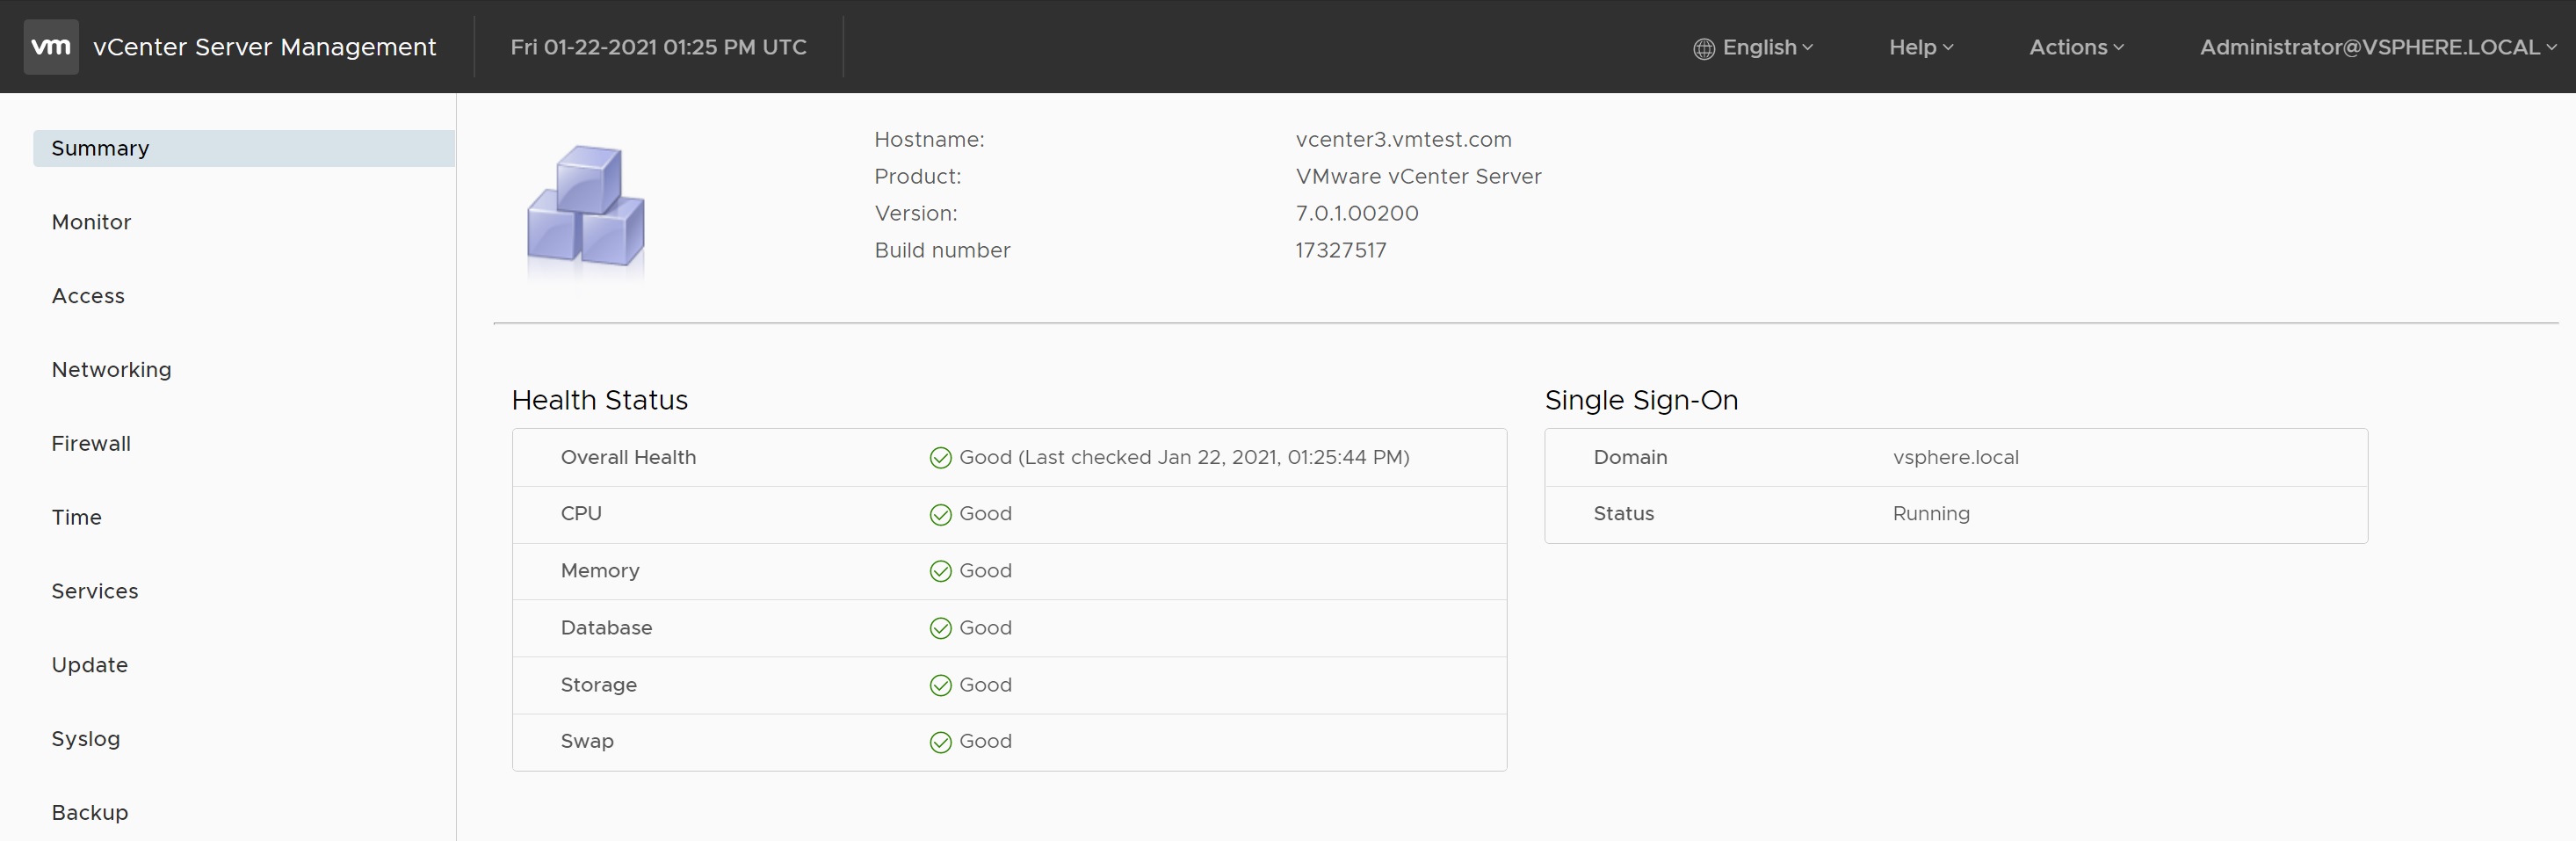
The management console can be accessed using the URL https://<IP address or vcenter server name>:5480, it is used to configure the vCenter server itself, IP address, NTP, backups, etc. On first glace its appears to be the same as the vCenter GUI screen
Once you login it is very different, on the left-hand side there are various menus that can configure the vCenter server, the summary section details the health of the server and some information about the server itself.
The monitor screen displays performance graphs details how well the server is performing, you have cpu, memory, disk graphs.

The access screen details on the services that are available in regards in accessing the server SSH, DCLI, etc.

The network screen details how the networking is configured on the server, also you can change any of the networking configuration if you had to move the server to a different network for example. There is also a proxy settings if your company uses a proxy for a specific service.

The firewall screen allows you to tighten security using firewall rules as the vCenter comes with its own built in firewall.

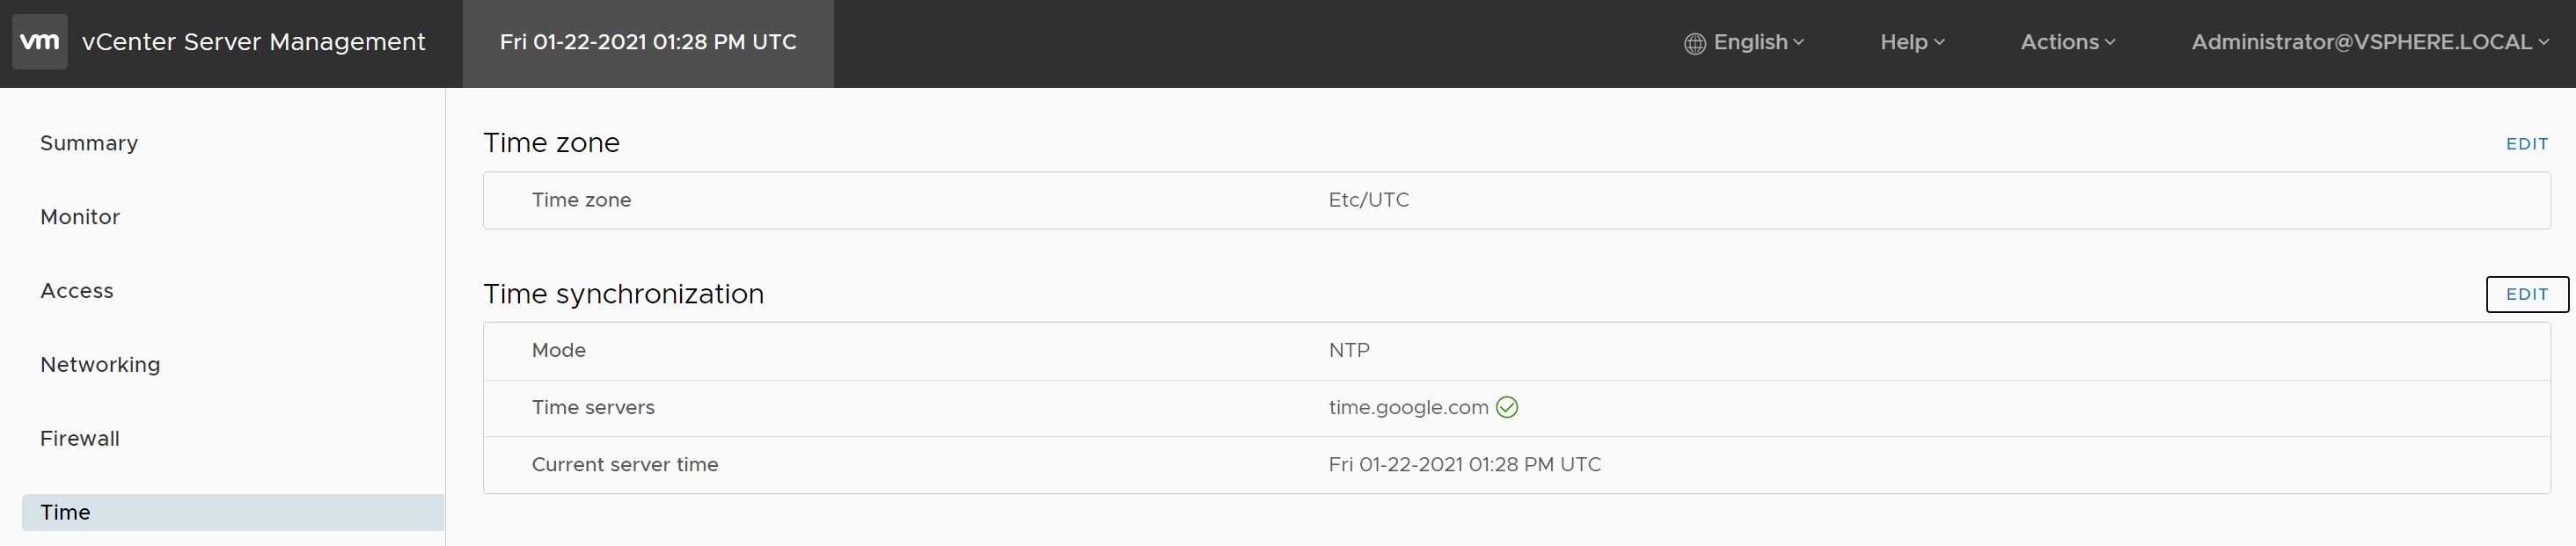
The time screen allows you to set the date/time or you can point to a NTP server, which is what you see below, I am using time.google.com to set the date/time. It is a very good idea to make sure that all VMWare applications take their time source from the same NTP server otherwise when setting other applications you might get time sync errors.
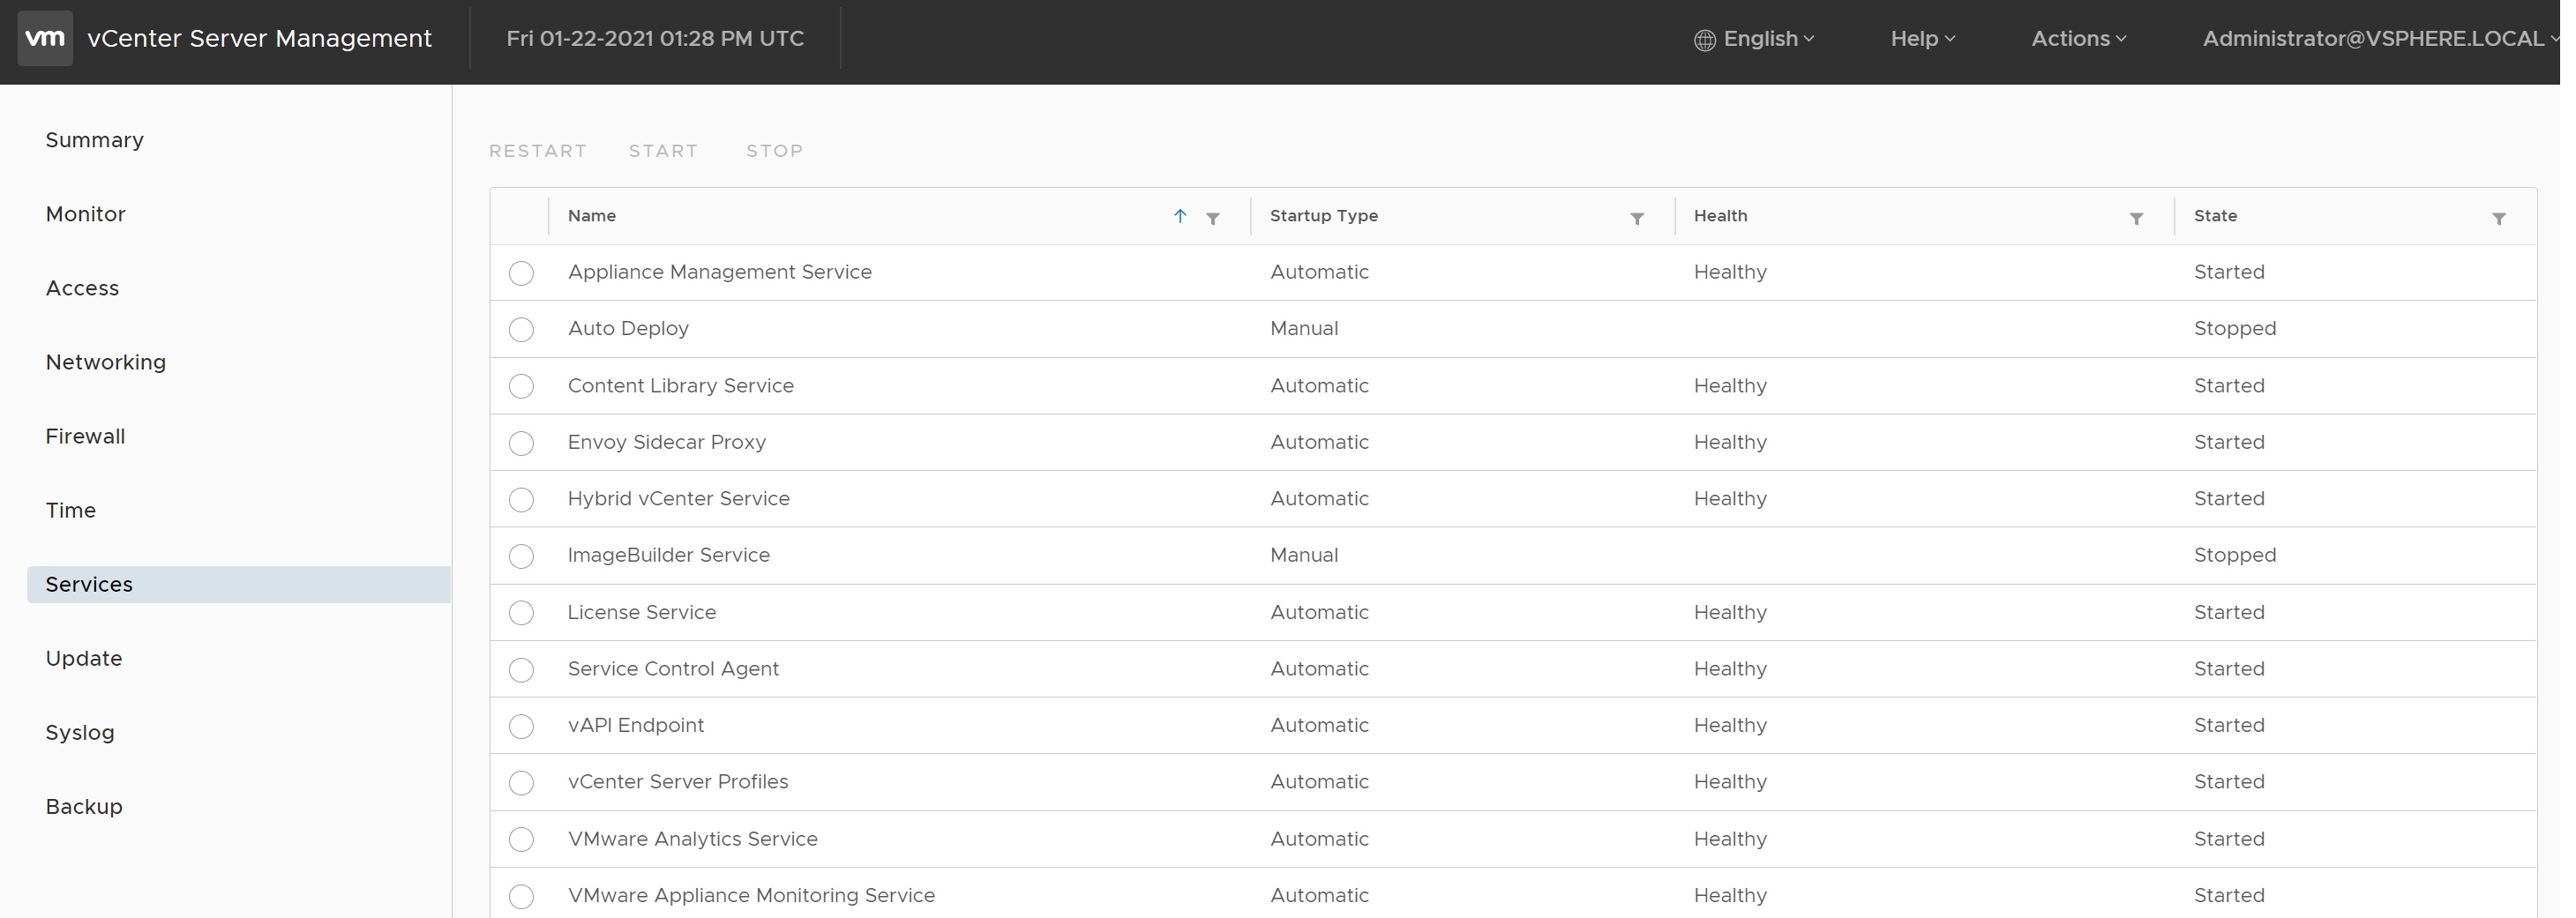
The service screen details all the services that are running on the vCenter, here you can stop/start a service if you have any issues with the vCenter server.
The update screen displays any updates that are available, as this is the lastest version of vCenter there are no updates available yet

In the updates settings link you can specify to check for updates automatically or even point to a different update server

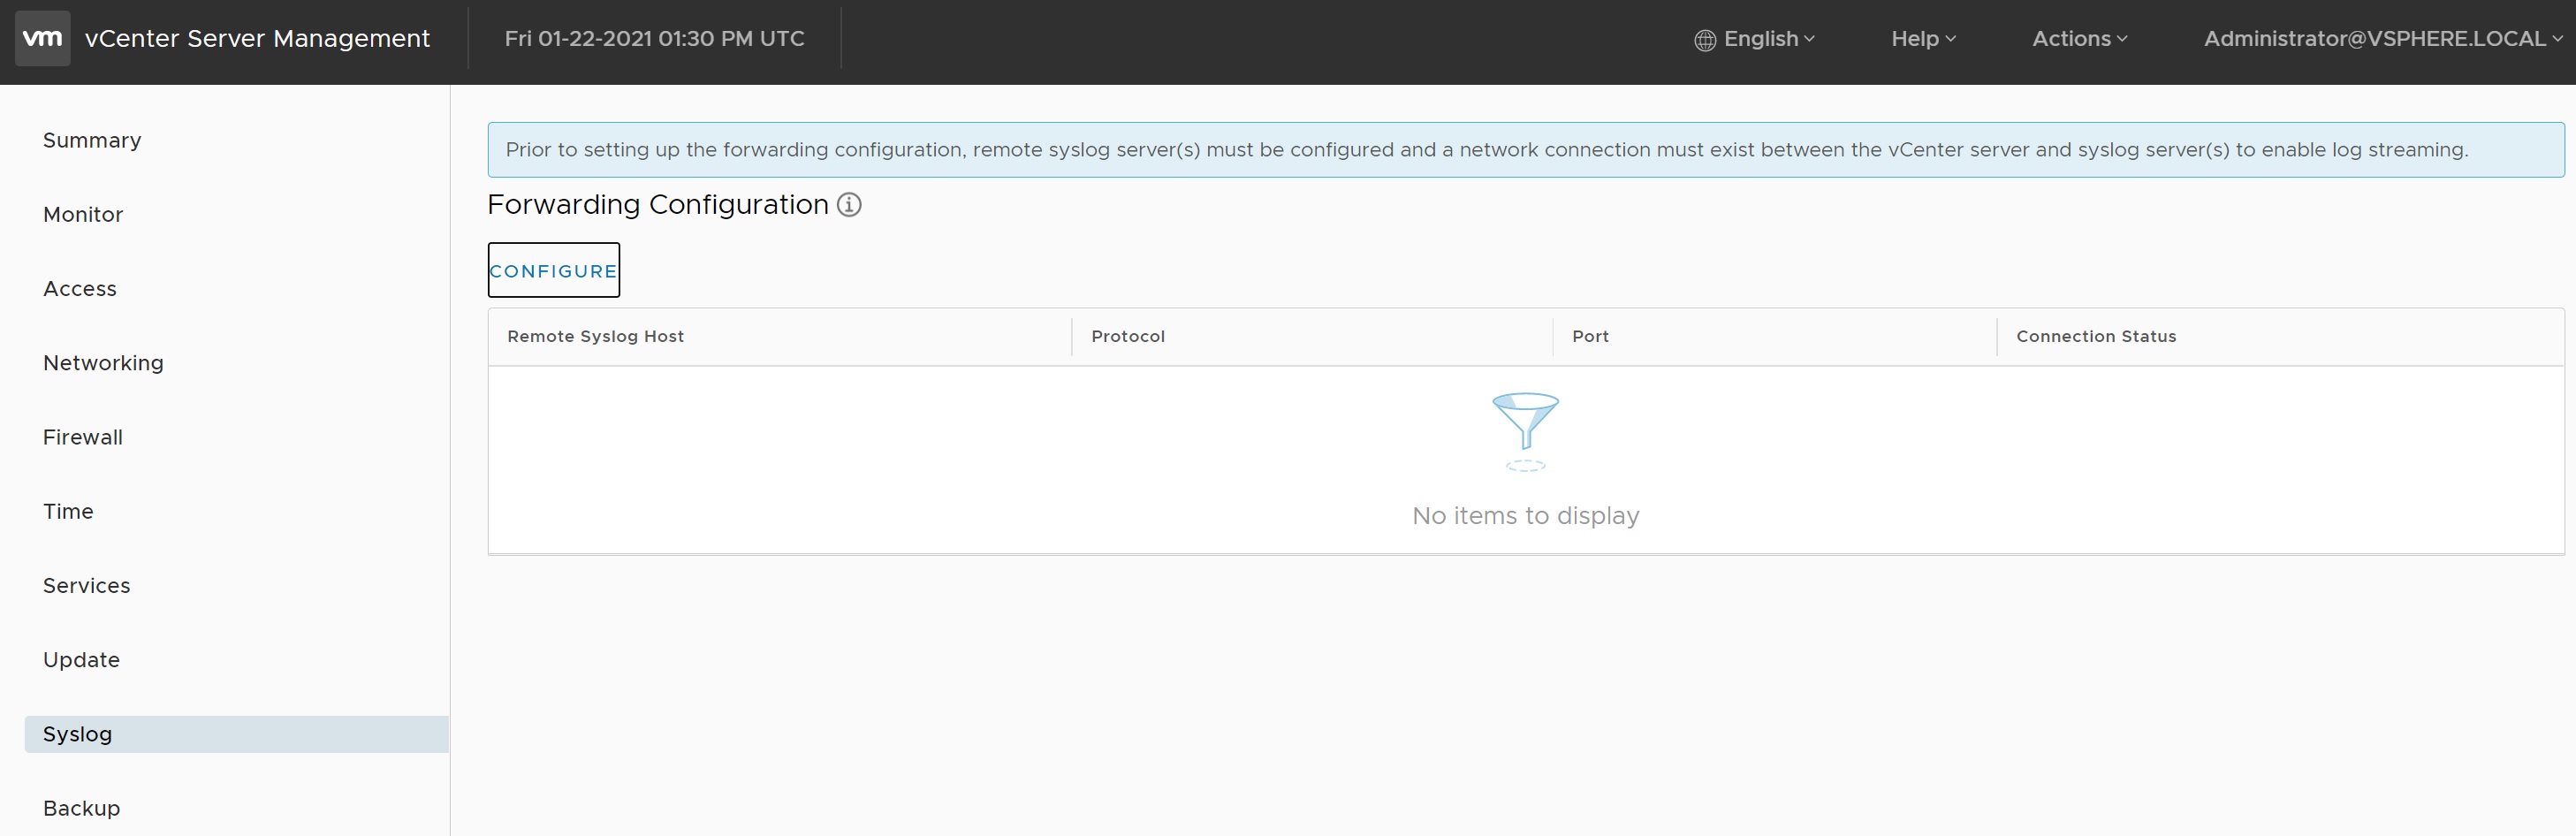
The syslog screen allows to you point to a syslog server to capture the log outputs of the server, if you use something like splunk then this can come in handy when trying to diagnose issues.
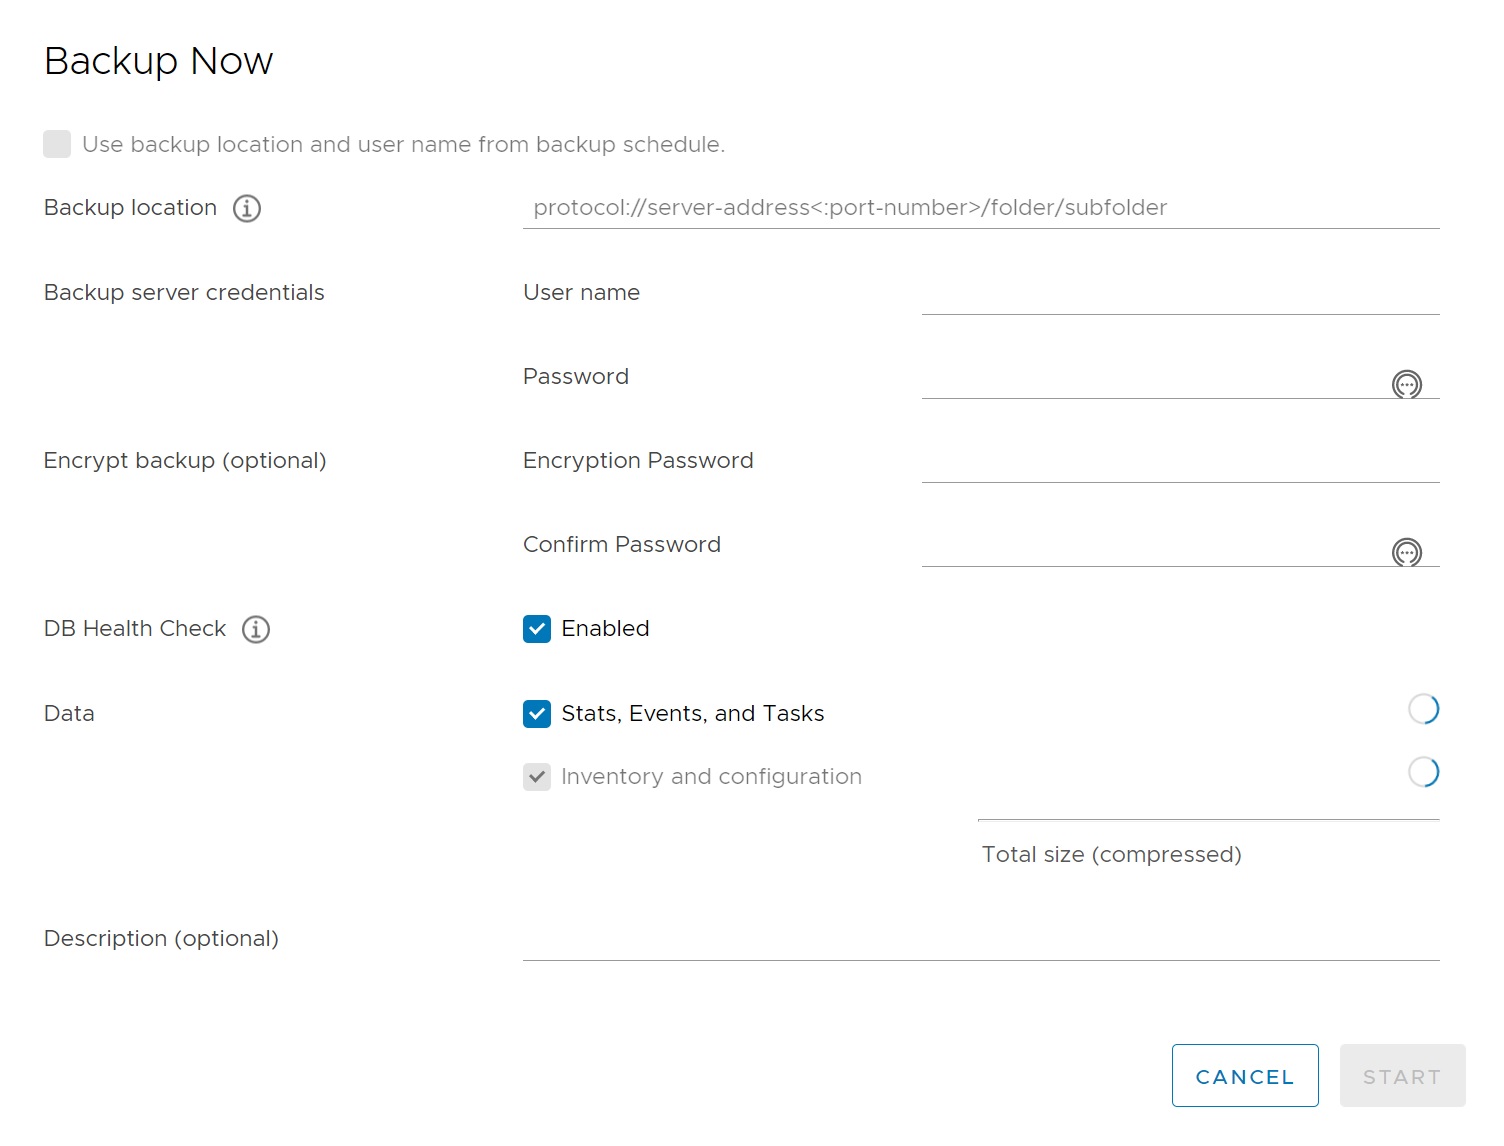
The backup screen allows you to backup the server to a backup server

When you select the BACKUP NOW button you are taken to a backup screen requesting details of the backup server, this could be a SAN storage appliance (for example my Synology SAN).
Lastly from the top of the page you have a Actions drop down menu, which allows you to shutdown/reboot the vCenter, switch the GUI theme, etc
Most of the screens are self explaining and very easy to configure, just make note of the port number (5480) when trying to access the management screen.
